The following is to fine-tune suspen-
sion.
The best way to set up a suspension,
is to start from factory settings, then
customize each adjustment one at a
time. Adjustments 2 through 6 are
interrelated. It may be necessary to
readjust center spring after adjusting
front springs for instance. Test run
the snowmobile under the same con-
ditions; trail, speed, snow, driver riding
position, etc. Change one adjustment
and retest. Proceed methodically un-
til you are satisfied.
WARNING
Do not attempt to lift the vehicle
by hand alone. Use appropriate
lifting device or have assistance
to share lifting stress in order to
avoid risk of strain injuries.
WARNING
Always remove tether cord cap be-
fore performing any maintenance
or adjustment, unless otherwise
specified. Vehicle must be parked
in a safe place, away from the trail.
Always lift the front of vehicle off
the ground with a suitable lifting
device before adjusting ski sus-
pension. Lift the rear of vehicle
off the ground with a suitable lift-
ing device before rear suspension
adjustment.
CAUTION:
Whenever
adjusting
rear suspension, check track ten-
sion and adjust as necessary.
Slight suspension bottoming occurring
under the worst riding conditions indi-
cates a good choice of spring preload.
1. Rear Springs — Comfort
IMPORTANT:
Make sure that all ob-
jects to be transported are in place in
rear rack and under the seat.
Grab rear bumper and lift until suspen-
sion is fully extended. From this point,
rear of snowmobile should collapse by
50 to 75 mm (2 to 3 in) when driver and
passenger (if so applicable) take place.
Measure at rear bumper as shown in
next photo.
WARNING
Do not attempt to lift the vehicle
by hand alone. Use appropriate
lifting device or have assistance
to share lifting stress in order to
avoid risk of strain injuries.
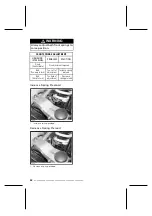
A03F2LB
A
TYPICAL — MEASURE AT REAR BUMPER
A. Proper adjustment (refer to table below)
REAR SPRINGS ADJUSTMENT
”A”
CAUSE
SOLUTION
50 to 75 mm
(2 to 3 in)
No adjustment required
More than
75 mm (3 in)
Too soft of
adjustment
Increase
preload
Less than
50 mm (2 in)
Too hard of
adjustment
Decrease
preload
Increase Spring Preload
All Models except Skandic SUV/
Expedition TUV
CAUTION: To increase preload, al-
ways turn the left side adjustment
cam in a clockwise direction, and
the right side cam in a counterclock-
wise direction. Left and right ad-
justment cams may be at different
settings.
58
______________________
Summary of Contents for Skandic Series
Page 1: ...Mmo 2006 006_SKANDIC ANG FH8 Tue Jun 14 09 22 22 2005 Page 1 Composite C M Y CM MY CY CMY K...
Page 8: ...6 _______________________...
Page 9: ...SAFETY INFORMATION ______________________ 7...
Page 33: ...ENVIRONMENT INFORMATION _____________________ 31...
Page 37: ...VEHICLE INFORMATION _____________________ 35...
Page 78: ...76 ______________________...
Page 79: ...MAINTENANCE INFORMATION _____________________ 77...
Page 108: ...106 _____________________...
Page 109: ...WARRANTY _____________________ 107...
Page 120: ...118 _____________________...
Page 123: ...Mmo 2006 006_SKANDIC ANG FH8 Tue Jun 14 09 22 22 2005 Page 1 Composite C M Y CM MY CY CMY K...


