background image

5

SKOPE Remote Glass Chiller – GC110r

Installation

SKOPE GC110r

Controls

The chiller can be turned on and off using the power switch beside the electronic 

controller. See “Electronic Controller” on page 8 for further control options.

Positioning the Cabinet

This appliance is intended to be positioned underneath a bench top, with a cutout in the 

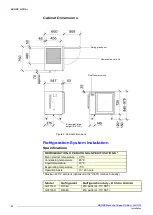
top to allow access to the removable lid on top of the chiller (see “Cabinet Dimensions” 

on page 6).

Positioning the cabinet

• Avoid direct sunlight and warm draughts.
• Make sure normal operating conditions do not exceed 40°C at 65% relative 

humidity.

• Allow adequate space in front of the cabinet for the door to open fully.
• Ensure the cabinet is positioned on a level surface so the door will shut and seal 

correctly. The self-closing door has an internal torsion bar, pre-tensioned at the 
factory, and should not require any further adjustment.

Installing the cabinet

• Do not overload the power supply. See the cabinet rating label for power supply and 

current draw.

• This appliance is intended to be connected to a remote refrigeration system (see 

“Refrigeration System Installation” on page 6).

• The chiller requires no additional ventilation around the cabinet.

Adjustable Legs

The four adjustable legs can adjust the cabinet height up to 30 mm. To adjust the height 

of each leg, turn the black plastic foot at the bottom of the leg counter-clockwise to raise 

the height or clockwise to lower the height of the cabinet.

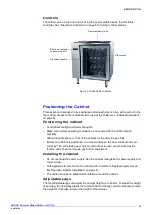
Figure 1: Glass Chiller Cabinet

Removable acrylic lid

Glass racks

Glass door handle

Electronic controller 

and power switch

Summary of Contents for GC110r

Page 1: ...User Manual MAN2900 Rev 2 1 Aug 2022 SKOPE Remote Glass Chiller GC110r...

Page 2: ...skope skope com Website www skope com Trademark Infringement The SKOPE trademark on this product is infringed if the owner for the time being does any of the following Applies the trade mark to the pr...

Page 3: ...Safety Information 4 Function 4 Positioning the Cabinet 5 Refrigeration System Installation 6 Electronic Controller Controller Overview 8 Controller Display 8 Temperature Setpoint 9 Messages and Alarm...

Page 4: ...qualified person in order to avoid a hazard If installing or removing the refrigeration unit refer to the Installation Guidelines below and observe all necessary safety precautions The appliance is no...

Page 5: ...itioned on a level surface so the door will shut and seal correctly The self closing door has an internal torsion bar pre tensioned at the factory and should not require any further adjustment Install...

Page 6: ...t dimensions Removable acrylic lid Swing glass door On off power switch Evaporator drain spigot 3 4 O D REFRIGERATION OPERATIONAL SPECIFICATIONS Mean product temperature 3 5 C Condensing temperature 4...

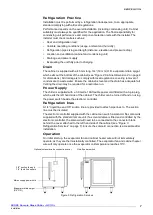
Page 7: ...all Venting the drain may be required for a restrictive run Power Supply The chiller is supplied with a 3 0 metre 10A flexible power cord fitted with a 3 pin plug which exits the left hand side of the...

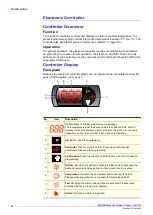
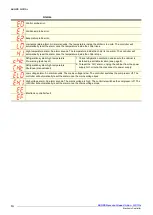
Page 8: ...now the parts of the faceplate you may use ES 1 2 3 4 5 6 8 7 No Item Description 1 Digital display of cabinet temperature or messages The temperature is what the sensor inside the chiller detects and...

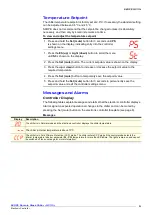
Page 9: ...the display indicating entry into the controller settings menu 1 Press the ES up or Light down button to scroll the menu until St is shown on the display 2 Press the Set mute button The current setpoi...

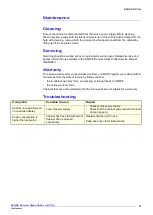
Page 10: ...ion system high temperature Pre warning auto reset 1 Check refrigeration ventilation and ensure the cabinet is installed in a suitable location see page 5 2 To reset the CHt alarm unplug the cabinet f...

Page 11: ...ervice Manual MAN2901 Warranty To receive a warranty for your purchased cabinet you MUST register your cabinet within four weeks from the date of invoice by filling out either the in cabinet warranty...

Page 12: ...SKOPE Contacts SKOPE Industries Limited ABN 73 374 418 306 AU 1800 121 535 NZ 0800 947 5673 skope skope com www skope com...

Reviews: