background image


19/30 


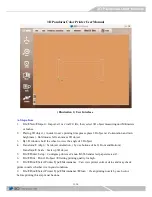
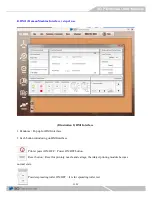
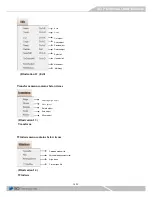
Object(s) State contains below items : 

(Illustration 15) Object(s) 

State


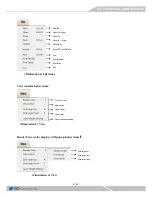
Right-click menu contains the following options; below items show up only 3D object was imported.


(Illustration 16) Right-click mouse 

button


Menu for View 


(Illustration 17) Menu for View


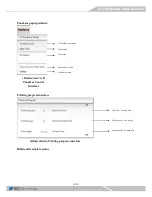
XY Axis 


(Illustration 18) 

XY Axis 

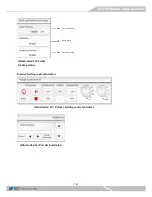
Object volume 

Select All 


Unselect All 


Align object 


Mirror object 


Move object 


Rotate object 


Scale object 


Pandoras COM port 

Multi Select 


Summary of Contents for 3D PANDORAS

Page 1: ......

Page 2: ...2 30 Before Opening The Cover ...

Page 3: ...3 30 After Opening The Cover ...

Page 4: ...4 30 ...

Page 5: ...5 30 ...

Page 6: ...6 30 ...

Page 7: ...7 30 ...

Page 8: ...8 30 ...

Page 9: ...9 30 ...

Page 10: ...10 30 ...

Page 11: ... object 4 Transform Align Set object orientation by use buttons of Left Front and Bottom Transform Scale Scale up 3D object 5 File Printer Setup Configure printer as Canon iX6560 and select paper size as A3 6 File Print Print 3D object Setting printing quality for high 8 File Print Select Printer Type Maintenance Can view printer current status and may check printer nozzle whether it is in good co...

Page 12: ... Pandoras Pop up for HMI interface 2 Each button introducing on HMI interface Printer power ON OFF Power ON OFF button Reset button Reset for prinintg nozzle and cartage the inkject printing module become normal state Powder spreading roller ON OFF It is for spreading roller test ...

Page 13: ...ter for more powder feeding Left home position Move printer platform to left home position Move to left Move printer platform from right to left direction Powder spreading Before powder spreading please define base height ness it usually requires few mm and after first powder spreading the Z axis platform moved down to pre defined layer thickness For Z axis UP Z axis movement will be stopped when ...

Page 14: ...ovement will be stoppted when loose the button Printing layer thickness 0 08mm is min thickness please defines parameter above than 0 08mm Phase Stop File Menu File menu contains below items Illustration 3 File File item options File menu contains below items Open old files s3pd New file Open file s3pd Exit Printer setup ...

Page 15: ...splay will pop up below items Illustration 6 View For color view Lower layer Upper layer Layer thickness setting Display by dot Display by line Display by face View switch Exit Print setup 列印設定 Print preview Print Import STL or VRML file Save file as Save file s3pd Close file Open file s3pd New file ...

Page 16: ...face Printing progress interface Illustration 8 Printing progress interface Build and feed plate status 3D Pandoras print mode Mono mode Print mode limit border position Platform position Total layer Strating time Printing layer Time require Printing height Printing time ...

Page 17: ...17 30 Illustration 9 Powder feeding status Powder feeding control interface Illustration 10 Powder feeding control interface Illustration 11 Powder build plate Layer thickness Build plate Powder feeding ...

Page 18: ...low items Illustration 14 Windows Redo Undo Cut object Copy object Paste object Mulriselect Select all Unselect all Delete object Multicopy Adjusting align object Mirror object Scle object Rotate object Move object 列印設定 列印設定 開啟轉案檔案 part Cascade window file Vertical side document view Align icons Current open file ...

Page 19: ...ing options below items show up only 3D object was imported Illustration 16 Right click mouse button Menu for View Illustration 17 Menu for View XY Axis Illustration 18 XY Axis Object volume Select All Unselect All Align object Mirror object Move object Rotate object Scale object Pandoras COM port Multi Select ...

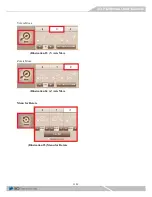
Page 20: ...20 30 XZ Axis Illustration 19 XZ Axis YZ Axis Illustration 20 YZ Axis Menu for Move Illustration 21 Menu for Move X Axis Move Illustration 22 X Axis Move ...

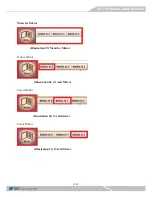
Page 21: ...21 30 Y Axis Move Illustration 23 Y Axis Move Z Axis Move Illustration 24 Z Axis Move Menu for Rotate Illustration 25 Menu for Rotate ...

Page 22: ...22 30 X Axis Rotate Illustration 26 X Axis Rotate Y Axis Rotate Illustration 27 Y Axis Rotate Z Axis Rotate Illustration 28 Z Axis Rotate ...

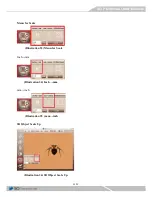
Page 23: ...23 30 Menu for Mirror Illustration 29 Menu for Mirror X Axis Mirror Illustration 30 X Axis Mirror Y Axis Mirror Illustration 31 Y Axis Mirror Z Axis Mirror Illustration 33 Z Axis Mirror ...

Page 24: ...24 30 Menu for Scale Illustration 33 Menu for Scale Inch mm Illustration 34 Inch mm mm inch Illustration 35 mm inch 3D Object Scale Up Illustration 36 3D Object Scale Up ...

Page 25: ...s 90 ink on each ink cartage 1 Before re fill binder please close outfall of binder bag use syringes inject the binder to the bag 2 Always keep 80 binder inside of the bag 3 Plug back for injection pipe 4 Open the outfall of pipe place the feeding pipe in original shape so that binder flowing smoothly 5 Clean dropping binder D Procedure of operating 1 Connect AC power cable 2 Connect two USB cable...

Page 26: ...nsor keep 2cm 3cm distance before reach home position and press home button move to home position 6 If error occurs please do not perform any action software will continue to operating 7 Printer will print multi page automatically H Procedure of replace powder please wear the mask before replace powder 1 Use small shovel removes majority powder 2 For the residual powder use HMI powder feeding ON f...

Page 27: ...ned or during printing CD R disc holder closed when printed CD R 1851 1856 1 850 1855 Orange light flash 6 times Close inside door open CD R disc holder press the RESUME button Ink cartridge installation errors 1681 1680 Orange light flash 7 times CD R or DVD R discs mounted on shelves into the print path and press RESUME button Waste ink near full warning error 1700 1701 Orange light flash 8 time...

Page 28: ...roller or motherboard or feed motor Cleaning unit cam sensor fault 5C00 Orange light flash 4 times Replace the cleaning unit or main board ASF Cam sensor fault 5700 Orange light flash 5 times Paper feeder assembly Adjust paper feeder assembly Printer temperature is high 5400 Orange light flash 6 times Replace main board Waste ink full error 5B00 other area 5B01 Japan Orange light flash 7 times Rep...

Page 29: ...0 Orange light Green light flash 15 times Replace main board Clean the gear sensor error 5C20 Orange light Green light flash 16 times Replace main board cleaning unit Feeder encoder error 6010 Orange light Green light flash 17 times Replacing the feed encoder motherboard feed motor discharge paper components Ink cartage detects error 6502 Orange light Green light flash 19 times Replace the paper e...

Page 30: ...lash 23 times alternately Cam sensor in the boot or intend to cleaning J Maintenance mode 1 Press RESUME button and press power button for power on 2 Press power button and release RESUME button and press twice RESUME button 3 Release POWER button and RESUME button at the same time entering the maintenance mode 4 Once power light change to green use software for operation ...

Reviews: