T
RIPOD
SET UP
T
ELESCOPE
ASSEMBLY
3
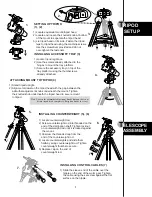
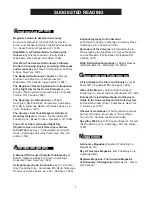
INSTALLING ACCESSORY TRAY (3)
1) Locate tripod leg brace.
2) Use the screws already attached to the
hinges to mount the tray platform.
3) Secure the accessory tray on top of the
tray platform using the thumbscrews
already attached.
SETTING UP TRIPOD
(1), (2)
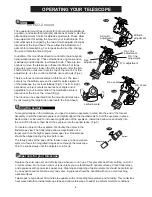
1) Locate equatorial mount/tripod head.
2) Locate and loosen the knurled knob at bottom
of the mount to seperate the tripod head.
3) Lie tripod head on its side. Fasten the tripod
legs to tripod head using the machine screws.
Use the screwdriver provided and do not
over-tighten the fasteners.
1.
2.
3.
4.
Note: Loosen the azimuthal adjustment knobs if mount does not
fit into tripod head completely. Retighten knobs to secure.
ATTACHING MOUNT TO TRIPOD (4)
1) Stand tripod upright.
2) Align metal dowel on the tripod head with the gap between the
azimuthal adjustment knobs underneath the mount. Tighten
the knurled knob underneath the tripod head to secure mount
to tripod.
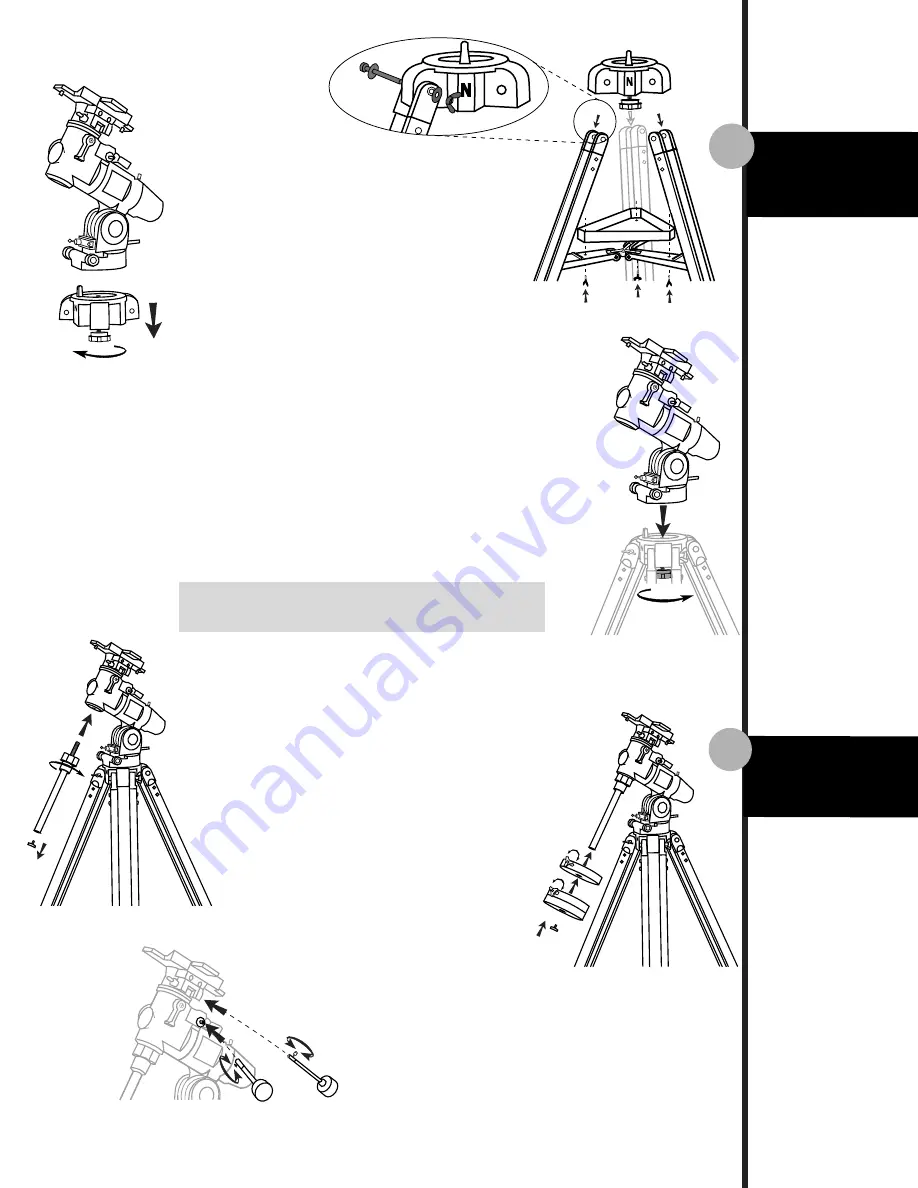
INSTALLING COUNTERWEIGHT (5), (6)
1) Locate counterweight rod.
2) Screw counterweight rod into threaded on the
end of the declination shaft. Tighten locknut
on counterweight rod until it is locked against
the mount.
3) Unscrew the threaded cap from the
end of the counterweight rod.
4) Locate counterweights and slide them
halfway along counterweight rod. Tighten
counterweight thumbs to secure.
5) Replace cap on the end of
counterweight rod.
6.
5.
INSTALLING CONTROL CABLES (7)
1) Slide the sleeve end of the cable over the
nipple on the end of the worm gear. Tighten
the cable using the set screw against the flat
surface on the nipple.
7.


