4
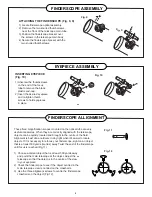
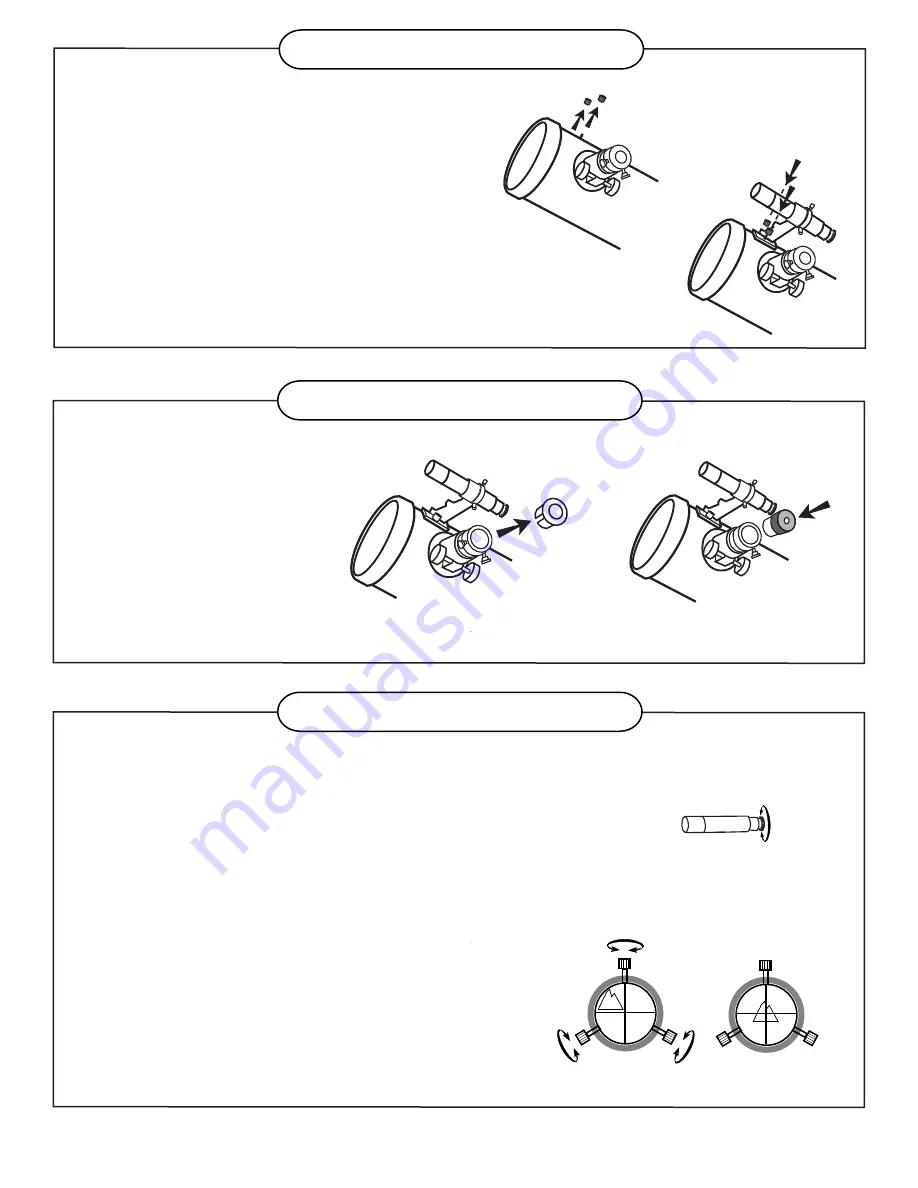
FINDERSCOPE ASSEMBLY
Fig. 11
Fig. 12
EYEPIECE ASSEMBLY
FINDERSCOPE ALLIGNMENT
ATTACHING THE FINDERSCOPE (Fig. 8, 9)
1) Locate finderscope optical assembly.
2) Remove the two knurled thumbscrews
near the front of the telescope main tube.
3) Position the finderscope bracket over
the screws in the telescope main body.
4) Secure the finderscope bracket with the
two knurled thumbscrews.
These fixed magnification scopes mounted on the optical tube are very
useful accessories. When they are correctly aligned with the telescope,
objects can be quickly located and brought to the centre of the field.
Alignment is best done outdoors in day light when it's easier to locate
objects. If it is necessary to refocus your finderscope, sight on an object
that is at least 500 yards (metres) away. Twist the end of the finderscope
until focus is reached (Fig.11).
1) Choose a distant object that is at least 500 yards away
and point the main telescope at the object. Adjust the
telescope so that the object is in the centre of the view
in your eyepiece.
2) Check the finderscope to see if the object centred in the
main telescope view is centred on the crosshairs.
3) Use the three alignment screws to centre the finderscope
crosshairs on the object (Fig.12).
Fig. 9
Fig. 8
Fig. 10
INSERTING EYEPIECE
(Fig. 10)
1) Unscrew the thumbscrews
on the end of the focus
tube to remove the black
plastic end-cap.
2) Insert the desired eyepiece
and re-tighten thumb
screws to hold eyepieces
in place.


