background image

3

TRIPOD SET UP

Fig.1

Fig.3

Fig.2

ATTACHING THE TRIANGLE 

ACCESSORY TRAY (Fig. 2)

Place the accessory tray on top of 

the bracket, and secure with the 

locking knob from underneath.

1)  

ATTACHING THE QUICK-RELEASE ACCESSORY TRAY (Fig. 3)

Hold the accessory tray directly above the bracket. Rotate the tray until the 

shape of the hole matches the locking mechanism in the center of the bracket. 

Place the tray on top of the bracket and rotate to lock the tray in place.

1)  

ADJUSTING TRIPOD LEGS (Fig.1)

1)

2)

3)


Slowly loosen the height adjustment clamp and gently pull out the lower 

section of each tripod leg.  Tighten the clamps to hold the legs in place. 

Spread the tripod legs apart to stand the tripod upright. 

Adjust the height of each tripod leg until the tripod head is properly leveled. 

Note that the tripod legs may not be at same length when the mount is level.


TELESCOPE ASSEMBLY

Fig.4

Fig.5

(Diagram applicable to 

all telescope designs.)

Place the single arm mount into the tripod head.

Push the large cup underneath the tripod head upward and 

turn counter-clock wise to secure the mount to the tripod. 

1)

2)

ATTACHING THE MOUNT TO THE TRIPOD 

1)

2)

3)

Loosen the black screw on the top of the mount until it is not 

protruding from the dovetail accepter.

Find the approximate balance point on the telescope tube. 

Slide in the telescope tube until the balance point of the telescope falls 

in the center of the mount head. Tighten the screw until the dovetail 

bar on the telescope tube is securely fastened on the mount.

ATTACHING THE TELESCOPE TUBE TO THE MOUNT  

1)

2)

3)

Remove the black screw on the top of the cradle ring and 

place it at a safe place for later use.

Carefully open the cradle ring just enough so the telescope 

tube can be slided in. 

Slide in the telescope tube. Close the cradle ring and insert the 

black screw from the opposite side of the arm as shown in 

Fig.4. Tighten the screw until the telescope tube is securely 

fastened inside the cradle ring.

(Diagram applicable to all 

telescope designs.)

The dovetail type

The clamp type

TELESCOPE ASSEMBLY - GT MOUNTS

Summary of Contents for AZ GOTO

Page 1: ...GT020609V3 03 05 AZ GOTO TELESCOPES ESC SETUP ENTER 1 2 3 4 5 6 7 8 9 0 TO UR UTILITY RATE M IC NGC PLANET USER OBJECT ID...

Page 2: ...SER DEFINED DATABASE IDENTIFYING AN UNKNOWN OBJECT LINKING WITH A COMPUTER UPDATING THE SYNSCANTM AZ FIRMWARE SYNSCAN TM AZ MENU TREE TECHNICAL SPECIFICATIONS APPENDIX A RS 232 CONNECTION APPENDIX B S...

Page 3: ...s Place the single arm mount into the tripod head Push the large cup underneath the tripod head upward and turn counter clock wise to secure the mount to the tripod 1 2 ATTACHING THE MOUNT TO THE TRIP...

Page 4: ...Telescopes with a dovetail bar attached can be installed directly onto the Multi function mount without using the Mounting Platform Fig 8 ATTACHING THE TELESCOPE TUBE TO THE MOUNT 1 If you are using...

Page 5: ...ll slots and remove the plastic shipping cover over the battery Fig b Turn on the Red Dot Finder by rotating the variable brightness control clockwise until you hear a click Continue rotating the cont...

Page 6: ...on the power SynScanTM AZ Hand Control The SynScanTM AZ hand control cable has a RJ 45 with 8 connecting pins on one end and a RJ 12 with 6 connecting pins on the other end Plug the RJ 45 end into the...

Page 7: ......

Page 8: ...dinal coordinate followed by the latitudinal coordinate Use the scroll keys to choose between W or E and N or S Pressing the left or right directional keys will move the cursor to the previous or next...

Page 9: ...ightest Alignment The Brightest Star alignment will prompt and help you find the brightest star of a specific direction in the sky at your current site It is convenient for user to identify the bright...

Page 10: ...time entered during initial setup is based on the same source as last time For example if you enter the time on your watch during this observing session the time you enter next time should also be rea...

Page 11: ...to date Each Catalog has a set number of objects to choose from Use the numeric keys to select an object by entering its number Pressing ENTER will display its coordinate Primary information such as s...

Page 12: ...acklit and the beeper volume Press the RIGHT or LEFT directional key to increase or decrease the value Factory Setting This submenu allows you to reset the hand control to its default setting Daylight...

Page 13: ...next or previous digit Press ENTER to save To store an object location in Alt Az format first point the telescope to the desired location to obtain the Alt Az value then press ENTER to save After the...

Page 14: ...Fig s RJ 11 Hand Control 1 EXPD 2 TD 3 GND 4 EXPD 5 RD 6 12V RJ 11 Pin outs 654321 In the planetarium software of your choice choose Celestron NexStar 5i Celestron NexStar 8 9 11 GPS or Synta Skywatc...

Page 15: ...rmware data file named SynScanVXXXXAZ ssf to the SynScan folder The XXXX indicates the version number of the firmware 1 2 3 4 Preparing your PC for the update Plug the RJ 11 end of the PC link cable i...

Page 16: ...some PCs may not support such high rate If the update process fails after a few tries you can reduce the rate by pressing the SETUP key once or twice on the hand control after the power supply is plug...

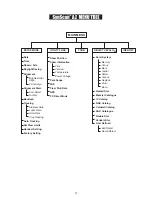
Page 17: ...tion Park Scope PAE Clear PAE Data GPS PC Direct Mode Sidereal Rate Lunar Rate Solar Rate Stop Tracking Auto Select Sort By Time Version Temperature Power Voltage UTILITY FUNC IDENTIFY Solar System Na...

Page 18: ...03 steps rev Rate 0 1 0X Rate 1 2 0X Rate 2 8X Rate 3 16X Rate 4 32X Rate 5 200X Rate 6 400X Rate 7 600X Rate 8 800X Rate 9 1000X Sidereal Lunar Solar Dual Axes Tracking Brightest Star Alignment Two S...

Page 19: ...mand conflicts with slew limits there will be no action Goto Ra Dec R34B 12CE Scope must be aligned If command conflicts with slew limits there will be no action Get Azm Alt Z 12AB 4000 10 characters...

Page 20: ...te TrackRateLowByte 0 0 d Negative Alt tracking 80 3 17 7 TrackRateHighByte TrackRateLowByte 0 0 The number 35 is returned from the hand control 4 Sending a slow Goto command through RS232 to the hand...

Page 21: ...III...

Page 22: ...ONT OF THE TELESCOPE FOR VIEWING THE SUN WHEN OBSERVING THE SUN PLACE A DUST CAP OVER YOUR FINDERSCOPE OR REMOVE IT TO PROTECT YOU FROM ACCIDENTAL EXPOSURE NEVER USE AN EYEPIECE TYPE SOLAR FILTER AND...

Reviews: