background image

Part II: Getting Started

5

Install the mount’s head on the base so the three threads [shown by arrows in 

(

Fig. 2

)

] are 

aligned with the three screws on the base [shown by arrows in 

(

Fig. 1

)

]. 

Tight the three screws from the base onto the head threads [shown by an arrow in 

(

Fig. 3

)

].

Be sure the head is secure onto the base. 

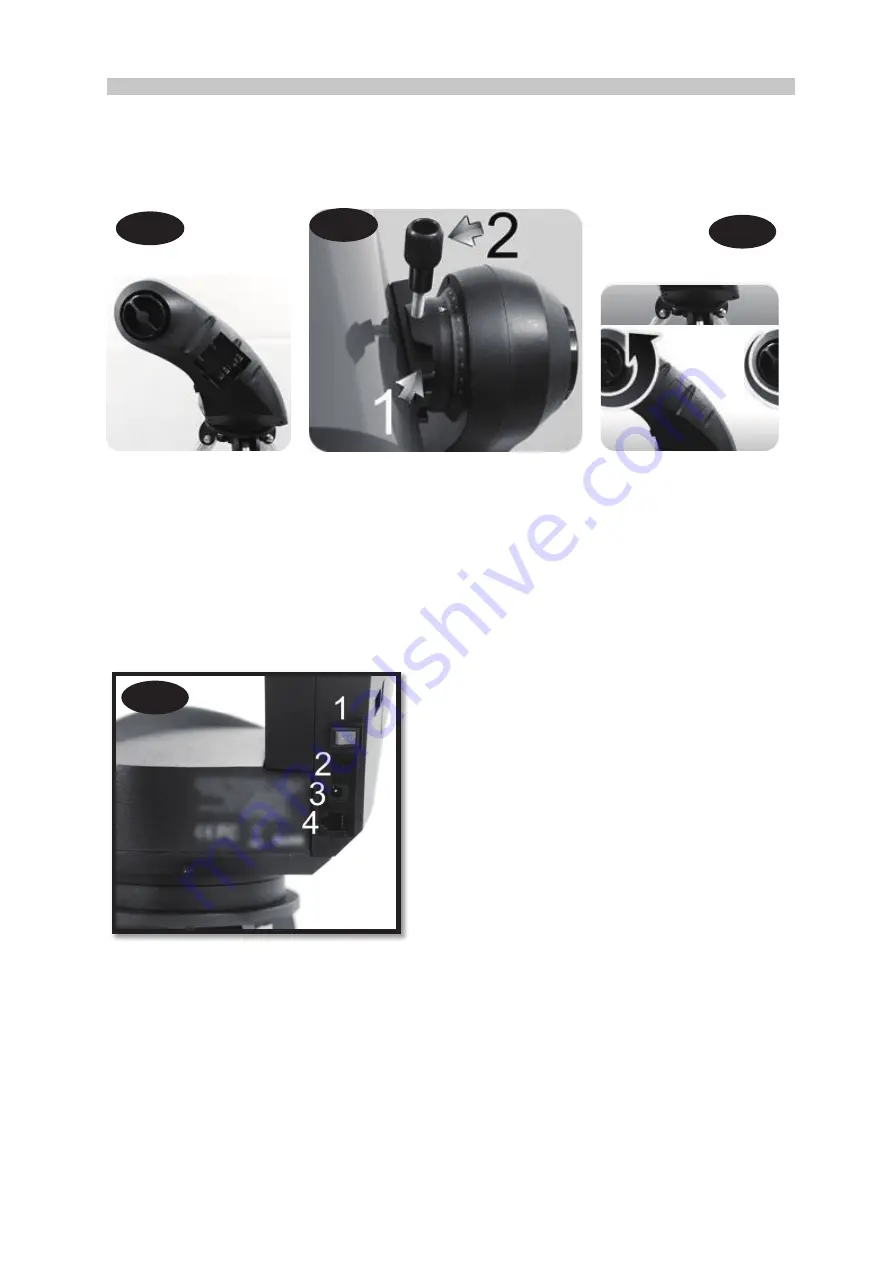
If not done yet, please install 8xAA cells inside the box located on the external side of the 

mount’s  arm.  To  open  the  box,  gently  lift  the  panel  with  one  finger.  Please  note  the  cell 

holder gets place for 4xAA cells on one side, and 4xAA more on the other side. Please insert 

the cells with right polarity. When done close the panel 

(

Fig. 4

)

To install a telescope, loosen the handle screw 

(

Fig. 5.2

until you can slide the telescope 

dovetail bar 

(

Fig. 5.1

)

 inside the bracket. Once inserted, tighten the handle screw 

(

Fig. 5.2

)

until  the  dovetail  bar  on  the  telescope tube  is  securely  fastened  on the  mount.  Adjust the 

clutch knob 

(

Fig. 6

to obtain a locking force enabling the main tube to be pushed manually 

while staying steady once released. 

Fig. 4

Fig. 5

Fig. 6

Fig. 7

To install the camera instead of the telescope, 

please refer to chapter “Terrestrial Photography”.

Connectors description:
1: ON / OFF switch

2: Snap connector for camera shutter release

3: external power 12V DC input

4: RJ12 hand controller connection port 

Summary of Contents for Star Discovery 2i

Page 1: ...INSTRUCTION MANUAL 202007 V1 Star Discovery 2i...

Page 2: ...ed dot finder 6 Mounting the telescope accessories 6 Using the Red Dot Finder 6 Aligning the Red Dot Finder 7 Download SynScan or SynScan Pro APP 7 Terrestrial photography 7 Download APP Manual Wirele...

Page 3: ...uge 42000 object database including objects from Messier IC NGC and Caldwell catalogs the planets named stars double stars variable stars and even user de fined objects like new comets SynScan or posi...

Page 4: ...evel the base Fig 1 You don t have to align a leg to a specific direction Please note the three screws position on the base Star Discovery 2i SD GoTo bundle Fig 1 Fig 2 Fig 3 Standard parts 1 The Star...

Page 5: ...he other side Please insert the cells with right polarity When done close the panel Fig 4 To install a telescope loosen the handle screw Fig 5 2 until you can slide the telescope dovetail bar Fig 5 1...

Page 6: ...d eyepiece then re tighten thumbscrews to hold the eyepiece in place Fig 8 Using the Red Dot Finder The Red Dot Finder is a zero magnication pointing tool that uses a coated glass window to superimpos...

Page 7: ...o app is installed on your smart device You can find them in your App Store Google Play or on our webpage Switch on the Star Discovery 2i mount Connect your smart device with the WiFi signal with iden...

Page 8: ...e the bracket has a metal plate reinforcement on one side as shown in Fig 11 This metal plate should face the blocking screw on the vertical axe IMPORTANT NOTE PLEASE CHECK CAREFULLY THAT YOU HAVE INS...

Page 9: ...nd use the two screws part 2 to assemble the secondary accessory plate part 3 on the mounting bracket part 1 Take care to mount the secondary accessory plate with it screw on the same side as the scre...

Page 10: ...nification of 25x and an exit pupil of 8mm This combination can probably be used by a young person but would not be of much value to a senior citizen The same telescope used with a 32mm eyepiece gives...

Page 11: ...ity Choosing the best time to observe The best conditions will have still air and obviously a clear view of the sky It is not necessary that the sky be cloud free Often broken cloud conditions provide...

Page 12: ...E FRONT OF THE TELESCOPE FOR VIEWING THE SUN WHEN OBSERVING THE SUN PLACE A DUST CAP OVER YOUR FINDERSCOPE OR REMOVE IT TO PROTECT YOU FROM ACCIDENTAL EXPOSURE NEVER USE AN EYEPIECE TYPE SOLAR FILTER...

Reviews: