Wireless telescope control
Fig.10
Part II: Getting Started
7
The Star discovery 2i mount will be equipped with a telescope optical tube for astronomy obser-
vation purpose. Please refer to the telescope optical tube manual for use of the telescope and
its accessories.
Aiming the telescope automatically with the Star Discovery 2i mount, connected to your smart
device equipped with WiFi (smartphone, tablet, laptop):
Wireless terrestrial photography control:
The Star discovery 2i mount can be equipped with a camera for terrestrial panorama photogra-
phy, timelapse photography etc.
The connection procedure is identical. The app to be installed is different: SynScan Photo.
The Wi-Fi will be turned off automatically to conserve energy if no connection is established
within 15 minutes after being turned on.
By default, the SSID of the built-in Wi-Fi is “SynScan_xxxx” with no password.
Reset Wi-Fi configuration to factory default by turning on the power without the SynScan hand
control connected and no app operations via the Wi-Fi connection for 1 hour.
Entry-level users are recommended to start with SynScan app, the SynScan Pro app is for
experienced users.
Make sure the freely available software (SynScan or SynScan Pro) app is installed on your
smart device. You can find them in your App Store, Google Play or on our webpage
Switch on the Star Discovery 2i mount.
Connect your smart device with the WiFi signal with identification “SynScan …..”
Refer to SynScan App User’s Manual.
-
-
-
-
Aligning the Red Dot Finder
Plastic
shipping
cover
Like all finderscopes, the Red Dot Finder must be properly aligned with the main telescope
before use. This is a simple process using the azimuth and altitude control knobs
.
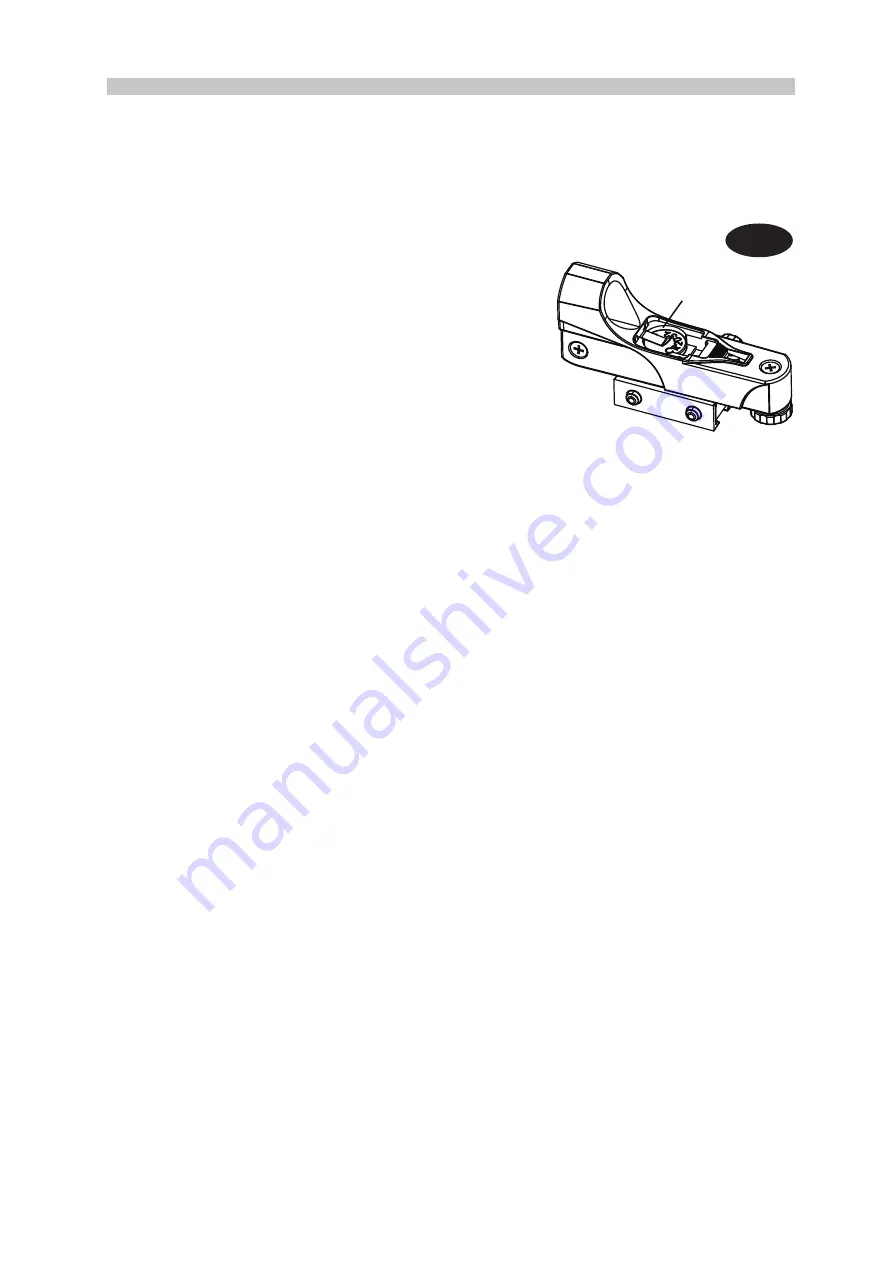
Open the battery cover by pulling it down (you can gently
pry at the 2 small slots) and remove the plastic shipping
cover over the battery
(
Fig. 10
)
.
Turn on the Red Dot Finder by rotating the variable bright-
ness control clockwise until you hear a “click”. Continue
rotating the control knob to increase the brightness level.
Insert a low power eyepiece into the telescope’s focuser.
Locate a bright object and position the telescope so that
the object is in the centre of the field of view.
With both eyes open, look through the sight tube at the
object. If the red dot overlaps the object, your Red Dot
Finder is perfectly aligned. If not, turn its azimuth and
altitude adjustment controls until the red dot is merged
with the object.
1.
2.
3.
4.
Download SynScan or SynScan Pro APP
http://www.skywatcher.com/download/software/synscan-app/
http://www.skywatcher.com/download/manual/synscan-hand-control-and-synscan-app/
Download SynScan App User’s Manual


