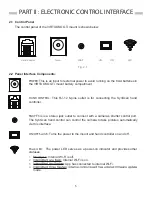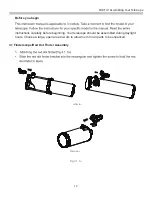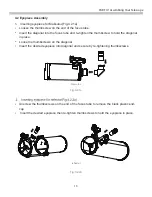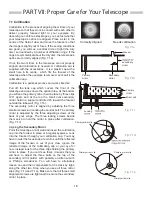
Fig. 7.1f
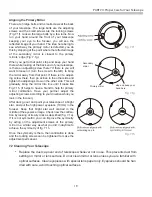
Fig. 7.1g
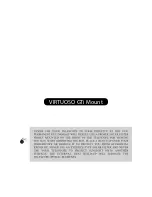
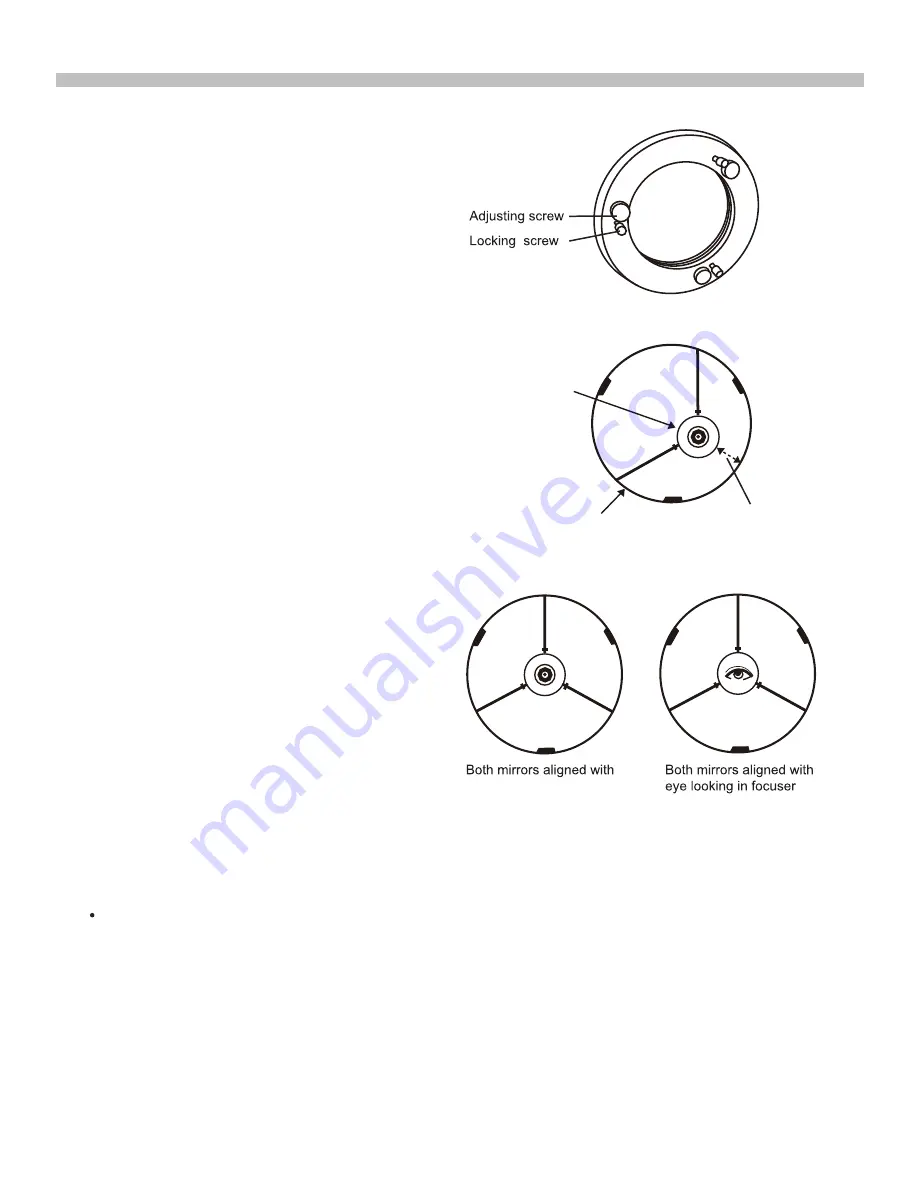
Fig. 7.1h
PART VII: Proper Care for Your Telescope
19
7.2 Cleaning Your Telescope
Replace the dust cap over end of telescope whenever not in use. This prevents dust from
settling on mirror or lens surface. Do not clean mirror or lens unless you are familiar with
optical surfaces. Clean eyepieces with special lens paper only. Eyepieces should be han
dled with care, avoid touching optical surfaces.
Secondary
mirror
Primary mirror
stop and keep your
hand here
collimating cap in
Aligning the Primary Mirror
There are 3 large bolts and 3 small screws at the back
of your telescope. The large bolts are the adjusting
screws and the small screws are the locking screws
(Fig.7.1f). Loosen the large bolts by a few turns. Now
run your hand around the front of your telescope
keeping your eye to the focuser, you will see the
reflected image of your hand. The idea here being to
see which way the primary mirror is defected, you do
this by stopping at the point where the reflected image
of the secondary mirror is closest to the primary
mirrors’ edge (Fig. 7.1g).
When you get to that point, stop and keep your hand
there while looking at the back end of your telescope,
is there an adjusting screw there? If there is you will
want to loosen it (turn the screw to the left) to bring
the mirror away from that point. If there isn’t a adjust-
ing screw there, then go across to the other side and
tighten the adjusting screw on the other side. This will
gradually bring the mirror into line until it looks like
Fig.7.1h. (It helps to have a friend to help for primary
mirror collimation, Have your partner adjust the
adjusting screws according to your direction while you
look in the focuser.)
After dark go out and point your telescope at a bright
star, and put the high power eyepiece (10mm) in the
focuser. Keep that bright star well centred in the
middle of the eyepiece image. Check now the collima-
tion by looking at its airy disk as described (fig. 7.1a).
If it is not symmetric, you can improve the symmetry
by acting on the adjustment screws of the primary
mirror in a similar way as what you did in daytime to
achieve the symmetry of fig. 7.1h.
Once the symmetry is there, then collimation is done
and the locking screws can be tightened to make the
adjustment permanent.

