72
Appendix B: Wireless Stand-Alone Connection
•
It’s usually best to connect the Skycut while it is next to the wireless computer. Once connectivity is
established, you can then experiment to see how far from the computer the Skycut can be located.
•
There are two situations to consider before getting started. If you are not sure which applies to your Skycut,
then select
B
and go to that section first.
A. The Skycut has never been set up wirelessly to a network.
B. The Skycut has previously been connected to a wireless network.
A. The Skycut has never been set up wirelessly to a network
•
Power on the Skycut and wait for the light to come on. In the orange strip on the control panel, it should
read either “Hi-Link” or “Cutter”, followed by some alphanumeric characters and then the IP Address:
192.168.16.254. If something else is shown there, proceed to
Section B.
•
On your computer, open your list of available networks. In the list, you should see one with this type of name
format.
•
Select that network and enter the following
Network Key
when prompted:
12345678
•
Proceed to
Step 9
in
Section 2.2.2
. Remember that your computer will not have access to the Internet or
other network devices while in
Wireless Stand-alone
mode.
B. The Skycut has previously been connected to a network
•
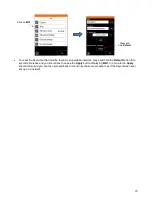
On the control panel
,
press the
MENU
button, select
WIFI,
and press
OK
. Use the
Y-
button to move down
to highlight
Default
and press
OK
.
•
Wait a minute or two and the default
IP Address
will then appear in the orange strip at the top of the
display.
•
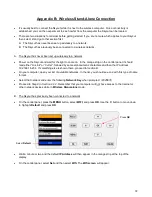
On the control panel, select
Set
and then select
Wifi.
The
Wifi screen
will appear:
Select
Default
Press
OK

