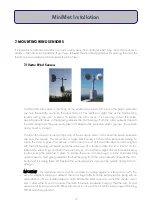
5. Drive the large guyline pegs about halfway into the (or fix bolts as appropriate), at 4.85m,
5.15m, 9.85m and 10.15m (approximately) from the mast base plate, 3 at each distance at 120
degrees circular spacing, (one for each guyline rope). Pegs should be fixed at an angle of
approximately 45 degrees pointing away from the base plate.
6. Place the compressed mast onto the base plate. Rotate so that the windvane sensor
NORTH marker is facing North, and the dual wind arm mount and locking collar screws are
facing east / west (use a magnetic compass).
7. Use the temporary rope guylines supplied to hold the compressed mast vertical (using the
small tent pegs). The temporary rope guylines are fitted by placing the small fixed loop in
each guyline rope over the hooks in the collar on the bottom section of the mast. Then with
the mast held vertical (use a spirit level) the other end of the guylines can be fixed using the
small pegs supplied. The guylines can be tightened to hold the mast firmly by pulling the
free end of the guyline. When the mast is in position tie a knot in the rope guyline's free
end to stop it slipping.
8. Begin raising the mast sections one at a time. Use a free standing ladder or platform so
that the top of the lowest section can be easily reached. This mast is intended to be
extendable to a maximum of 10 metres. Under no circumstances should the mast be
extended to a position where the cross-hatch marks on the extending sections come into view.
a) Raise the topmost section first – gradually about 0.5m at a time, use the locking
collar to temporarily hold. Secure the wind sensor cables with cable ties at each
interval.
b) Secure the guyline ring in the position marked in Pre-installation Assembly. Uncoil
the wire guyline ropes so they are accessible from the ground later.
c) Continue raising until the cross hatch pattern is reached, and then lower slightly so
that it is no longer visible. Rotate the mast section so that the protruding wind arm
mount is still in line with the locking collar screws.
d) Finally tighten the locking collar.
e) Repeat with each next section in turn, from top to bottom. If it is windy during the
installation, get some helpers to hold the longest guy ropes to prevent excessive
movement of the topmost sections in the wind until secured.
9. Begin to secure the permanent guylines set by set, starting from the lowest (shortest) set.
a) Unscrew to extend the straining screws at the end of each guyline and hook them
to the D shackle
on each large tent peg or bolt (hook facing upwards)
b) Gently fasten all 3 guylines in the set and check the mast is still exactly vertical
9
MiniMet Installation
Summary of Contents for MiniMet
Page 1: ...MiniMet Installation Manual Iss 2 0...
Page 45: ...APPENDIX 2 CONCRETE BASE FOR A 2M MAST 44 MiniMet Installation...
Page 46: ...APPENDIX 3 SITE LOCATION 45 MiniMet Installation...
Page 47: ...APPENDIX 4 ASSEMBLY OF MAST SUPPLIED IN MORE THAN ONE SECTION 46 MiniMet Installation...
Page 49: ...APPENDIX 6 RAINGAUGE BASEPLATE 48 MiniMet Installation...
Page 50: ...APPENDIX 7 MOUNTING OF GSM GPRS ENCLOSURE TO BRACKET 49 MiniMet Installation...
Page 51: ...APPENDIX 8 MOUNTING THE GSM GPRS MODULE ON THE MAST NO SOLAR PANEL 50 MiniMet Installation...
Page 55: ...APPENDIX 12 TYPICAL MINIMET INSTALLATION WITH GSM GPRS 54 MiniMet Installation...
Page 56: ...APPENDIX 13 TYPICAL MINIMET INSTALLATION WITHOUT GSM GPRS 55 MiniMet Installation...
Page 57: ...APPENDIX 14 56 MiniMet Installation...
Page 58: ...APPENDIX 15 FITTING THE BATTERY COVER 57 MiniMet Installation...

