9
V-ring
V-ring
Jump mat
7
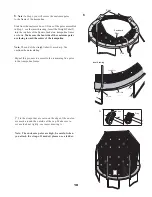
3.
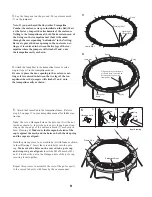
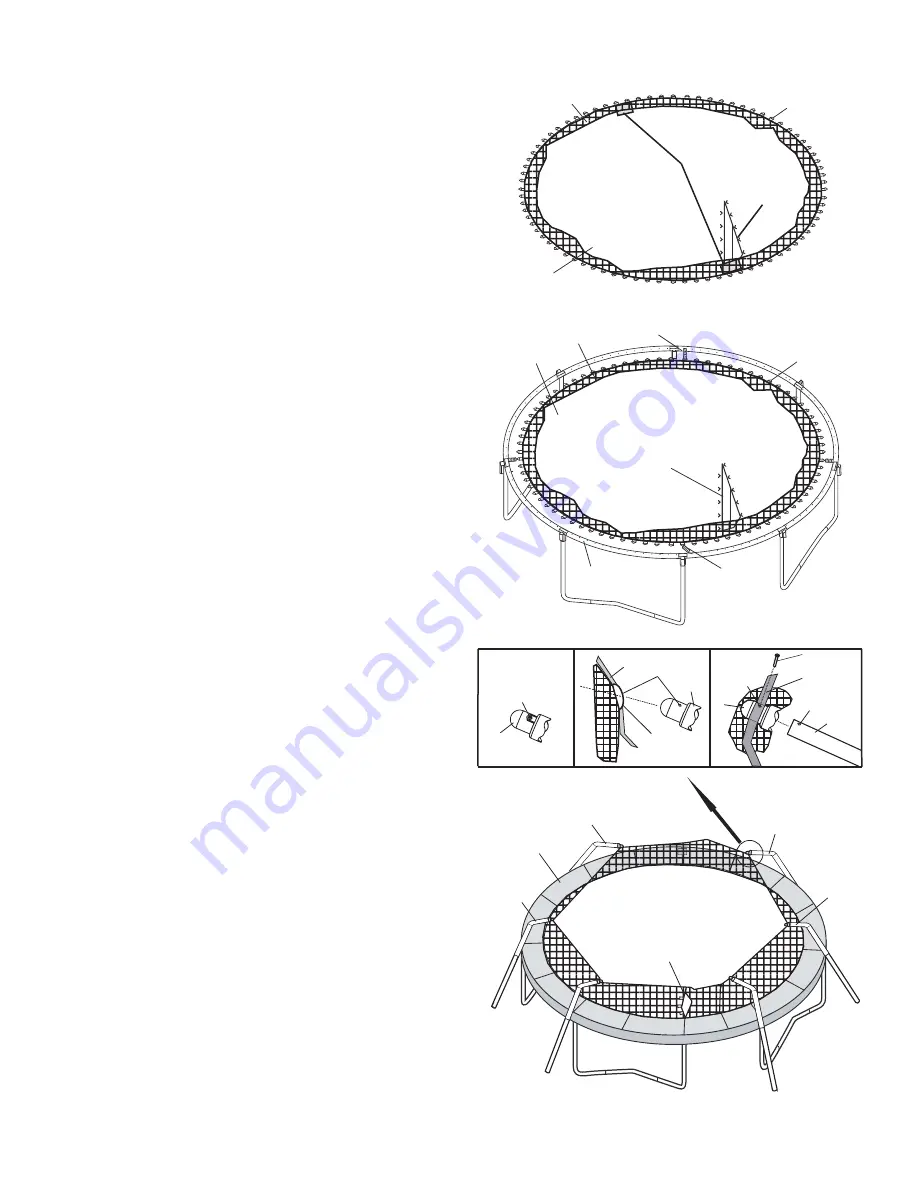
Lay the Jump mat on the ground. Put enclosure mesh
(7) on the jump mat.
Align opening of enclosure
as shown here, centered in
between the legs of the
trampoline.
Spring
Jump mat
7
4.
Attach the Jump Mat to the trampoline frame by refer-
ring to steps 6-7 in the trampoline manual.
Be sure to place the door opening in the enclosure net-
ting so it is centered in between the two legs of the tra-
mpoline where the jumpers will climb off and onto
the trampoline easily as shown.
Trampoline
frame
Spring
3
4
5
Warning label
Opening of
the enclosure
5
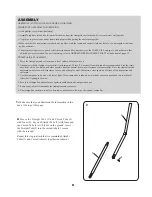
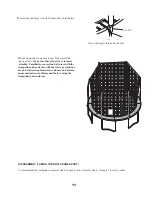
. Attach the Frame Pad to the trampoline frame. Refer to
step 8-9 on page 13 in your trampoline manual for further ins-
truction.
Note
: There is a Hexagon hole on the pole cap (1) with a nut
inside as shown A. Insert the pole cap(1) though one strap
ring on the top edge of the enclosure mesh(7) as shown in
Inset Drawing B.
Make sure the Hexagon hole side of the
cap is against the mesh, and the holes on both the strap ring
and the caps are aligned.
Hold the pole cap close to a curved tube (6) with foam as shown
in Inset Drawing C. Insert the curved tube(6) into the pole
cap.
Make sure the holes on the curved tube
,
pole cap
and strap ring are aligned.
Insert the M5x50mm bolt(2)
until it touches the nut in the Hexagon hole of the pole cap,
securing them together.
Repeat this process to assemble the rest of the pole caps(1)
to the curved tubes(6) with foam by the same manner.
Inset drawing
C
Holes
B
1
7
Strap ring
Strap
6
1
Hole
2
Hole
A
1
Hexagon hole
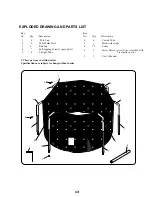
Note: If you purchased the Skywalker Trampoline
Combo, the enclosure was pre-installed on the Bed (Mat)
at the factory. Inspect the attachments of the enclosure
Netting to the trampoline mat (bed). Make certain each of
the V-rings on the trampoline mat (bed) is threaded
through the corresponding “buttonhole” in the Netting.
Be sure to place the door opening in the enclosure net-
ting so it is centered in between the two legs of the tra-
mpoline where the jumpers will climb off and onto
the trampoline easily as shown.
Enclosure Door
6
6
6
6
Frame Pad


