……………………………………………………
7. Installing The SkyWind NG
Seite 19
| Owners Manual SkyWind NG, Version 5.1
…………………………
7.4 Mounting the rotor blades
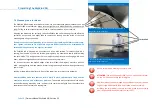
The SkyWind NG patented rotor blades are CNC cut from aerospace grade aluminum to an ac-
curacy of 1/100 of a Millimeter. Make sure to align the rotor blades perfectly
-
one above the
other. Failing to do this step correctly will lead to constant vibration in your turbine!
Although the blades are cut perfectly, the anti
-
reflective and noise reducing coat can affect the
perfect fit on the shaft. You might need to remove the coating from the inside of the shaft
mounting hole using a sharf knive.
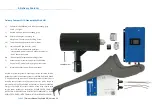
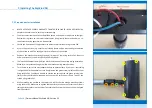
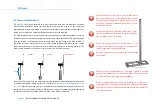
Be aware that the central mounting screw is the only part holding the rotor assembly toge-
ther. Tighten the screw to 7 Nm (the lock ring must be flat) and secure the installation with
Loctite 243! See pictures on the right for illustration.
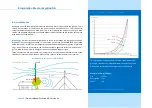
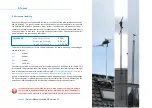
The SkyWind NG is a downwind, horizontal axis, micro wind turbine. This means the wind is
coming
‚
from behind
‘
of the wind turbine, passing along the nacelle and tower before hitting
the rotor blade. This design allows the rotor adjust itself perfectly with changing wind direc-
tions—without a large and heavy wind vane or expensive yaw motors.
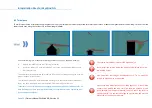
For a correct function the bended edges of the rotor blade, the winglets, must face with the
wind
-
meaning away from the nacelle. A rotor facing the wrong direction will not generate any
power at all!
Looking at the wind turbine (rotor in front of the tower) the rotor must turn clockwise.
After installation make sure that the rotor is firmly in place, spins absolutly freely and the
nacelle can also turn 360° without any problems.
The nacelle must not turn back into one di-
rection after beeing moved by hand
-
otherwise the tower is misaligned from the vertical into
the direction the wind turbine is leaning into.
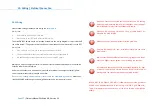
Be very careful when handling the rotor blades.
ATTENTION:
You will need correct DIN tools to install the wind turbi-
ne. You will also need Loctite 243 screw glue.
Aluminum blades can be damaged during shipment or by harsh hand-
ling. Damaged blades may NEVER be installed on a wind turbine!
Installting the rotor blade is the very last step. Make sure everything
else is finished before and the turbine is set to OFF.
…………………………
…………………………
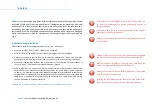
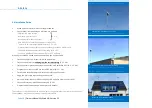
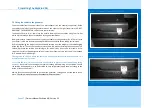
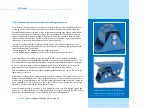
Make sure to place the rotor blades perfectly on top of
each other! Be very precise!
Use the correct order when installing the parts of the
rotor blade. Be very precise!
Loctite 243

