1. How to enter and exit factory mode
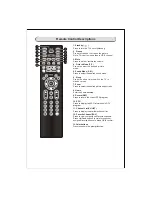
Press Source button, and then press digital button “3”, “1”, “9”, “5” in turns to enter the factory menu. Press
©
and
ª
button to choose the item
ˈ
press OK button to enter the submenu and press
¨
button to adjust the value.
In the factory mode, press “menu” key can exit the factory mode.
Software information:
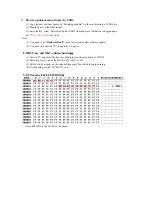
Enter factory mode, you can get the software information from the bottom of menu.
Panel information:
Enter factory mode, enter “PANEL CONTROL” item, you can get the panel information from the bottom of
menu.
Aging mode
Enter factory mode, select “SYSTEM SETTING” item, press OK button enter, select “AGING MODE” item,
press
¨
button open aging mode.
Note: You can press the shortcut key in the factory remote control to open or close the aging mode.
4. How to adjust ADC
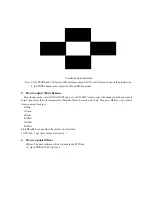
Before adjusting, enter the channel you want to adjust and input adjust signal (YPBPR channel: 576P and 720P,
100% color bar; VGA channel: 1366*768, tessellated white and black). Select “AUTO ADC”, press
¨
button to
auto adjusts the ADC value.
100% color bar
Summary of Contents for 8M51B
Page 2: ...Content 2 11 17 18 19 20 21 28 29 45 46 49 50 57...
Page 3: ...LED 8M51B...
Page 5: ...65 120 140 For 32 LED For 42 LED For 47 LED...
Page 6: ...8 8 6...
Page 7: ...40 40 3 2 1 4 2 50 0 5 80 40 3 12000 26inches is 8 ohm 3 3 3 3 DC Voltage PANEL 12 12...
Page 8: ...40 YES 8 6 46 46 NO NO Standard Spanish Standard 20...
Page 9: ...4 2 4 0 40 70 0 40 70 0 40 40 85 Y0 50 30000...
Page 23: ......
Page 24: ...U16 64M X 16 BIT G DIE DDR3 1333 SDRAM FBGA 96...
Page 25: ...U17 128M X 16 BIT G DIE DDR3 1333 SDRAM FBGA 96...
Page 26: ...U8 16MB SPI FLASH SOP 8 U21 2G BIT CMOS NAND EEPROM TSOPI48...
Page 27: ......
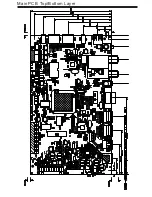
Page 28: ...Main PCB Top Bottom Layer...
Page 29: ...Main PCB Top Bottom Layer...
Page 30: ...8M51B Service Adjustment V0 1...


