8
Subtitles Display
: Select
On
to display subtitles whenever they are available, select
Off
if you don’t need
them to be shown.*
Aspect Ratio
:
Use this option to select the aspect ratio of the connected TV. The options are:
4:3
for a
4:3 TV (black bars on top and bottom of picture) and
16:9
for 16:9 TV sets.
Scan mode
:
Select
All
to store scrambled and free-to-air channels or select
Free
to store only free-to-
air channels.
Connection
:
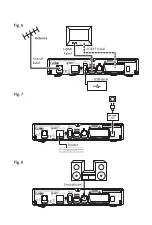
Use this option to select the established connection to your TV set. Select
HDMI
or
TV
SCART
.
* Availability of DVB/HoH subtitles depends on the broadcast. If subtitles are not supported, they can be activated via Videotext if available.
When all settings have been made, press the
gReen
Next
button to continue.
4.3 aerial adjustment
This part of the wizard will help you to setup your antenna and check signals.
Use
pq
to select the setting and
t
u
to change these values. The following settings are available:
Antenna Power
: Set to
On
if you use an active antenna (with built-in amplifier). When set to
On
,5 V will
be present at the ANT IN connector of the receiver. Select
Off
for passive antennas.
Channel No.
:
Select a channel which is known to carry a broadcast signal in your region. The
Signal
Strength
and
Signal Quality
bars give a visual indication of the reception. Adjust your
antenna to achieve the maximum signal strength and quality.
When all settings have been made, press the
gReen
Next
button to start the channel scan.
The receiver will search for all available channels. When the scan is finished, the receiver switches to
viewing mode. Now you can enjoy watching your favourite TV channels. If you get the message “No
channels found”, then check again the antenna, coaxial cable, connector and in menu if you have
reception. When this has been checked, reset the unit and follow the installation wizard again as shown
below.
Tip:
If the receiver won’t start after switching on the receiver for the first time,
reset the receiver to factory settings by pressing the
menu
button and
selecting
Load Factory Setting
in the menu
Installation
.
(defauLT pin: 0000)
.
5.0 QuicK guide TO using YOuR ReceiveR
We at SKYWORTH understand that you can’t wait to enjoy your new high definition digital terrestrial
receiver. The following quick guide will make you familiar with the basic operation of this device. We do,
however, advice you to read the full manual to get the best performance from your receiver.
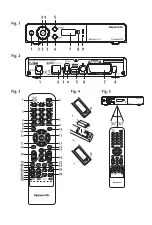
To switch your receiver ON or into Standby press
q
on the remote control or front panel of your receiver.
Choose the desired channel with
pq
. Alternatively, you can enter the channel number with the
0~9
buttons on the remote control or press
OK
in viewing mode to display the channel list. The volume can
be adjusted with
t
u
and within the menus and in Videotext use
vOL+/-
additionally you can use
!
to
mute all audio outputs. Use
p+/p-
buttons to scroll in list modes for your convenience.
6.0 OpeRaTiOn
Your new receiver is equipped with several features to make watching TV a true pleasure. This chapter
describes these features. Please do also read chapter
7.0
to get familiar with the menu of your receiver.
6.1 changing channels
Following ways are possible for changing channels with your new receiver:

