background image

10

CAUTION:
MAKE SURE THE BLUE/WHITE WIRE FROM THE SledStart MOD-
ULE MATCHES UP TO THE BLUE/WHITE WIRE ON THE HARNESS
SIDE AND TO THE RED/WHITE WIRE ON THE KEY SIDE OF THE
SNOWMOBILE CONNECTOR. ALSO BE SURE THAT ALL BROWN
WIRES ARE MATCHED UP IN ALL CONNECTORS. IF ANY OF THE
ABOVE DO NOT MATCH, DO NOT PROCEED WITH INSTALLATION.
PLEASE CONTACT US FOR FURTHER ASSISTANCE.

STEP 3

Remove necessary body panels to locate the 2-pin brake connector. This
connector should have a blue/red wire and a green wire. This connector
will be located in a rubber boot along with many other connectors. Un-
plug the connector and locate the blue/red wire and green wire on the
SledStart harness with the matching male/female piggyback attached. In-
sert the male connector from SledStart into the female connector from the
snowmobile. Next insert the female connector from SledStart into the male
connector from the snowmobile. Insert all the connectors back into the
rubber boot and reseal.

CAUTION:
MAKE SURE ALL BLUE/RED WIRES AND ALL GREEN WIRES
MATCH UP IN ALL CONNECTORS. IF ANY OF THE ABOVE DO
NOT MATCH, DO NOT PROCEED WITH INSTALLATION. PLEASE
CONTACT US FOR FURTHER ASSISTANCE.

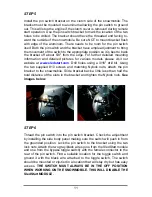
STEP 4

Locate the easiest accessible fuel injector on your snowmobile. Unplug
the connector on the top of the injector by squeezing the tab on the con-
nector and pulling up. These are watertight connectors and will be snug.
Wiggle carefully if necessary as you pull up to release watertight gasket
and remove the connector. Locate the orange/black wire from the SledStart
harness with the matching fuel injector piggyback connector. Plug the pig-
gyback onto the injector then plug the injector connector from the snow-
mobile harness into the piggyback. Cable tie the fuel injector piggyback
to a location that will be out of the way and secure. This will help reduce
wire fatigue caused my vibration leading to wire breakage, causing the
injector not to function. If the injector stops firing, remove the piggyback
and reinstall the direct connection again. SledStart will still function but
without the RPM cut off feature. Contact us for further assistance if nec-
essary.

Summary of Contents for SS1000YAM

Page 1: ...INSTALLATION MANUAL Model SS1000YAM For Yamaha Snowmobiles Designed by a rider for the rider ...

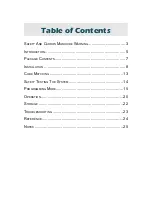
Page 2: ...s SAFETY AND CARBON MONOXIDE WARNING 3 INTRODUCTION 5 PACKAGE CONTENTS 7 INSTALLATION 8 CODE MATCHING 13 SAFETY TESTING THE SYSTEM 14 PROGRAMMING MODE 15 OPERATION 20 STORAGE 22 TROUBLESHOOTING 23 REFERENCE 24 NOTES 25 ...

Page 3: ...Copyright 2009 SledStart LLC All Rights Reserved Operations Manual Model SS1000YAM Two way LCD Remote Start System ...

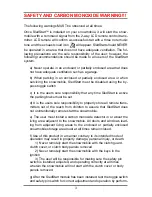
Page 4: ...he parking brake must be set d It is the users sole responsibility to properly store all remote trans mitters out of the reach from children to assure that SledStart does not unintentionally remote start the snowmobile e The user must install a carbon monoxide detector in or about the living area adjacent to the snowmobile All doors and windows lead ing from adjacent living areas to the enclosed o...

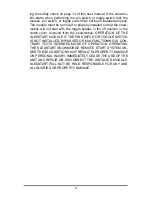
Page 5: ...the off position or the clutch cover removed from the snowmobile OPERATION OF THE SLEDSTART MODULE IF THE PIN SWITCH OR TOGGLE SWITCH IS NOT INSTALLED BYPASSED OR MALFUNCTIONING IS CON TRARY TO ITS INTENDED MODE OF OPERATION OPERATING THE SLEDSTART SNOWMOBILE REMOTE START SYSTEM UN DER THESE CONDITIONS MAY RESULT IN PROPERTY DAMAGE OR PERSONAL INJURY IMMEDIATELY CEASE THE USE OF THE UNIT AND REPAI...

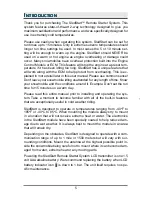
Page 6: ... for any length of time Know your snowmobile and the conditions around it Example Don t set the run time for 15 minutes on a warm day Please read this entire manual prior to installing and operating the sys tem Take a moment to become familiar with all of the built in features that are exceptionally useful in cold weather riding SledStart is designed to operate in temperatures ranging from 40o F t...

Page 7: ...ing conditions 1 This device may not cause harmful interference 2 This device must accept any interference received including interference that may cause undesired operation Changes or modifications not expressly approved by the party respon sible for compliance could void the user s authority to operate the device ...

Page 8: ... the following contents SledStart module with the pre wired harness One 2 way LCD Remote transmitter One 1 way transmitter One AAA 1 5V battery One 3V coin battery One pre wired bypass toggle switch One pin switch One pin switch mount bracket Two 10 screws Two nylock nuts Two heavy duty long cable ties Six small cable ties Split loom ...

Page 9: ...lable Any location that will not see excessive amounts of heat snow pack or water is suitable Be careful of mounting module near any steering components as these parts need to move free and clear of any obstacle It is suggested that you inspect the module after your first ride especially for deep powder riding The SledStart module is specially coated internally to prevent dam age from moisture but...

Page 10: ... time can make for a very bad day Please install both of these switches STEP 1 Remove necessary body panels to locate the battery of the snowmobile With a Phillips screwdriver remove the negative and positive leads to the battery being careful not to lose the square nuts in the battery terminal housings It is a good idea to insert the bolts back into the battery and be sure the positive and negati...

Page 11: ...eseal CAUTION MAKE SURE ALL BLUE RED WIRES AND ALL GREEN WIRES MATCH UP IN ALL CONNECTORS IF ANY OF THE ABOVE DO NOT MATCH DO NOT PROCEED WITH INSTALLATION PLEASE CONTACT US FOR FURTHER ASSISTANCE STEP 4 Locate the easiest accessible fuel injector on your snowmobile Unplug the connector on the top of the injector by squeezing the tab on the con nector and pulling up These are watertight connectors...

Page 12: ...bsite at www sledstart com Drill holes using a 3 16 drill bit Using the two supplied 10 screws and matching Nylock nuts attach the pin bracket to the snowmobile Slide bracket back a little less than half the total distance of the slots in the bracket and tighten the Nylock nuts See images below STEP 6 Thread the pin switch into the pin switch bracket Check the adjustment by installing the side bod...

Page 13: ...t snow mobile models see our website at www SledStart com STEP 10 Attach the red 12V lead from the SledStart module with the 30 amp fuse removed to the battery positive pole along with the factory ring connec tor Next install the Pink white and Black wires from the SledStart module to the battery s negative pole along with the factory ring connector After installation is complete and you have chec...

Page 14: ...ode matching mode The headlight will flash along with audible clicking from the module STEP 2 Now press and release the T button then press and release S on the remote you are matching The headlight should flash quickly five times indicating a successful match For additional remotes please visit our website at www sledstart com Note To add an additional remote control repeat Steps 1 and 2 Maximum ...

Page 15: ...nking and starting the engine The LCD remote will con firm a successful start by a three note music tone and the exhaust cloud will appear Press S again to shut the engine off Next the ignition and the SledStart module will shut down along with three shut down tones from the LCD transmitter Once the engine is off turn the bypass toggle switch to the OFF position Press the S button on the LCD remot...

Page 16: ...e the system will exit programming After selecting and confirming any setting with the S button you will automatically exit programming To re enter programming mode press the button for two seconds and programming will resume at the point where you last exited The button will also scroll to the desired feature At any time to exit programming without saving changes press the X button or to move to ...

Page 17: ... see chart page 17 The engine will restart each time the under hood temperature reaches the user selected temperature This feature remains engaged until it is deactivated which is done by simply pressing for 2 seconds to re enter program ming mode With the icon flashing press the X button to can cel Temperature Auto Start mode Engine starter crank time Press T to scroll to the desired engine start...

Page 18: ...d Op tions FE ATU R E O P TIO N 1 D E F AU L T O P TIO N 2 O P TIO N 3 1 E ngine R un T im e 5 m in 10 m in 15 m in 2 T im er M ode Interval 1 hour 2 hours 3 hours 3 T urbo M ode R un T im e 30 sec 1 m in 3 m in 4 R P M C utoff Low H igh N A 5 Light C ircuit Flashing C onstant N A FEATURES OVERVIEW Feature 1 Engine Run Time This feature sets how long the engine will run during any mode of remote s...

Page 19: ...un time will be determined by the option selected in Feature 1 See chart on page 17 Feature 3 Turbo Mode Run Time Valet Mode This feature will allow cool down for turbo units or can be used as a valet mode To activate Turbo Mode press twice To deactivate Turbo Mode press twice again Wait five seconds for icon to expire from LCD screen To use Turbo Mode with engine running and key in the run positi...

Page 20: ...ne fails to start or loses ignition SledStart will make two more attempts to start the engine If the snowmobile fails to start after 3 attempts SledStart shuts down If the engine shuts down after the one minute window SledStart will not attempt to restart regardless of the number of attempts made during initial start up This feature is designed to protect the engine from overheating On many models...

Page 21: ...ote start press the S button on LCD remote User will be notified of a successful start by a three note music tone and the ex haust cloud icon will appear on the LCD screen An unsuccessful start will result in three short beeps of the same tone and no exhaust cloud icon appears on the LCD screen With a successful start the en gine will run for the programmed time in feature 1 of the features and op...

Page 22: ...ature Auto Start must be engaged from the programming menu To operate Temperature Auto Start see page 16 With a successful start the engine will run for the programmed time in feature 1 of the features and options See chart page 17 Turbo Mode Run Time Valet Mode ALWAYS SET THE PARKING BRAKE WHEN USING ANY MODE OF REMOTE START This feature will allow cool down for turbo units or can be used as a va...

Page 23: ...ring that first one minute Please use caution and only use remote start modes on a cold en gine S S S S STORAGE TORAGE TORAGE TORAGE TORAGE The SledStart module and LCD continuously communicate with each other Like a car alarm there is a constant small draw on the battery If you do not ride your snowmobile regularly this can result in a dead battery It is recommend for any storage over seven days ...

Page 24: ...ss switch is set to ON Check clutch side pin switch for proper operation Check the connector that plugs into the ignition key switch Check that the LCD is code matched to the SledStart module See page 13 Check for a weak or dead battery in the LCD remote Check for a weak or dead battery in the snowmobile For further assistance please contact us by email at contact_us sledstart com or visit www sle...

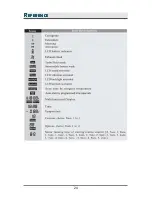
Page 25: ...24 R R R R REFERENCE EFERENCE EFERENCE EFERENCE EFERENCE ...

Page 26: ..._______________ ___________________________________________________ ___________________________________________________ ___________________________________________________ ___________________________________________________ ___________________________________________________ ___________________________________________________ ___________________________________________________ ____________________...

Reviews: