background image

4


g) Use the power tool, accessories and tool bits, etc. in accordance with these  


     instructions, taking into account the working conditions and the work to be  


    performed.

 Use of the power tool for operations different from those intended could result  


     in a hazardous situation.


h) 

Caution!:


The chip collector tray could be very hot while cutting or after cutting.


Don’t touch it by hand!! 


5) SERVICE


a)


Have your power tool serviced by a qualified repair person using only identical 


    replacement parts.

 This will ensure that the safety of the power tool is maintained.

Safety Instructions for Saw


DANGER: 

a) Keep hands away from cutting area and the blade. Keep your second hand on  


    auxiliary handle. 

If both hands are holding the saw, they cannot be cut by the blade.


b) Do not reach underneath the workpiece. 

The guard cannot protect you from the blade   


    below the workpiece.


c) Never hold piece being cut in your hands or across your leg. Secure the workpiece  


   with the vice or clamps when necessary.

 It is important to support the work properly to  


   minimize body exposure, blade binding, or loss of control. 


d) Hold power tool by insulated gripping surfaces when performing an operation    


   where the cutting tool may contact hidden wiring or its own cord.

 Contact with a “live”  


   wire will also make exposed metal parts of the power tool “live” and shock the operator.


e) Always use blades with correct size and shape (diamond versus round) of arbor   


   holes. 

Blades that do not match the mounting hardware of the saw will run ineffectively,  


   causing loss of control.


f) Never use damaged or incorrect blade washers or bolts. 

The blade washers and bolts  


   are specially designed for your saw, ensuring optimum performance and safety of operation.

Causes and Operator Prevention of Kickback:


• 

Kickback is a sudden reaction to a pinched, bound or misaligned saw blade, causing an  


uncontrolled saw to lift up and out of the workpiece toward the operator.

• 

When the blade is pinched or bound tightly by the cut closing down, the blade stalls and the  


motor reaction drives the unit rapidly back toward the operator.

• 

If the blade becomes twisted or misaligned in the cut, the teeth at the back edge of the blade  


can dig into the top surface of the metal, causing the blade to climb out of the cut and jump  


back toward the operator.


Kickback is the result of saw misuse and/or incorrect operating procedures or conditions and can 

be avoided by taking proper precautions as given below: 


a) Maintain a firm grip on saw handle and position your arms to resist kickback forces.  


    Position your body to either side of the blade, but not in line with the blade.

 Kickback  


   could cause the saw to jump backwards, but kickback forces can be controlled by the  

Summary of Contents for 72905361120

Page 1: ...Slugger order number 7 29 05 361 12 0 14 335mm SLUGGER METAL CUTTING SAW Instruction Manual Metal...

Page 2: ...ons Failure to follow the warnings and instructions may result in electric shock fire and or serious injury SAVE ALL WARNINGS AND INSTRUCTIONS FOR FUTURE REFERENCE 1 WORK AREA SAFETY a Keep work area...

Page 3: ...eft attached to a rotating part of the power tool may result in personal injury e Do not overreach Keep proper footing and balance at all times This enables better control of the power tool in unexpec...

Page 4: ...live wire will also make exposed metal parts of the power tool live and shock the operator e Always use blades with correct size and shape diamond versus round of arbor holes Blades that do not match...

Page 5: ...e open position If saw is accidentally dropped guards may be bent b Check the operation of the guards springs If the guards and the spring are not operating properly they must be serviced before use T...

Page 6: ...tool is operating CAUTION The blade will rotate a period of time after turning off the switch 3 Adjustment Before sawing adjust the saw depth 4 Must select the right blade Use the suitable saw blade w...

Page 7: ...OPERATE IN DAMP CONDITIONS ASSEMBLY AND ADJUSTMENT INSTRUCTIONS WARNING For your own safety never connect the plug to a power source outlet until all assembly steps are complete and you have read and...

Page 8: ...d down chain To move the cutting head to the up position simply unhook the chain from the handle housing 3 Quick Vise Clamp the work piece to this vise by turning the handle crank of vise The stationa...

Page 9: ...right position 12 Depth stop Allows saw to cut desired depths by adjusting the power head 13 Top Blade Cover Protects users from cutter contact on upper portion of blade 14 Arbor Wrench Used for blade...

Page 10: ...screws A WARNING Ensure arbor lock C is disengaged and 8mm HEX wrench has been removed before turning on power Clean Chip Tray Loosen the screw A take out the chip tray B and clear it Put the chip tr...

Page 11: ...cut is made the less heat is created in the work piece preventing discoloring and blade life is prolonged Cut with maximum force without overloading the motor 3 When cutting long heavy pieces use an...

Page 12: ...in a position as shown The most efficient cuts are done if blade cuts the thinnest section of material Recommended Cutting Capacity WARNING Greater than recommended capacities may lead to tool and or...

Page 13: ...properly Periodically check screws and bolts for tightness Feed oil at the oiling points once a month for extending machine service life machine oil is suit able for the saw Oiling points are Rotary...

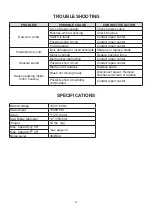
Page 14: ...ce blade Motor overload Reduce pushing force Unusual sound Mechanical obstruction Contact repair center Possible short circuit Contact repair center Blade out of balance Replace blade Heavy sparking i...

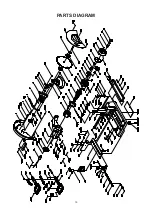
Page 15: ...15 PARTS DIAGRAM...

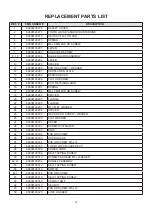
Page 16: ...SCREW 19 69908120294 SPACER 20 69908120295 FLANGE 22 69908120296 FLANGE 23 69908120297 M10 FLAT WASHER 24 69908120298 SPACER 25 69908120299 HEX SOC HD SCREW WASHER 26 69908120300 FLAT WASHER 27 69908...

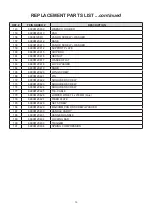
Page 17: ...0 69908120338 RUBBER PIN 71 86 69908120339 GEAR HOUSING ASSEMBLY 72 69908120340 RUBBER PIN 73 69908120341 BALL BEARING 74 69908120342 SPRING 75 69908120343 LOCK PIN 75 1 69908120344 KNOB 76 6990812034...

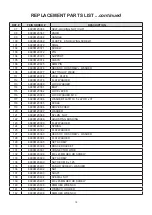
Page 18: ...5 x 22 OD x 3T 118 69908120385 SCALE 119 69908120386 DRIVE SCREW 120 69908120387 WASHER 121 69908120388 NYLON NUT 122 69908120389 ADJUSTING BUSHING 123 69908120390 FLAT WASHER 124 69908120391 SPRING 1...

Page 19: ...164 69908120419 KNOB 165 69908120420 WING SCREW 168 69908120421 PIN 172 69908120422 SHOULDER SCREW 173 69908120423 SHOULDER SCREW 174 69908120424 SHOULDER SCREW 177 69908120425 TIE CABLE 178 699081204...

Page 20: ...he path of the saw blade Always disconnect the plug from the socket before carrying out any work on the machine Never expose tool to rain Caution Laser radiation Avoid direct eye contact with light so...

Page 21: ...21...
Page 22: ...el 412 922 8886 Toll Free 1 800 441 9878 www feinus com FEIN Power Tools Inc Subject to technical changes 2014 06 06 Make the most of your FEIN warranty All you need to do is register your new FEIN po...

Reviews: