9
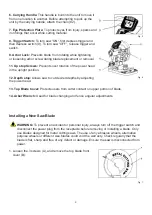
6. Carrying Handle:
This handle is built into the unit to move it
from one location to another. Before attempting to pick up the
unit by the carrying handle, attach the chain (#2).
7. Eye Protection Plate:
To protect eyes from injury, sparks and
iron filings that occur while cutting material.
8. Trigger/Switch:
To turn saw “ON”, first depress trigger and
then depress switch (9). To turn saw “OFF”, release trigger and
switch.
9. Arbor Lock:
Prevents blade from rotating while tightening
or loosening arbor screw during blade replacement or removal.
11. Up stop Screws:
Prevents over rotation of the power head
in the upright position.
12. Depth stop:
Allows saw to cut desired depths by adjusting
the power head.
13. Top Blade Cover:
Protects users from cutter contact on upper portion of blade.
14. Arbor Wrench:
Used for blade changing and fence angular adjustments.
Installing a New Saw Blade
WARNING:
To prevent an accident or personal injury, always turn off the trigger switch and
disconnect the power plug from the receptacle before removing or installing a blade. Only
use blades designed for metal cutting saws. The use of any abrasive wheels, alternative
purpose wheels or different size blades could void the warranty. Check regularly that the
blade is flat, sharp and free of any defect or damage. Ensure the saw is disconnected from
power.
1. Loosen the 3 screws (A), and remove the top blade front
cover (B).
Fig. 5
Fig. 6
Fig. 7
Summary of Contents for 72905361120
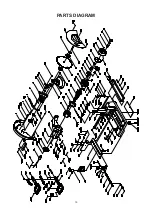
Page 15: ...15 PARTS DIAGRAM...
Page 21: ...21...


