6 Removing the DC Assembly
SMA Solar Technology AG
Replacement Manual
DCCON-STPTL10-RM-xx-10
19
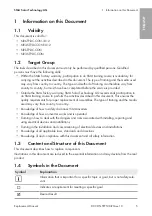
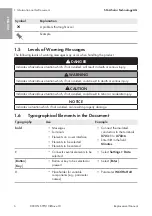
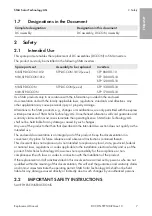
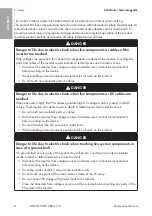
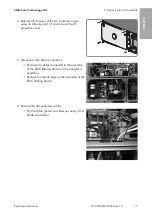
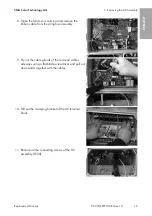
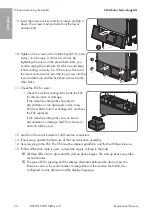
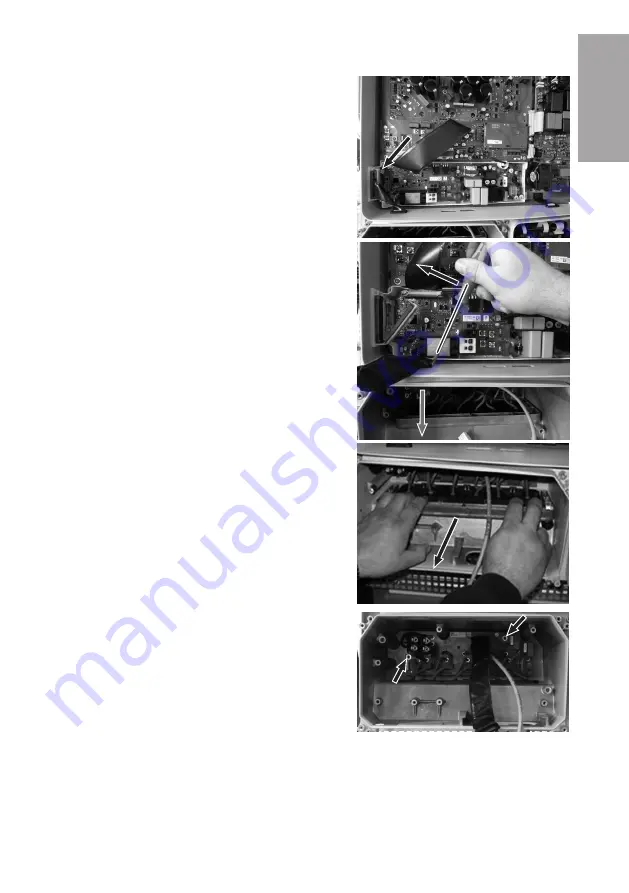
8. Open the ferrite core terminal and remove the
ribbon cable from the string-fuse assembly.
9. Pry out the cable glands of the removed cables
sideways using a flat-blade screwdriver and pull out
downwards together with the cables.
10. Pull out the clamping bracket of the DC terminal
block.
11. Remove all the connecting screws of the DC
assembly (TX20).
ENGLISH
Summary of Contents for NR-STP-DC-CON-1012
Page 77: ...1 SMA Solar Technology AG DCCON STPTL10 RM xx 10 77 1 5 1 6 X703 1 X703 6 10...
Page 80: ...2 SMA Solar Technology AG DCCON STPTL10 RM xx 10 80 DC DC DC DC 5...
Page 82: ...2 SMA Solar Technology AG DCCON STPTL10 RM xx 10 82 5 C v v SMA SMA...
Page 88: ...5 SMA Solar Technology AG DCCON STPTL10 RM xx 10 88 DC DC DC PE...
Page 89: ...6 DC SMA Solar Technology AG DCCON STPTL10 RM xx 10 89 DC PE 20 v v 6 DC 1 5 84...
Page 90: ...6 DC SMA Solar Technology AG DCCON STPTL10 RM xx 10 90 2 4 DC 3 DC 3 8 4...
Page 91: ...6 DC SMA Solar Technology AG DCCON STPTL10 RM xx 10 91 5 ESS ESS ESS 6 TX20 7 4...
Page 92: ...6 DC SMA Solar Technology AG DCCON STPTL10 RM xx 10 92 8 9 10 DC 11 DC TX20...
Page 94: ...7 DC SMA Solar Technology AG DCCON STPTL10 RM xx 10 94 4 DC 5 DC 6 TX20 3 5 Nm 7 DC 8 DC 9...
Page 269: ......
Page 270: ...www SMA Solar com...

