7 Installing the DC Assembly
SMA Solar Technology AG
Replacement Manual
DCCON-STPTL10-RM-xx-10
22
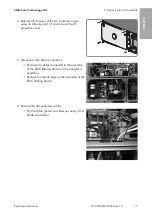
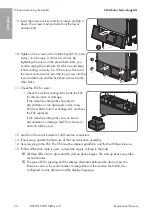
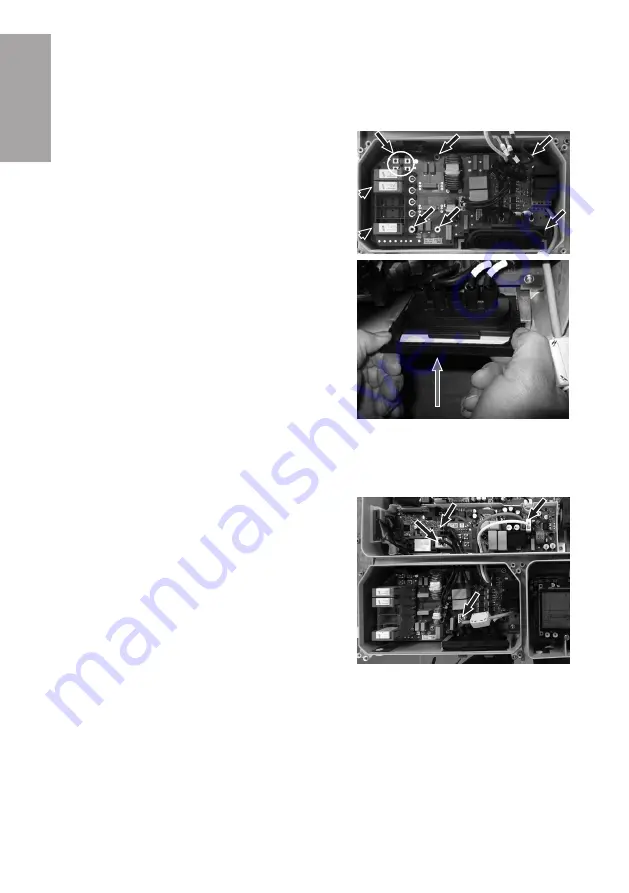
• The outer right cable must be in the cutout of the assembly.
• Only if the contact dome retainer has been attached recently, the 4 screws supplied
(circle) can be attached.
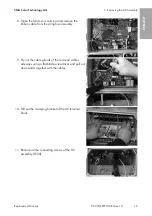
11. Tighten all the fastening screws supplied (TX20,
torque: 3.5 Nm).
12. Insert the ESS pin connector in the bracket and
attach using the clamping clip.
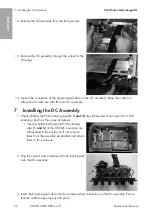
13. Lead all cables with the cable glands of the assembly of the EMC filtering device through the
enclosure openings to the string-fuse assembly.
14. Ensure that the cable glands are securely in place in the enclosure opening.
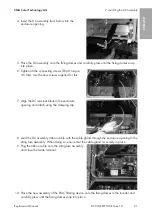
15. Connect all cables of the assembly of the EMC filtering device:
• Connect the cables to the string-fuse assembly
When doing so, ensure that the assignment is
correct.
• Insert the 8-pole plug onto the assembly of the
EMC filtering device.
16. Ensure that all cables are securely in place.
ENGLISH
Summary of Contents for NR-STP-DC-CON-1012
Page 77: ...1 SMA Solar Technology AG DCCON STPTL10 RM xx 10 77 1 5 1 6 X703 1 X703 6 10...
Page 80: ...2 SMA Solar Technology AG DCCON STPTL10 RM xx 10 80 DC DC DC DC 5...
Page 82: ...2 SMA Solar Technology AG DCCON STPTL10 RM xx 10 82 5 C v v SMA SMA...
Page 88: ...5 SMA Solar Technology AG DCCON STPTL10 RM xx 10 88 DC DC DC PE...
Page 89: ...6 DC SMA Solar Technology AG DCCON STPTL10 RM xx 10 89 DC PE 20 v v 6 DC 1 5 84...
Page 90: ...6 DC SMA Solar Technology AG DCCON STPTL10 RM xx 10 90 2 4 DC 3 DC 3 8 4...
Page 91: ...6 DC SMA Solar Technology AG DCCON STPTL10 RM xx 10 91 5 ESS ESS ESS 6 TX20 7 4...
Page 92: ...6 DC SMA Solar Technology AG DCCON STPTL10 RM xx 10 92 8 9 10 DC 11 DC TX20...
Page 94: ...7 DC SMA Solar Technology AG DCCON STPTL10 RM xx 10 94 4 DC 5 DC 6 TX20 3 5 Nm 7 DC 8 DC 9...
Page 269: ......
Page 270: ...www SMA Solar com...

