7 Installing the DC filter assembly
SMA Solar Technology AG
Replacement Manual
DC-EMV-STPTL10-RM-xx-10
19
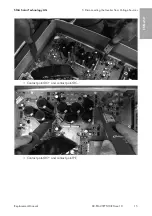
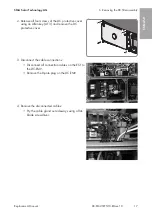
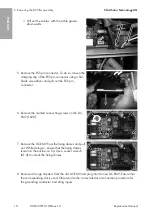
• If the new DC-EMV is not equipped with
varistors, take the varistors from the old DC-
EMV using the insertion tool (STP-IT). Keep the
varistors in a safe place for later use on the
new DC-EMV.
7
Installing the DC filter assembly
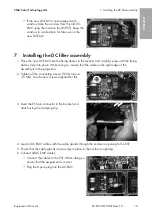
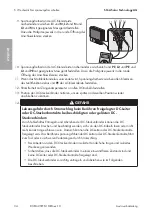
1. Place the new DC-EMV onto the fixing domes in the inverter and carefully press until the fixing
domes snap into place. While doing so, ensure that the cable on the right edge of the
assembly is in the projection.
2. Tighten all the connecting screws (TX20, torque:
3.5 Nm). Use the new screws supplied for this.
3. Insert the ESS pin connector in the bracket and
attach using the clamping clip.
4. Lead all DC-EMV cables with the cable glands through the enclosure opening to the ESF.
5. Ensure that the cable glands are securely in place in the enclosure opening.
6. Connect all DC-EMV cables:
• Connect the cables to the ESF. When doing so,
ensure that the assignment is correct.
• Plug the 8-pole plug into the DC-EMV.
ENGLISH
Summary of Contents for NR-STP-DC-EMV
Page 68: ...1 SMA Solar Technology AG DC EMV STPTL10 RM xx 10 68 1 5 1 6 X703 1 X703 6 10...
Page 71: ...2 SMA Solar Technology AG DC EMV STPTL10 RM xx 10 71 DC DC DC DC 5...
Page 73: ...2 SMA Solar Technology AG DC EMV STPTL10 RM xx 10 73 5 C v v SMA SMA...
Page 75: ...4 SMA Solar Technology AG DC EMV STPTL10 RM xx 10 75 4 B A 1 A HM DC EMV B PVS 5 DC 1000 V...
Page 79: ...5 SMA Solar Technology AG DC EMV STPTL10 RM xx 10 79 18 20 20 4 19 2 DC DC DC PE...
Page 80: ...6 DC SMA Solar Technology AG DC EMV STPTL10 RM xx 10 80 DC PE 20 v v 6 DC 1 5 75...
Page 81: ...6 DC SMA Solar Technology AG DC EMV STPTL10 RM xx 10 81 2 4 DC 3 DC 3 PVS DC EMV 8 DC EMV 4...
Page 87: ...9 SMA Solar Technology AG DC EMV STPTL10 RM xx 10 87 SMA Solar Technology AG 2...
Page 236: ...www SMA Solar com...

