Wiring and Connecting the Sunny Boy
Wiring the DC Input
SB1100U-11:SE1604
SMA America
4-9
Wiring the DC Input
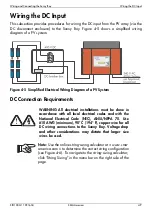
This subsection provides procedures for wiring the DC input from the PV array (via the
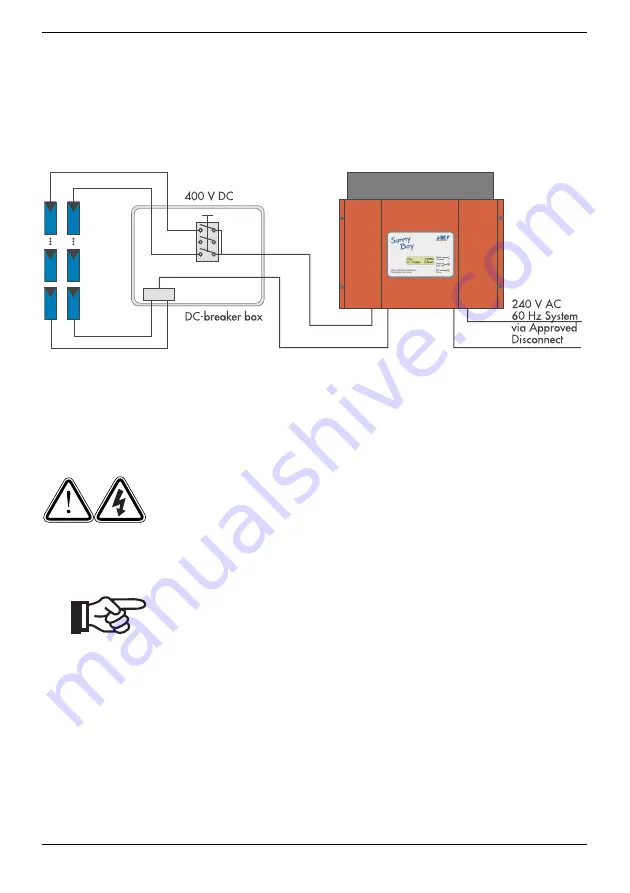
DC disconnect enclosure) to the Sunny Boy. Figure 4-5 shows a simplified wiring
diagram of a PV system.
Figure 4-5 Simplified Electrical Wiring Diagram of a PV System
DC Connection Requirements
WARNING: All electrical installations must be done in
accordance with all local electrical codes and with the
National Electrical Code (NEC), ANSI/NFPA 70. Use
#10 AWG (minimum), 90° C (194° F), copper wire for all
DC wiring connections to the Sunny Boy. Voltage drop
and other considerations may dictate that larger size
wires be used.
Note:
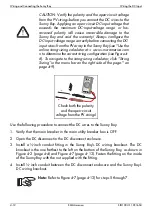
Use the online string-sizing calculator at < www.sma-
america.com > to determine the correct string configuration
(see Figure 4-6). To navigate to the string-sizing calculator,
click “String Sizing” in the menu bar on the right side of the
page.
Summary of Contents for SB1100U
Page 1: ...Photovoltaic Grid Tied String Inverter Sunny Boy 1100U Installation Guide SOLARTECHNOLOGY...
Page 2: ......
Page 8: ...vi SMA America SB1100U 11 SE1604...
Page 12: ...Unpacking and Inspection 2 2 SMA America SB1100U 11 SE1604...
Page 44: ...Commissioning the Sunny Boy 5 6 SMA America SB1100U 11 SE1604...
Page 68: ...Displays and Messages 6 24 SMA America SB1100U 11 SE1604...
Page 72: ...Troubleshooting 7 4 SMA America SB1100U 11 SE1604...
Page 74: ......
Page 75: ......
Page 76: ......

