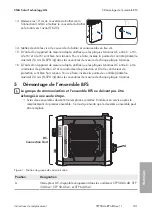
5 Démontage de l’ensemble BFS
SMA Solar Technology AG
Instructions de remplacement
STP50-4x-BFS-RM-xx-11
102
Procédure :
1. Mettez l’onduleur hors tension (voir chapitre 4, page 99).
2. Attendez cinq minutes. Cela permet de s’assurer que les condensateurs sont déchargés.
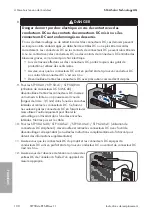
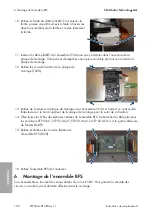
3. Dévissez les 10 vis du couvercle du boîtier de la
Connection Unit DC (TX 25) et retirez le couvercle
du boîtier en le tirant vers l’avant.
10x
4. Déchargez la Connection Unit DC sur les points de contact avec le détecteur de tension sans
sa propre source de tension. Assurez-vous ce faisant que la tension résiduelle est inférieure à
5 V.
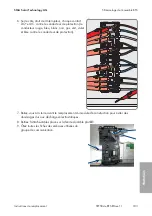
5. Sur le côté droit de l’interrupteur, chaque paire de
contacts DC+ contre chaque contact DC- (le
conducteur rouge, bleu et blanc contre un
conducteur noir et le conducteur gris, vert et violet
contre un conducteur bleu).
FRANÇAIS
Summary of Contents for STP 33-US-41
Page 57: ...1 SMA Solar Technology AG STP50 4x BFS RM xx 11 57 1 5 1 6 X703 1 X703 6 10...
Page 60: ...2 SMA Solar Technology AG STP50 4x BFS RM xx 11 60 DC DC DC DC 5...
Page 61: ...2 SMA Solar Technology AG STP50 4x BFS RM xx 11 61 AC DC DC AC DC 1000 V...
Page 62: ...2 SMA Solar Technology AG STP50 4x BFS RM xx 11 62 DC 5 C v v...
Page 67: ...5 BFS SMA Solar Technology AG STP50 4x BFS RM xx 11 67 5 DC DC DC 1 1 6 DC DC DC 7 8 X1...
Page 196: ...1 SMA Solar Technology AG STP50 4x BFS RM xx 11 196 1 5 1 6 X703 1 X703 6 10 WCtlHz Hz...
Page 198: ...2 SMA Solar Technology AG STP50 4x BFS RM xx 11 198 2 2 5 DC DC DC DC DC...
Page 199: ...2 SMA Solar Technology AG STP50 4x BFS RM xx 11 199 5 AC DC DC AC...
Page 200: ...2 SMA Solar Technology AG STP50 4x BFS RM xx 11 200 DC 1000 V DC 5 C...
Page 205: ...5 BFS SMA Solar Technology AG STP50 4x BFS RM xx 11 205 5 DC DC DC 1 1 6 DC DC DC 1 7 8 X1...
Page 211: ......
Page 212: ...www SMA Solar com...


