7 Electrical Connection
SMA Solar Technology AG
Operating manual
SB55-LV-JP-41-BE-en-13
36
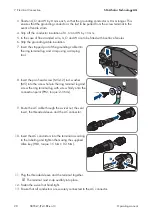
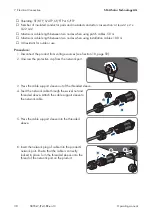
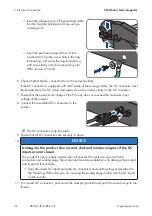
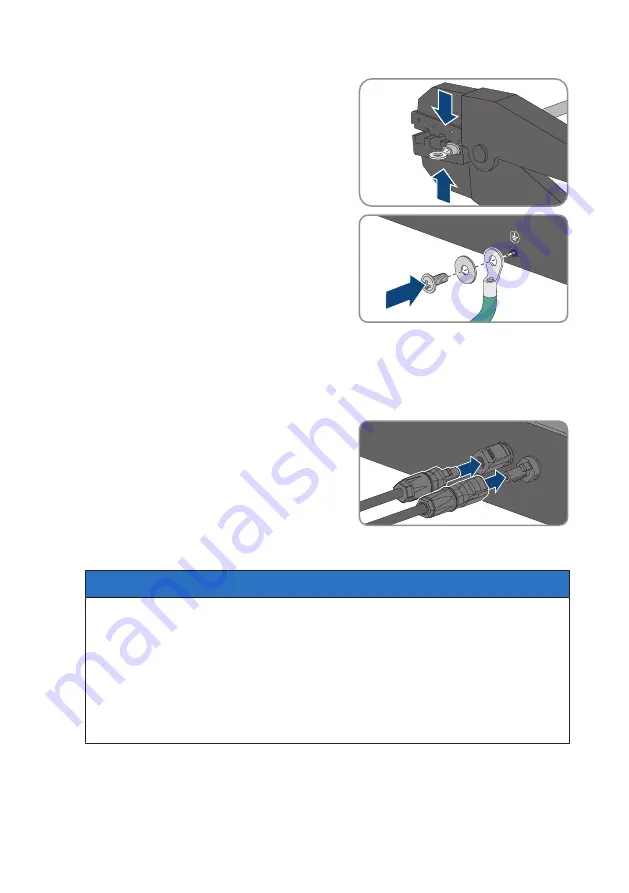
• Insert the stripped part of the grounding cable
into the ring terminal lug and crimp using a
crimping tool.
• Insert the pan head screw (M5x12) incl.
washer (M5) into the screw hole in the ring
terminal lug and screw the ring terminal lug
with screw firmly onto the connection point
(PH2, torque: 2.5 Nm).
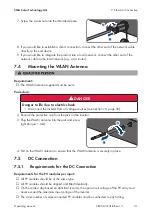
6. Check whether the DC connectors have the correct polarity.
If the DC connector is equipped with a DC cable of the wrong polarity, the DC connector must
be reassembled. The DC cable must always have the same polarity as the DC connector.
7. Ensure that the open-circuit voltage of the PV array does not exceed the maximum input
voltage of the inverter.
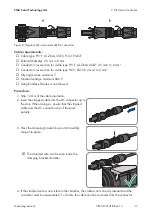
8. Connect the assembled DC connectors to the
inverter.
☑ The DC connectors snap into place.
9. Ensure that all DC connectors are securely in place.
10.
NOTICE
Damage to the product due to sand, dust and moisture ingress if the DC
inputs are not closed
The product is only properly sealed when all unused DC inputs are closed with DC
connectors and sealing plugs. Sand, dust and moisture penetration can damage the product
and impair its functionality.
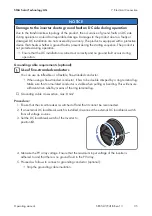
• Seal all unused DC inputs using the DC connectors and sealing plugs as described in
the following. When doing so, do not plug the sealing plugs directly into the DC inputs
on the inverter.
11. For unused DC connectors, push down the clamping bracket and push the swivel nut up to the
thread.


