SMA Solar Technology AG
58
SB50US-80US-IUS094030
Installation Guide
5.8.1 DC Wiring Without SMA DC-Disconnect
Use the following procedure to connect the DC wires to the Sunny Boy without SMA DC-Disconnect:
1. Verify that the AC breaker is OFF.
2. Verify that the DC disconnect is open in the external DC disconnect enclosure.
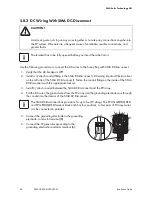
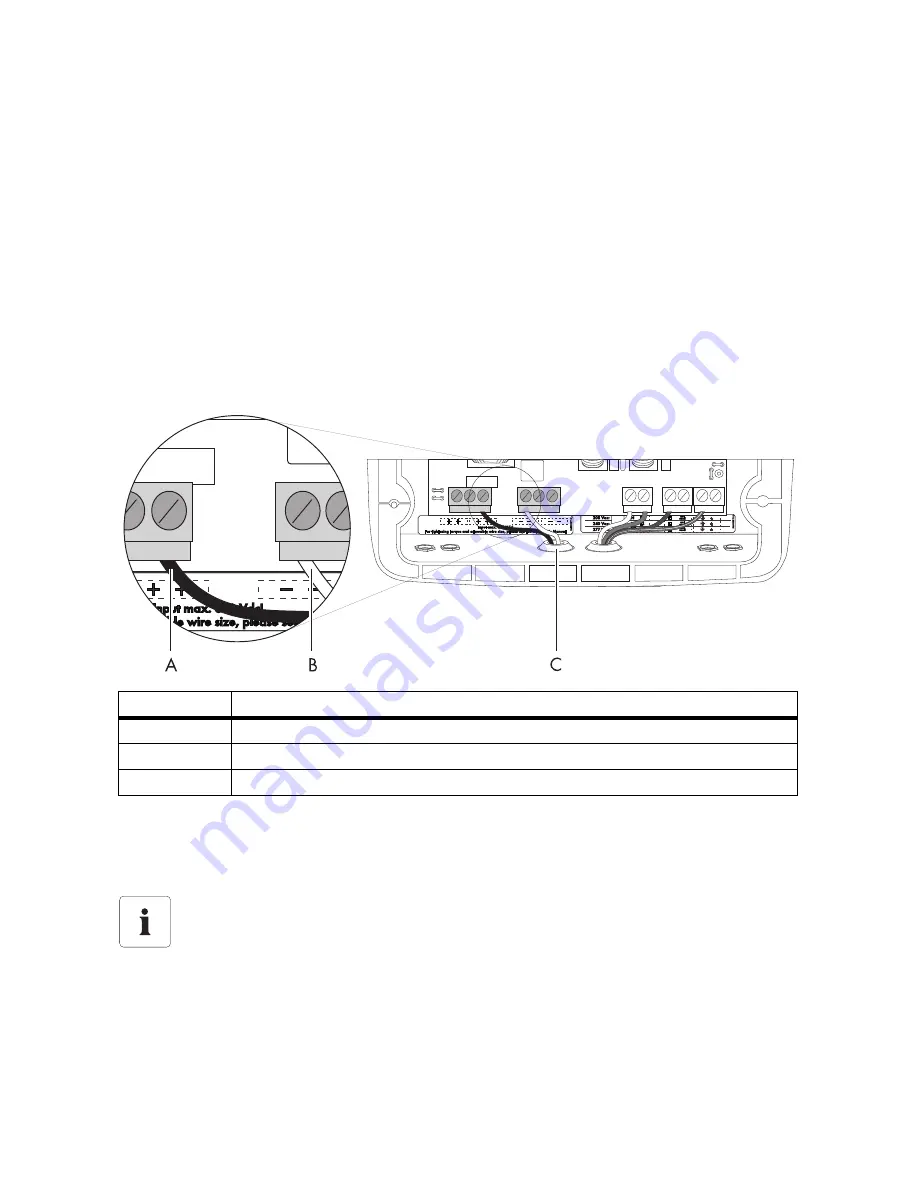
3. Install a 3/4-inch conduit fitting in the Sunny Boy’s DC wiring knockout. The DC knockout is the
left one of the two large openings in the center on the bottom of the Sunny Boy, as shown in
chapter 5.2 "Bottom View and Dimensions" (page 40) and in the figure below. Fasten the
conduit fitting on the inside of the Sunny Boy with the appropriate locknut.
4. Install 3/4-inch conduit between the DC disconnect enclosure and the Sunny Boy’s DC wiring
knockout.
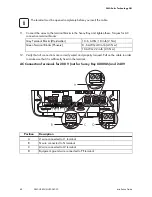
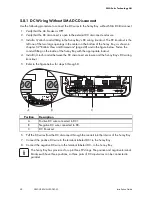
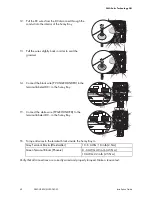
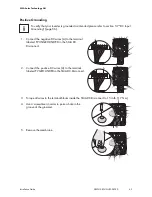
5. Refer to the figure below for steps 6 through 8.
6. Pull the DC wires from the DC disconnect through the conduit into the interior of the Sunny Boy.
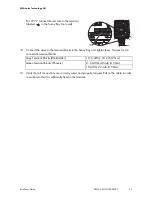
7. Connect the positive DC wire to the terminal labeled DC+ in the Sunny Boy.
8. Connect the negative DC wire to the terminal labeled DC– in the Sunny Boy.
Position
Description
A
Positive DC wire connected to DC+
B
Negative DC wire connected to DC–
C
DC Knockout
The Sunny Boy has provisions for up to three PV strings. The positive and negative terminal
blocks each have three positions, so three pairs of DC-input wires can be connected in
parallel.

