16
Installing Your Interactive Whiteboard
Installing the Mirror Stand for the 2865 or 2965
If you’re installing a 2865 or a 2965, you’ll need to install the mirror stand in the projection room
behind the interactive whiteboard. After you remove the cross braces (page 17),
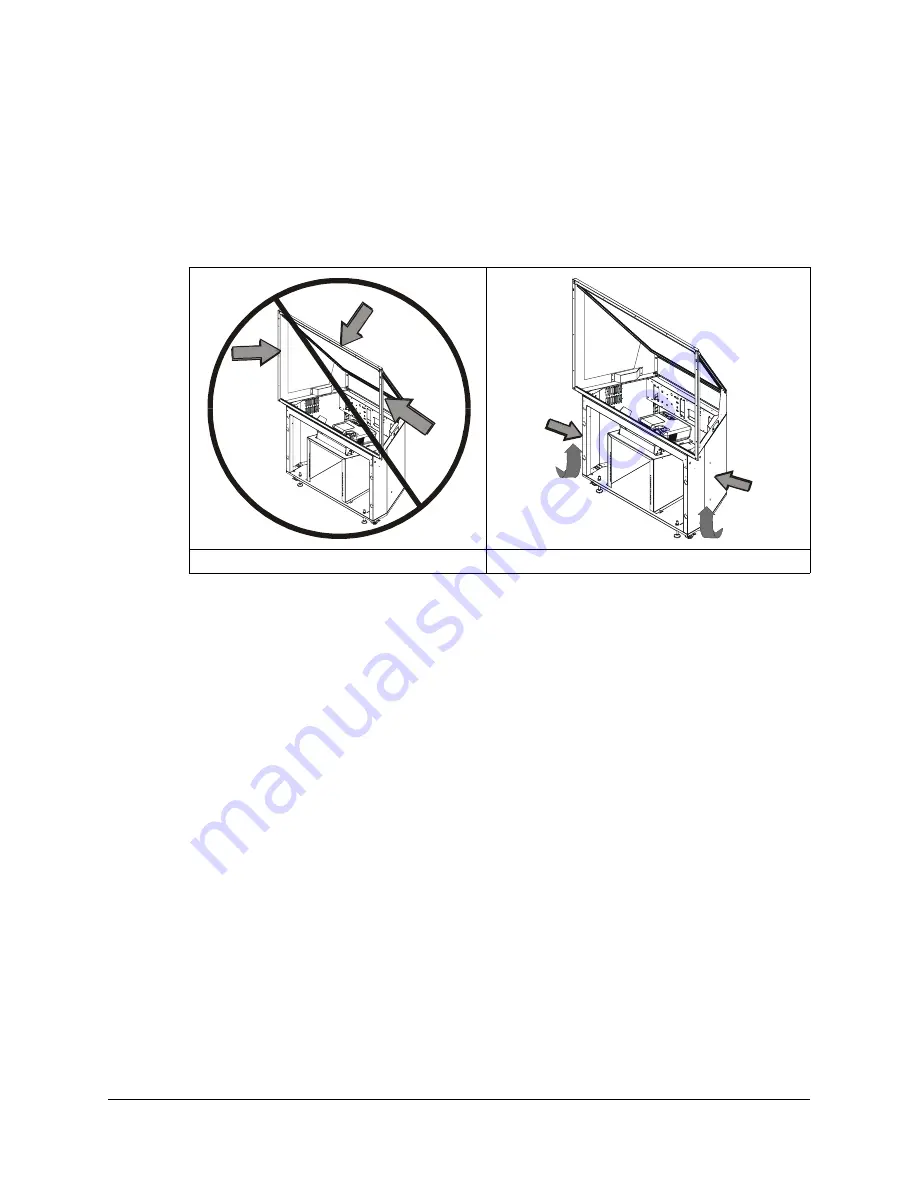
don’t apply
pressure to any part of the screen opening—particularly to the upper corners—when moving or
adjusting the height of the mirror stand
. Don’t push on the mirror stand because excessive
pressure may cause it to lose its square shape. Instead, lift the mirror stand from the bottom, or
push it at the bottom only.
The optimal position for your mirror stand depends on your model of interactive whiteboard.
•
For the 2865, the
maximum
distance between the lower cabinet of the mirror stand and the
wall surface upon which you mount the interactive whiteboard is 3 1/4" (8.3 cm).
•
For the 2965, you must allow
at least
15" (38.1 cm) between the lower cabinet of the mirror
stand and the wall surface upon which the interactive whiteboard is mounted.
You’ll also need to consider the thickness of your wall when you position the mirror stand.
When the mirror stand is in place, you must align its opening horizontally and vertically with the
interactive whiteboard. To do this, adjust the leveling legs, which are raised above the casters for
shipping.
•
For a 2865, you can adjust the front legs from inside the mirror stand (page 18) and the back
legs from below the stand (page 19)
•
For a 2965, you can adjust both sets of legs from below the stand (page 19)
Once all the legs are adjusted, the casters should be approximately 1/2" (1.3 cm) above the floor.
NOTE:
If you didn’t position the interactive whiteboard at the recommended height, position the
mirror stand so the center of the projected image is aimed at the center of the screen.
You may have to readjust the leveling legs as you position the mirror stand. First, raise the stand to
the approximate height by adjusting the front legs, followed by the back legs. Finally, level the
mirror stand by making fine adjustments on the legs until the stand is perfectly level.
Don't Push at the Top or Sides
Lift or Push at the Bottom
Summary of Contents for In-WallRear Projection Interactive Whiteboard
Page 1: ...In WallRear Projection SMART Board TM Installation Guide Interactive Whiteboard...
Page 14: ...8 Preparing to Install Your Interactive Whiteboard...
Page 42: ...36 Preparing Your Interactive Whiteboard for Use...
Page 48: ...42 Using and Maintaining the Interactive Whiteboard...
Page 62: ...56 Appendix B Restoring the Projector Settings...
Page 64: ...58 Waste Electrical and Electronic Equipment Regulations...


