Preparing to Install Your Interactive Whiteboard
7
Before you complete the following procedure, obtain the four hex screws, the four split
lockwashers and the 3/16" hex key from the hardware kit. You’ll also need the two mounting
brackets.
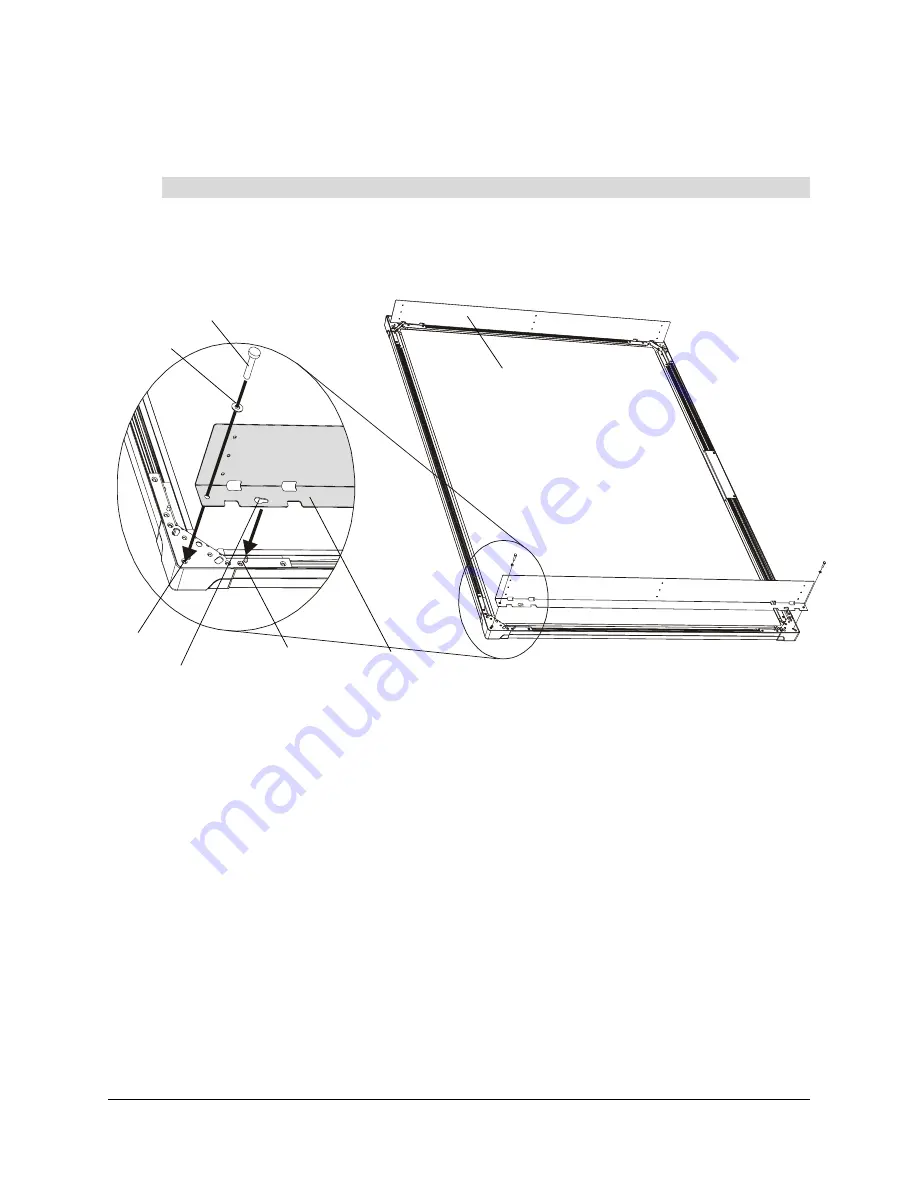
1. Place the interactive whiteboard face-down on a smooth, flat surface.
2. Position each L-shaped mounting bracket against the frame, as shown below. Align the screw
hole and post in each corner of the frame with the screw hole and keyhole in the bracket.
3. Slip each of the four screws through a split lockwasher, and then insert them into the
appropriate bracket holes at the top and bottom of each bracket.
4. Tighten all screws with the supplied hex key so that the mounting brackets are securely
attached to the frame of the interactive whiteboard.
To attach the mounting brackets to the interactive whiteboard
Installed Bracket
Rear of Screen
WARNING: Don’t touch or mark
the rear surface of the screen
Attach the bracket’s narrow
flange to the frame.
Post
Keyhole
Screw Hole
Lockwasher
Hex Screw
Summary of Contents for In-WallRear Projection Interactive Whiteboard
Page 1: ...In WallRear Projection SMART Board TM Installation Guide Interactive Whiteboard...
Page 14: ...8 Preparing to Install Your Interactive Whiteboard...
Page 42: ...36 Preparing Your Interactive Whiteboard for Use...
Page 48: ...42 Using and Maintaining the Interactive Whiteboard...
Page 62: ...56 Appendix B Restoring the Projector Settings...
Page 64: ...58 Waste Electrical and Electronic Equipment Regulations...


