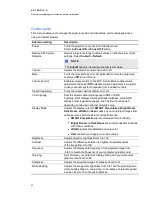
Submenu setting
Description
Degamma
Adjusts the color performance of the display from 0 to 3.
Color
Adjusts the Red, Green, Blue, Cyan, Magenta and Yellow colors on
the projector from 0 to 100 to provide custom color and luminance
output. Each color has a default value of 100. Adjustments to the
color settings register to the User mode.
Auto Signal Detect
Enables or disables signal searching of input connectors.
l
Select
On
to have the projector continuously switch inputs until
it finds an active video source.
l
Select
Off
to maintain signal detection in one input.
Lamp Reminder
Select
On
to show or
Off
to hide the lamp replacement reminder when
it appears. This reminder appears 100 hours before the recommended
lamp replacement.
Lamp Mode
Adjusts lamp brightness to
Standard
or
Economy
.
Standard
displays a high-quality, bright image.
Economy
increases the lamp
life by decreasing the brightness of the image.
Auto Power Off
Sets the length of the auto power off countdown timer between 1 and
240 minutes. The timer begins to count down when the projector no
longer receives a video signal. The timer finishes when the projector
enters Standby mode. Select 0 to turn off the timer.
Zoom
Adjusts the zoom to the center of the image in or out from
0 to 30.
H-position (RGB input)
Moves the projected image’s horizontal position left or right from 0 to
100.
V-position (RGB input)
Moves the projected image’s vertical position up or down from -5 to 5.
Aspect Ratio
Adjusts the image output to
Fill Screen
,
Match Input
or
16:9
.
l
Fill Screen
produces an image that fills the entire screen by
stretching and scaling.
l
Match Input
matches the projector’s aspect ratio to the input’s
aspect ratio. As a result, black bands might appear along the
top and bottom edge of the screen horizontally (letterbox
format) or along the left and right edge of the screen vertically,
(pillarbox format).
l
16:9
changes the output to 16:10 by letterboxing the image,
which is recommended for use with HDTV and DVDs
enhanced for wide-screen television.
N
N O T E
See
on page 27 for appearance
descriptions in each mode.
Startup Screen
Sets the type of startup screen to
SMART
or
User
. The
SMART
screen is the default SMART logo on a blue background. The
User
screen uses the saved picture from the Capture User Startup Screen
function.
A P P E N D I X
A
Remotely managing your interactive whiteboard system
58
Summary of Contents for X800ix
Page 36: ......
Page 48: ......
Page 86: ......
Page 94: ...whiteboard See interactive whiteboard X XGA support 28 Z zoom 58 I N D E X 84 ...
Page 95: ......
Page 96: ...Toll Free 1 866 518 6791 U S Canada or 1 403 228 5940 www smarttech com ...


