background image

-06-

-03-

4.3 Field of view: Make sure the target is larger than the 
   unit's spot size. The smaller target the closer measure  
   distance. When accuracy is critical, make sure the target is  
   at least twice as large as the spot size.

4.4 Emissivity: Most organic materials and painted or 
    oxidized surfaces have an emissivity of 0.95 (pre-set in 
    the unit). Inaccurate readings will result from measuring 
    shiny or polished metal surfaces. To compensate for this, 
    adjust the units emissivity reading (see table below and 
    5.3 settings) or cover  the surface to be measured with 
    masking tape or flat black paint. Measure the tape or 
    painted surface when the tape or painted reach the same 
    temperature as the material underneath.

4.5 Table of approximate emissivity


(Figure4)

1

8

(Figure3)

9

9V

DC IN

      
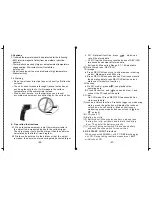
(2) Laser / back light button: when back light turn on ,any
      operations will remain back light for 10 sec. LCD 
      indicate on/off status.

(3)

(5) key functions: press 3 key, LCD subdisplay 

         MAX-MIN-AVG

-HAL-LAL-SGN-PLY-CLR-EMS 

display means normal 


press 4 key to enter.

         a. MAX: measuring maximum temperature
         b. MIN: measuring minimum temperature
         c. AVG: measuring average temperature
         d

         e. HAL: high temperature alarm--when selected 
             press 5 keys to set high temperature alarm 
             

 dconfirmed by pressing 4 key. When 


 trigger, LCD display HI icon with 

             
         f. LAL: low temperature alarm--when selected
            press 5 keys to set low temperature alarm 
    

blinks

-DIF

         segment (only main 

measuring 

mode) 

. DIF: Basic on the reading before press 4 key,

             compute the difference of current reading.

HAL, 

trigger 

an

reading 

over

BiBi audio 

sounds.

 LAL,

trigger

        and confirmed by pressing 4 key. When reading 

            over trigger, LCD display LOW icon with BiBi audio
            sounds
         g. SGN: data storage--when selected STO, lock & 
             DATA & 1---indicator will shown when press 4 key. 
             After temperature read out press 6 key to store,
             then 2---memory unit will be shown. 
    

REC/CLR

LASER

BACKLIT

MODE

SET

7

5

MODE

SET

REC/CLR

4

3

6

2

RS232

9V

DC IN

10-11

19mm@
300mm

18mm@
900mm

42mm@
1500mm

0.8”@

0.7”@

36"

1.7”@

60"

D:S=50:1

12"

Summary of Contents for AR882+

Page 1: ...Non contact infrared thermometer Instruction manual Model AR882 ...

Page 2: ...ow battery power Please replace new battery to prevent inaccurate measuring 8 6 If unit not being use for long period please unload the battery Repeatability 1 of reading or 0 1 Response time 500 mSec 95 response Spectral response 8 14 um Emissivity 0 10 to 1 00 adjustable pre set 0 95 Ambient operating range 0 to 40 32 to 104 Relative humidity 10 95 RH noncondensing upto 30 86 Storage temperature...

Page 3: ...racy the laser pointer makes aiming even more precise Computer software disc 1pcs RS232 USB Input interface 1pcs Main Parts 1pcs English Manual 1pcs Warranty card 1pcs 9V battery 1pcs PP packing box 1pcs 01 RS232 9V DC IN Figure5 RS232 socket Standard DC socket IN 6 1 For software installation and intructions please read the User Guide on CD 6 2 Software function Check the data store off line reco...

Page 4: ...p 10 Battery door When replace battery please press battery door clip pull down and forward the battery door Then install 9v battery correctly 11 Clesius Fahrenheit switch Please open battery and push the slide switch for convertsion 6 R S 232 DC IN PUT interface When connected AR882A with PC DATA willd isplay on LCD D uring taking realt ime measurment AUT willb link on LCD h PLY Data reall functi...

Page 5: ...off status 3 5 key functions press 3 key LCD subdisplay MAX MIN AVG HAL LAL SGN PLY CLR EMS display means normal press 4 key to enter a MAX measuring maximum temperature b MIN measuring minimum temperature c AVG measuring average temperature d e HAL high temperature alarm when selected press 5 keys to set high temperature alarm dconfirmed by pressing 4 key When trigger LCD display HI icon with f L...

Page 6: ...larm icon K high temperature alarm icon 5 3 Diagram description 1 Trigger When turn on LCD display VERXX software version for 1 sec And turn to display reading with SCAN icon Release the trigger display reading with HOLD icon Built in auto power off in 30sec RS232 9V DC IN 0 30 0 95 0 95 0 70 0 50 0 90 0 85 0 95 0 95 0 95 0 94 0 90 0 93 0 85 0 98 0 70 0 50 0 98 0 94 0 93 0 95 0 95 0 95 0 90 0 98 0...

Reviews: