background image

-05-

-04-

(Figure1)

A

B

C

D

E

F

G

H

I

J

K

 5.2

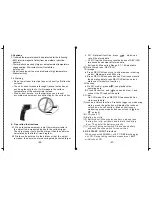
 Locating a hot/cold spot: To find a hot/cold spot, aim

       the thermometer outside the area of interest, then
       scan across with up and down motion until you locate
       the hot/cold spot.

(Figure2)

9V

DC IN

5.Quick start instruction 

5.1

LCD display:                           B measuring unit

    A measuring reading                    D back light on icon
    C laser on icon                              F scanning icon
    E battery power icon                    G data hold icon
    H mode/emissivity indicator        I data storge / read icon
    J low temperature alarm icon  
    K high temperature alarm icon


 5.3

 Diagram description

      (1) Trigger: When turn on LCD display VERXX software
            version for 1 sec. And turn to display reading with 
            SCAN icon. Release the trigger, display reading 
            with HOLD icon. Built in auto power off in 30sec.

RS232

9V

DC IN

0.30

0.95

0.95

0.70

0.50

0.90

0.85

0.95

0.95

0.95

0.94

0.90

0.93

0.85

0.98

0.70

0.50

0.98

0.94

0.93

0.95

0.95

0.95

0.90

0.98

0.90

0.80

0.94

0.93

0.94

Emissivity


Emissivity


Marterial


Marterial


Aluminum

Asbestos

Asphalt

Basalt

Brass

Brick

Carbon

Ceramic

Concrete

Copper

Dirt

Frozen food

Hot food

Glass(plate)

Ice

Iron

Lead

Limestone

Oil

Paint

Paper

Plastic

Rubber

Sand

Skin

Snow

Steel

Textiles

Water

Wood

Summary of Contents for AR882+

Page 1: ...Non contact infrared thermometer Instruction manual Model AR882 ...

Page 2: ...ow battery power Please replace new battery to prevent inaccurate measuring 8 6 If unit not being use for long period please unload the battery Repeatability 1 of reading or 0 1 Response time 500 mSec 95 response Spectral response 8 14 um Emissivity 0 10 to 1 00 adjustable pre set 0 95 Ambient operating range 0 to 40 32 to 104 Relative humidity 10 95 RH noncondensing upto 30 86 Storage temperature...

Page 3: ...racy the laser pointer makes aiming even more precise Computer software disc 1pcs RS232 USB Input interface 1pcs Main Parts 1pcs English Manual 1pcs Warranty card 1pcs 9V battery 1pcs PP packing box 1pcs 01 RS232 9V DC IN Figure5 RS232 socket Standard DC socket IN 6 1 For software installation and intructions please read the User Guide on CD 6 2 Software function Check the data store off line reco...

Page 4: ...p 10 Battery door When replace battery please press battery door clip pull down and forward the battery door Then install 9v battery correctly 11 Clesius Fahrenheit switch Please open battery and push the slide switch for convertsion 6 R S 232 DC IN PUT interface When connected AR882A with PC DATA willd isplay on LCD D uring taking realt ime measurment AUT willb link on LCD h PLY Data reall functi...

Page 5: ...off status 3 5 key functions press 3 key LCD subdisplay MAX MIN AVG HAL LAL SGN PLY CLR EMS display means normal press 4 key to enter a MAX measuring maximum temperature b MIN measuring minimum temperature c AVG measuring average temperature d e HAL high temperature alarm when selected press 5 keys to set high temperature alarm dconfirmed by pressing 4 key When trigger LCD display HI icon with f L...

Page 6: ...larm icon K high temperature alarm icon 5 3 Diagram description 1 Trigger When turn on LCD display VERXX software version for 1 sec And turn to display reading with SCAN icon Release the trigger display reading with HOLD icon Built in auto power off in 30sec RS232 9V DC IN 0 30 0 95 0 95 0 70 0 50 0 90 0 85 0 95 0 95 0 95 0 94 0 90 0 93 0 85 0 98 0 70 0 50 0 98 0 94 0 93 0 95 0 95 0 95 0 90 0 98 0...

Reviews: