background image

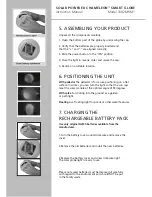
5. aSSemblInG your ProduCt

unpack all the components carefully.

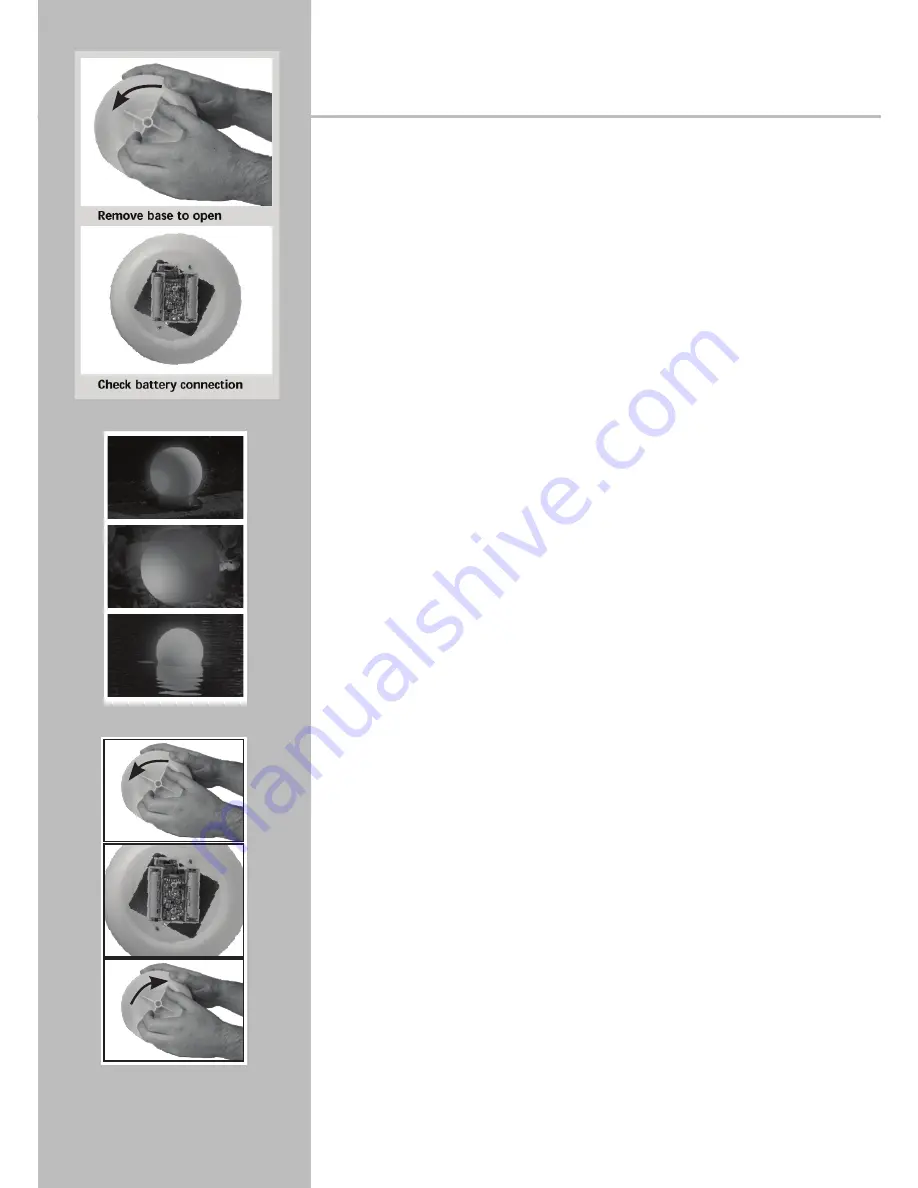
1. open the bottom part of the globe by unscrewing the cap.

2. verify that the batteries are properly inserted and  

that the “+” and “-“ are aligned correctly.

3. Slide the power button to the “on” position.

4. Close the light in reverse order and secure the cap.

5. decide on a suitable location.

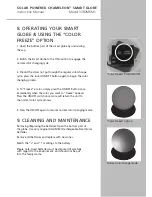
6. PoSItIonInG tHe unIt

with pedestal the pedestal is for secure positioning on a flat 

surface. In winter, you can turn the light so that the sun rays 

meet the solar module at the optimal angle of 90 degrees.

with spike For sticking into the ground as a garden  

or path light.

Floating as a floating light for ponds or other water features.
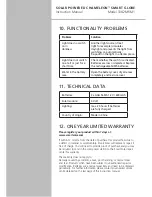
7. CHarGInG tHe 
reCHarGeable battery PaCk

Use only original ni-Mh batteries available from the 

manufacturer.

1.turn the battery cover counterclockwise and remove the 

cover.

2.remove the old batteries and install the new batteries.

3.replace the battery cover and screw clockwise tight.  

the solar globe light is ready to use.

Please note used batteries must be disposed of carefully  

with regard to the environment and should not be put  

in the family waste.

SolaR PoweRed ChaMeleon

 SMaRt Globe

Instruction Manual  


 Model 3382MRM1

Summary of Contents for Chameleon 3382MRM1

Page 1: ...Model 3382MRM1 Solar Powered Chameleon Smart Globe Programmable Color Changing Solar Globelight ...

Page 2: ...leon Smart Globe This solar light you have purchased a product that complies with the latest and most up to date technology This product complies with the European and National Standards The relevant certificates of conformity are deposited with the manufacturer To preserve this standard and in order to maintain safety you must adhere to these instructions 2 Security Instructions In the event of a...

Page 3: ...light switches on automatically when it gets dark and turns itself off when it gets light or when the batteries are fully discharged The Smart Globe should not be used as a toy Installation of the product must be in a sunny place for optimal performance Please Note For best results you should try to ensure that the installation allows full access to the sun without shadows The duration of lighting...

Page 4: ... solar module at the optimal angle of 90 degrees With spike For sticking into the ground as a garden or path light Floating As a floating light for ponds or other water features 7 Charging the rechargeable battery pack Use only original Ni Mh batteries available from the manufacturer 1 Turn the battery cover counterclockwise and remove the cover 2 Remove the old batteries and install the new batte...

Page 5: ...ss the ON OFF switch once more will return the unit to the normal color cycle process 5 Press the ON OFF again to resume normal color changing mode 9 Cleaning and maintenance Removing Replacing the batteries Open the bottom part of the globe Use only original AAA Ni MH rechargeable Smart Solar batteries Remove old batteries and replace with new ones Match the and markings to the battery Please not...

Page 6: ...ar item and need to be replaced periodically For further information please contact your nearest service centre detailed on the last page of this instruction manual Problem Solution Light does no switch on in darkness Another light source street light for example simulates daylight and prevents the light from switching on automatically Re position the light in a darker place Light does not switch ...

Page 7: ......

Page 8: ...For further information including parts warranty repair or general inquiries please contact Smart Solar at USA Corporate Office Tel 1 813 343 5775 Website www smartsolar com ...

Reviews: