Quick Reference
SMART Board™
Interactive Whiteboard Setup with USB Cable
NOTE
:
The instructions below are for the SMART Board interactive whiteboard 500 series and apply to both a
desktop and a laptop computer.
Connecting the SMART Board Interactive Whiteboard to Your Computer
1
Before connecting the SMART Board interactive whiteboard to your computer, install SMART Board software
by inserting the CD-ROM that came with your interactive whiteboard and following the on-screen instructions.
If you don’t have a CD-ROM, or if you’re not sure whether your CD-ROM is for the latest version of SMART
Board software, you can download the latest version from
www.smarttech.com/support/software
.
2
If the SMART Board icon with exclamation point, which indicates SMART Board software is running but an
interactive whiteboard is not yet connected to the computer, does
not
appear in the Microsoft Windows®
notification area (in the lower right portion of the desktop), select
Start
>
Programs
>
SMART Board
Software
, and select
SMART Board Tools
.
3
Shut down your computer.
4
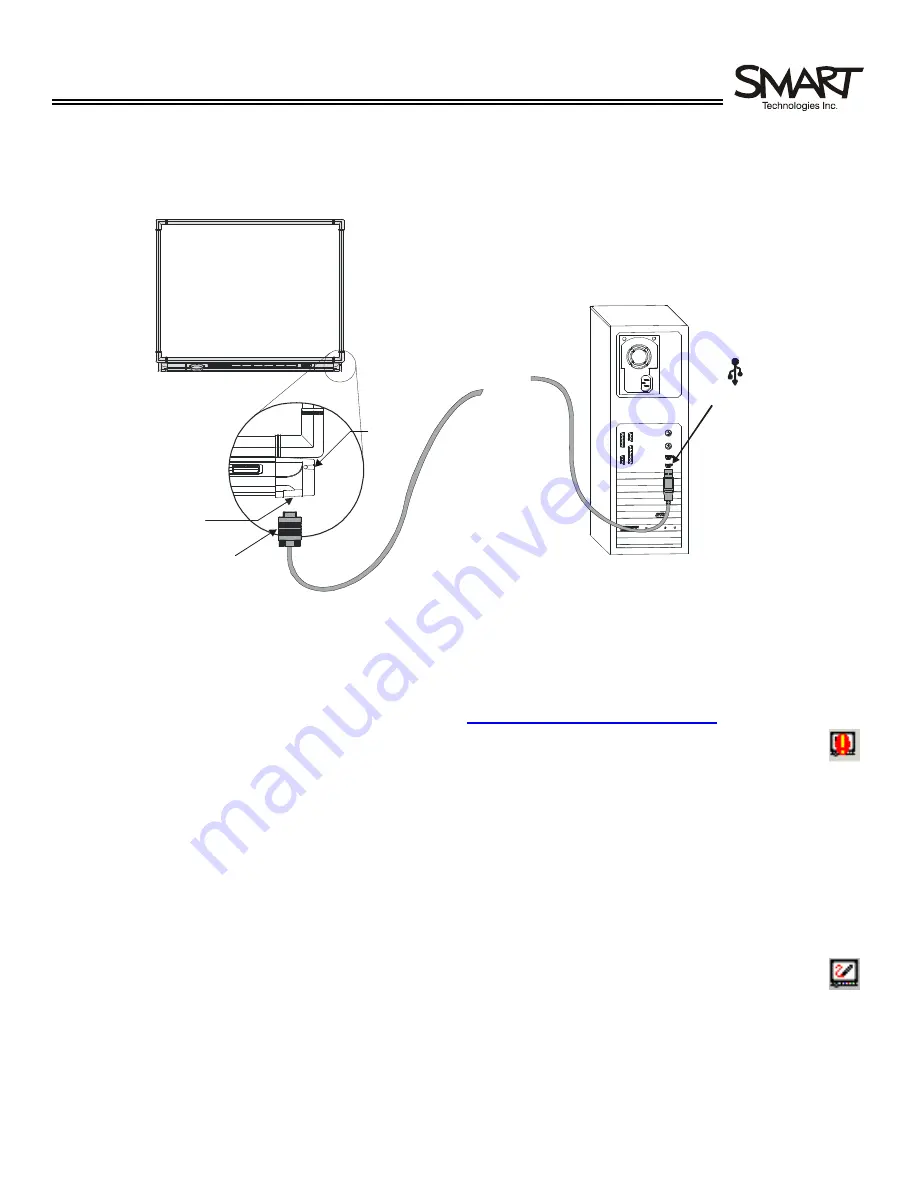
Insert the USB cable’s short DB9 connector into the 9-pin serial port under the lower right side of the SMART
Board interactive whiteboard and tighten the screws.
5
Insert the USB connector (at the other end of the USB cable) into the USB port on your computer and start
your computer.
The Ready Light on the right side of the pen tray will turn red, indicating that the pen tray is receiving power. If
the Ready Light has not turned red, verify that all connections are made as indicated above. When the Ready
Light turns green and the SMART Board icon in the Windows notification area changes from an exclamation
point to a white page with stylus, your interactive whiteboard is ready to use.
9-pin Serial Port
Short DB9 Connector
Ready
Light
USB Port


