16 |
INSTALLING AND SECURING YOUR SMART BOARD V280 INTERACTIVE
WHITEBOARD
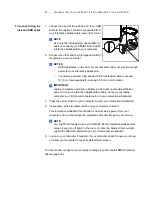
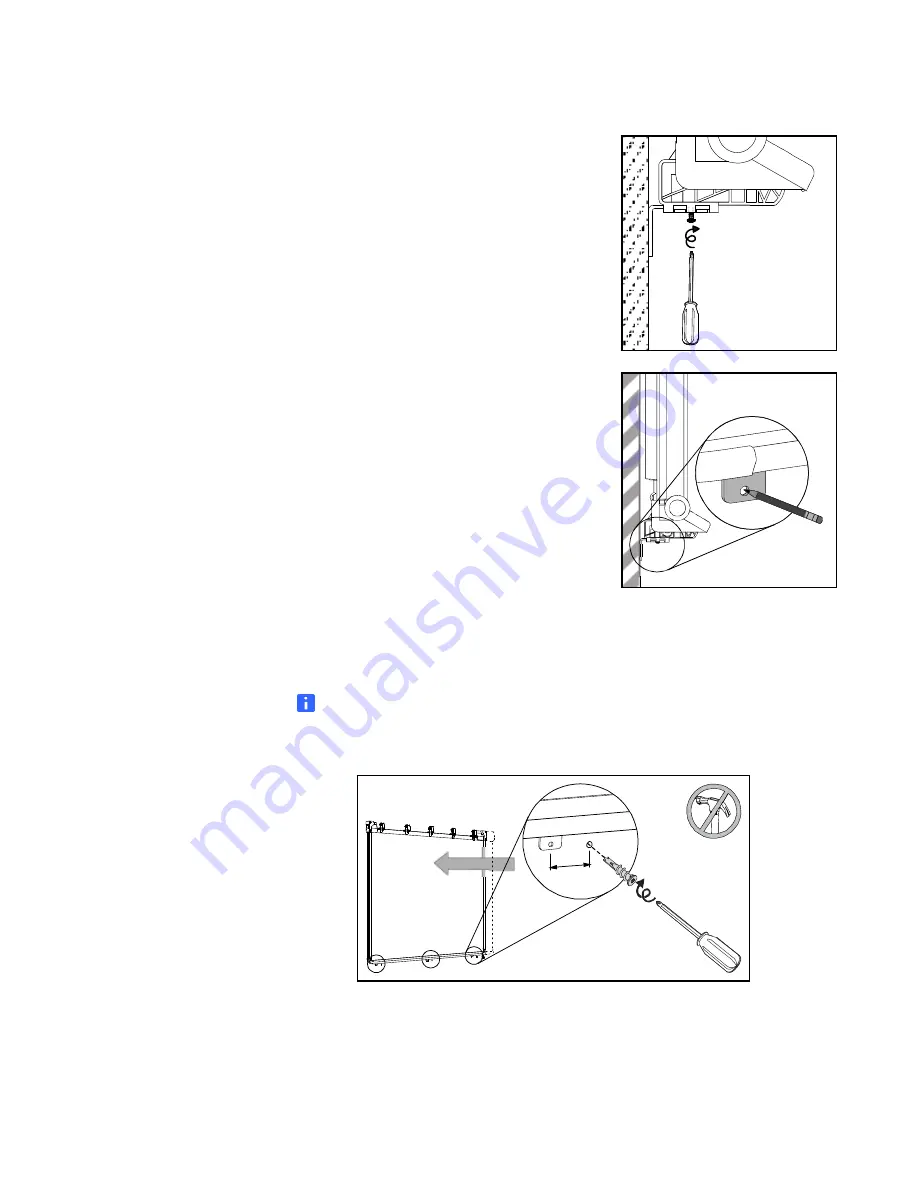
2. Using the screwdriver, secure each of the
three tabs to its corresponding bracket with one
of the included small thread-forming screws,
as illustrated.
3. Using each tab as a template, mark the location
of the three holes on the wall.
4. Slide your interactive whiteboard 2" (5 cm) sideways to the left along the
wall-mounting bracket.
5. Using the screwdriver, secure an included self-tapping wall anchor at each mark.
NOTE
For a concrete wall, drill holes at the marks, and then insert concrete anchors
(not included) into the holes.
6. Slide your interactive whiteboard 2" (5 cm) back to the right along the
wall-mounting bracket.
3×
3×
3×
2" (5 cm)
2" (5 cm)
4.
5.
Summary of Contents for SMART Board V280
Page 10: ...viii CONTENTS...
Page 18: ...8 INTRODUCING YOUR SMART BOARD V280 INTERACTIVE WHITEBOARD...
Page 30: ...20 INSTALLING AND SECURING YOUR SMART BOARD V280 INTERACTIVE WHITEBOARD...
Page 52: ...42 GETTING STARTED WITH SMART NOTEBOOK SOFTWARE...
Page 72: ...62 MAINTENANCE AND TROUBLESHOOTING...
Page 86: ...76 HARDWARE ENVIRONMENTAL COMPLIANCE...
Page 92: ......
Page 93: ......
Page 94: ...Toll Free 1 866 518 6791 U S Canada or 1 403 228 5940 www smarttech com...


