Configuring the SMART Hub SE240
23
3.
If a password is required to change the configuration settings, type the password in the box at
the bottom of the menu, and then press
OK
.
NOTE:
For information on the configuration settings password, see page 20.
4.
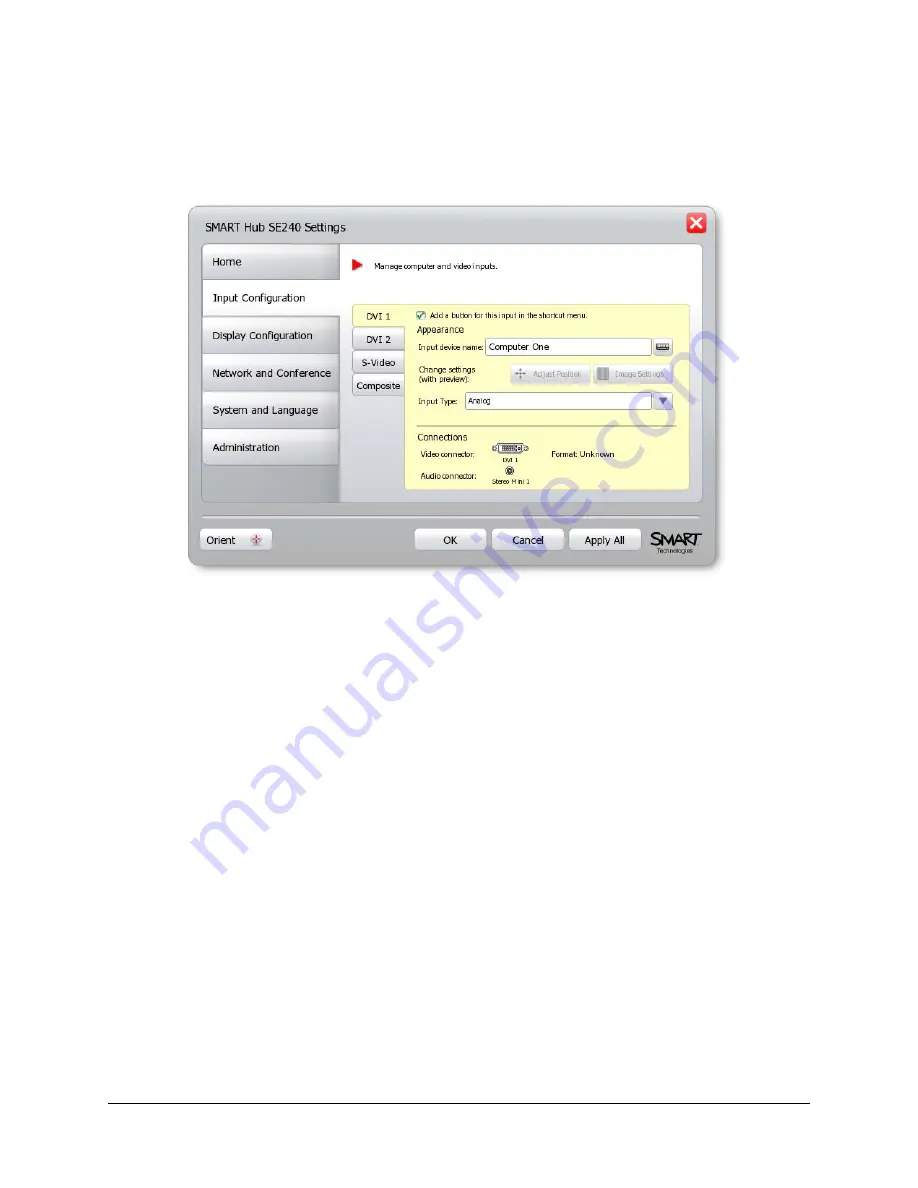
Press
Input Configuration
.
5.
Open the
DVI 1
tab if you are configuring the SMART Hub SE240 for the first computer.
OR
Open the
DVI 2
tab if you are configuring the SMART Hub SE240 for the second computer.
6.
If desired, clear the
Add a button for this input in the shortcut menu
check box to remove
the button for the computer input from the shortcut menu.
NOTE:
For information on the shortcut menu, see page 46.
7.
In the
Input device name
box, type a name for the computer.
8.
In the
Input Type
list, select
Analog
or
Digital
.
9.
Press
Apply All
.
You’ve configured the SMART Hub SE240 for the computer.
Summary of Contents for SE240
Page 1: ...Installation and User s Guide SMART Hub SE240 ...
Page 4: ...ii Important Information ...
Page 10: ...4 About the SMART Hub SE240 ...
Page 20: ...14 Installing the SMART Hub SE240 ...
Page 50: ...44 Configuring the SMART Hub SE240 ...
Page 90: ...84 Troubleshooting the SMART Hub SE240 ...
Page 92: ...86 Regulatory Compliance ...
Page 99: ......


