background image

5    English 

User Controls

User Controls

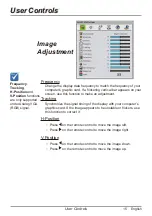
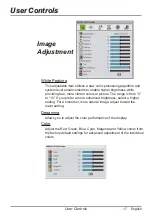
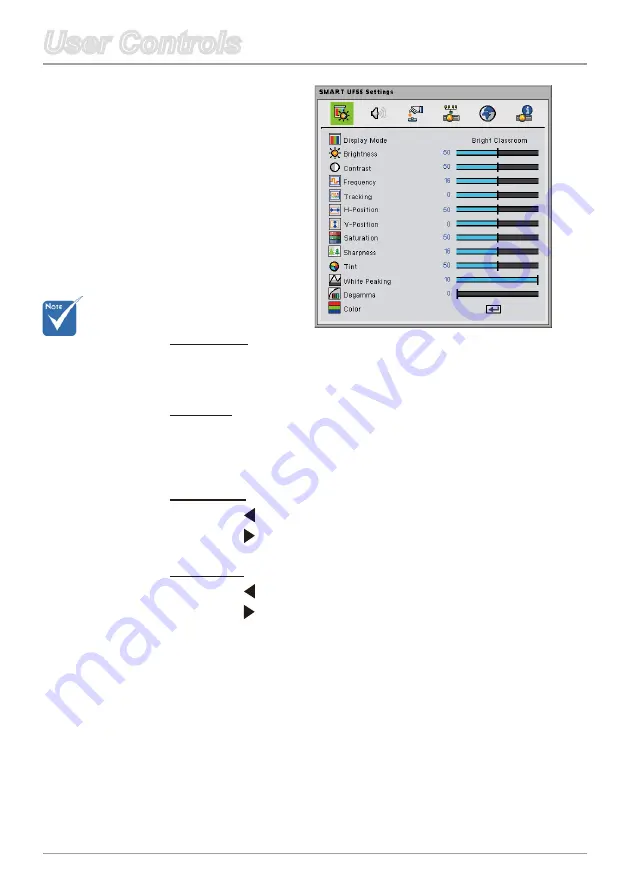
Frequency

Change the display data frequency to match the frequency of your 

computer’s graphic card. If a flickering vertical bar appears on your 

screen, use this function to make an adjustment.

Tracking

Synchronize the signal timing of the display with your computer’s 

graphics card. If the image appears to be unstable or flickers, use 

this function to correct it.

H-Position


Press   on the remote control to move the image left.


Press   on the remote control to move the image right. 

V-Position


Press   on the remote control to move the image down.


Press   on the remote control to move the image up. 


Frequency


Tracking

H-Position

 and 

V-Position

 functions 

are only supported 

under Analog VGA 

(RGB) signal.

Image  

Adjustment

Summary of Contents for UF55

Page 1: ...UF55 UF55w Projector User s Guide Part of the SMART BoardTM 600i3 Interactive Whiteboard System ...

Page 2: ...ks of their respective owners Windows is either a registered trademark or a trademark of Microsoft Corporation in the U S and or other countries Apple Macintosh and iMac are trademarks of Apple Computer Inc registered in the U S and other countries Copyright Notice 2008 SMART Technologies ULC All rights reserved No part of this publication may be reproduced transmitted transcribed stored in a retr...

Page 3: ...the projector into Idle Mode 11 Adjusting the Projected Image 12 Adjusting the Projector s Focus 12 User Controls 13 On Screen Display Menus 13 Using the OSD Menus 13 Image Adjustment 14 Audio Control 18 Default Settings 19 Network Settings 24 Multi Languages 25 Projector Information 26 Web Management 27 Appendices 42 Troubleshooting 42 Image Problems 42 Other Problems 44 Projector Status Indicati...

Page 4: ...e power outlet and follow all the lamp replacement instructions Warning This projector detects its own remaining lamp life Replace the lamp when lamp life warning messages appear Warning When you switch the projector off ensure that the cooling cycle is complete before disconnecting the power Allow 90 seconds for the projector to cool down Warning Cooling of the lamp during the ignition phase shou...

Page 5: ...amp This will prolong lamp life Don t Block the ventilation slots and openings on the unit Use abrasive cleaners waxes or solvents to clean the unit Use under the following conditions In extremely hot cold or humid environments Sea level to 6000 feet Extremely hot 35 Extremely cold 5 6000 feet above Extremely hot 30 Extremely cold 5 Extremely humid 70 R H Relative Humidity In areas susceptible to ...

Page 6: ... 3 Short throw ratio 0 6 UF55w True WXGA 0 65 1280 800 resolution Aspect ratio 16 10 Short throw ratio 0 51 2000 ANSI Lumens typical Computer compatibility Apple Macintosh iMac and VESA Standards UXGA SXGA SXGA WXGA XGA SVGA VGA Video compatibility NTSC NTSC4 43 PAL PAL M PAL N SECAM SDTV compatible 480i p 576i p HDTV compatible 720p 1080i Remote manager via network Remote manager via RS 232 ...

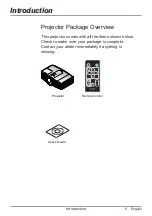
Page 7: ...oduction Remote Control Projector Package Overview This projector comes with all the items shown below Check to make sure your package is complete Contact your dealer immediately if anything is missing Projector Vol User s Guide ...

Page 8: ...lish Introduction Introduction 1 Lamp cover 2 Focus 3 Projection Lens 4 IR Receiver Main Unit Product Overview 5 Input Output IO cover 6 Diagnostic Indicator LED 7 Power Indicator LED 3 2 1 4 5 2 1 5 4 7 6 ...

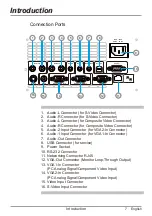
Page 9: ...In Connector 7 Audio Out Connector 8 USB Connector for service 9 Power Socket 10 RS 232 Connector 11 Networking Connector RJ45 12 VGA Out Connector Monitor Loop Through Output 13 VGA1 In Connector PC Analog Signal Component Video Input 14 VGA2 In Connector PC Analog Signal Component Video Input 15 Video Input Connector 16 S Video Input Connector 100V 240V 50 Hz 60 Hz Video S video Audio In Audio I...

Page 10: ...ode Select a display mode Bright Classroom Dark Classroom sRGB or User 5 Mute Turn off the sound temporarily 6 Power Turn on the power or enter Idle Mode 7 Enter Accept the selected mode 8 Menu selections and adjustments 9 Set the projector ID number 10 VOL Adjust the volume Vol 6 1 2 3 4 5 10 Remote control transmitter 8 Remote Control SBP 10X SBP 20W Projector UF55 Model No 03 00131 20 9 7 ...

Page 11: ...ere is a plastic sheet between the battery and its contact Remove the sheet before use To change the remote control s battery Procedure 1 Remove the battery holder by holding down the side release firmly and pulling out the battery holder 2 Insert a CR2025 coin cell battery Be sure to align the plus and minus ends of the battery properly 3 Replace the battery holder ...

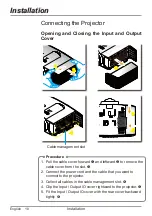
Page 12: ...V 50 Hz 60 Hz Au dio In Au dio In Au dio 1 Au dio Ou t Ser vic e Co ntr ol Au dio 2 3 Procedure 1 Pull the cable cover forward and leftward to remove the cable cover from the slot 2 Connect the power cord and the cable that you want to connect to the projector 3 Collect all cables in the cable management slot 4 Clip the Input Output IO cover rightward to the projector 5 Fit the Input Output IO cov...

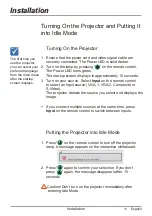
Page 13: ...2 Composite or S Video The projector detects the source you select and displays the image If you connect multiple sources at the same time press Input on the remote control to switch between inputs Putting the projector into Idle Mode 1 Press on the remote control to turn off the projector lamp A message appears on the interactive whiteboard 2 Press again to confirm your selection If you don t pre...

Page 14: ...English 12 Installation Installation Adjusting the Projector s Focus To focus the image rotate the Focus Ring until the image is clear Focus Ring Adjusting the Projected Image ...

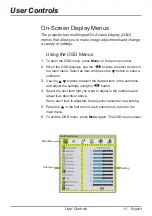
Page 15: ...the main menu Select an item and press the button to enter a submenu 3 Use the buttons to select the desired item in the submenu and adjust the settings using the button 4 Select the next item that you want to adjust in the submenu and adjust it as described above When each item is adjusted the projector saves the new setting 5 Press the in the first item of each submenu to return to the main menu...

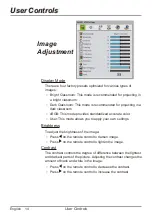
Page 16: ...ccurate color User This mode allows you to apply your own settings Brightness To adjust the brightness of the image Press on the remote control to darken image Press on the remote control to lighten the image Contrast The contrast controls the degree of difference between the lightest and darkest parts of the picture Adjusting the contrast changes the amount of black and white in the image Press o...

Page 17: ...f the display with your computer s graphics card If the image appears to be unstable or flickers use this function to correct it H Position Press on the remote control to move the image left Press on the remote control to move the image right V Position Press on the remote control to move the image down Press on the remote control to move the image up Frequency Tracking H Position and V Position f...

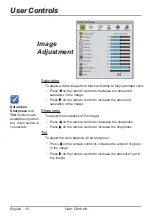
Page 18: ...he image Sharpness To adjust the sharpness of the image Press on the remote control to decrease the sharpness Press on the remote control to increase the sharpness Tint To adjust the color balance of red and green Press on the remote control to increase the amount of green in the image Press on the remote control to increase the amount of red in the image Saturation Sharpness and Tint functions ar...

Page 19: ...nt colors in picture The range is from 0 to 10 If you prefer a more enhanced brightness select a higher setting For a smoother more natural image adjust toward the lower setting Degamma Allows you to adjust the color performance of the display Color Adjust the Red Green Blue Cyan Magenta and Yellow colors from the factory default settings for advanced adjustment of the individual colors Image Adju...

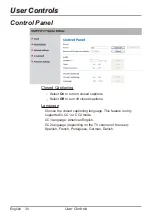
Page 20: ...lect On to disable the volume adjustment Select Off to enable the volume adjustment Closed Captioning Select On to turn on closed captions Select Off to turn off the captioning feature Closed Captioning Language Choose the closed captioning language This feature is only supported in CC1 or CC2 mode CC1 language American English CC2 language depending on the TV channel of the user Spanish French Po...

Page 21: ...ning message when the change lamp message displays The message appears 100 hours before the recommended lamp replacement Lamp Mode To adjust the brightness of the image Select Standard to brighten the image Select Economy to darken the image Auto Power Off minutes Set the countdown timer interval The countdown timer starts when there is no signal being sent to the projector The projector enters Id...

Page 22: ...The range of numbers is from 01 to 99 Keystone Press or on the remote control to adjust image distortion vertically and make a squarer image Aspect Ratio Select one of the following aspect ratios to define how the image appears Fill Screen The input source scales to fit the full size of projection area Match Input The original input source s aspect ratio is used 16 9 Use this format for 16 9 input...

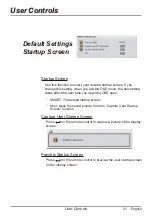
Page 23: ...effect the next time you open the OSD open SMART The default startup screen User Uses the saved picture from the Capture User Startup Screen function Capture User Startup Screen Press on the remote control to capture a picture of the display screen Preview Startup Screen Press on the remote control to preview the user startup screen on the display screen Default Settings Startup Screen ...

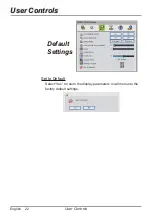
Page 24: ...English 22 User Controls User Controls Set to Default Select Yes to return the display parameters on all menus to the factory default settings Default Settings ...

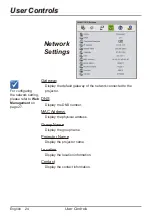
Page 25: ... from the DHCP server automatically Off allows you to assign an IP address manually Password Reminder Press on the remote control to e mail the yourself password you set through Web Management IP Address Display the IP address Subnet Mask Display the subnet mask number Default Settings For configuring the network setting please refer to Web Management on page 27 ...

Page 26: ...NS Display the DNS number MAC Address Display the physical address Group Name Display the group name Projector Name Display the projector name Location Display the location information Contact Display the contact information Network Settings For configuring the network setting please refer to Web Management on page 27 ...

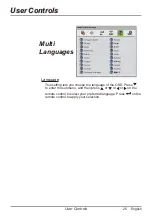
Page 27: ...s Language This setting lets you choose the language of the OSD Press to enter the submenu and then press or or or on the remote control to select your preferred language Press on the remote control to apply your selection Multi Languages ...

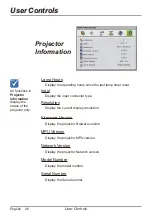
Page 28: ...y the current display resolution Firmware Version Display the projector firmware version MPU Version Display the projector MPU version Network Version Display the projector Network version Model Number Display the model number Serial Number Display the Serial number All functions in Projector Information display the status of the projector only Projector Information ...

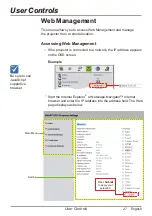
Page 29: ...nagement Start the Internet Explorer or Netscape Navigator Internet browser and enter the IP Address into the address field The Web page displays as below This menu allows you to access Web Management and manage the projector from a remote location Main Menu Setting Press Submit to apply your selection Example Be sure to use JavaScript supportive browser ...

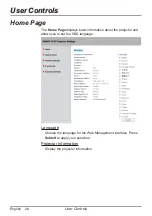
Page 30: ...nguage Choose the language for the Web Management interface Press Submit to apply your selection Projector Information Display the projector information The Home Page displays basic information about the projector and allows you to set the OSD language ...

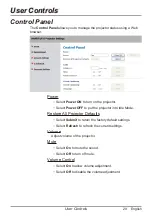
Page 31: ...aults Select Submit to return the factory default settings Select Refresh to refresh the current settings Volume Adjust volume of the projector Mute Select On to mute the sound Select Off to turn off mute Volume Control Select On to allow volume adjustment Select Off to disable the volume adjustment The Control Panel allows you to manage the projector status using a Web browser ...

Page 32: ...o turn on closed captions Select Off to turn off closed captions Language Choose the closed captioning language This feature is only supported in CC1 or CC2 mode CC1 language American English CC2 language depending on the TV channel of the user Spanish French Portuguese German Danish ...

Page 33: ...darkest parts of the picture Adjusting the contrast changes the amount of black and white in the image Frequency Change the display data frequency to match the frequency of your computer s graphic card If a flickering vertical bar appears on your screen use this function to make an adjustment Tracking Synchronize the signal timing of the display with your computer s graphics card If the image appe...

Page 34: ...roviding true more vibrant colors in picture The range is from 0 to 10 If you prefer a more enhanced brightness select a higher setting For a smoother more natural image adjust toward the lower setting Degamma Allows you to adjust the color performance of the display Color Adjust the Red Green Blue Cyan Magenta and Yellow colors from the factory default settings for advanced adjustment of the indi...

Page 35: ...g message when the change lamp message displays The message appears 100 hours before the recommended lamp replacement Lamp Mode To adjust the brightness of the image Select Standard to lighten the image Select Economy to darken the image Auto Power Off Set the countdown timer interval The countdown timer starts when there is no signal being sent to the projector The projector enters Idle Mode when...

Page 36: ...rs Fill Screen The input source scales to fit the full size of projection area Match Input The original input source s aspect ratio is used 16 9 Use this format for 16 9 input sources such as HDTV and DVDs enhanced for widescreen TV Startup Screen Use this function to select your desired startup screen If you change this setting when you exit the OSD menu the new setting takes effect the next time...

Page 37: ...t HIGH to rotate the projector s fan at high speed if the projector s temperature is high or if the location is above 6000 ft altitude Select NORMAL to use the normal rotational speed Projection Mode Select the projection mode Front Ceiling Rear or Rear Ceiling Source Select the input source VGA 1 VGA 2 Composite or S Video ...

Page 38: ...from the DHCP server automatically Off allows you to assign an IP address manually IP Address Set an IP address Subnet Mask Set the subnet mask number Gateway Set the gateway number DNS Set the DNS number The Network Settings allow you to enable or disable DHCP and set network related addresses and names ...

Page 39: ... projector Maximum characters 12 Projector Name Allows you to define the projector name Maximum characters 12 Location Allows you to define the location of the projector Maximum characters 16 Contact Allows you to define the contact name of the projector Maximum characters 16 Network Settings ...

Page 40: ... along with each SNMP Get Requst and allows access to device The default Read Only Community string is public Read Write Community The Read Write Community string is like a password It is sent along with each SNMP Set Requst and allows access to device The default Read Write Community string is public Trap Destination Address Allows you to define the Trap Destination Address of the projector Netwo...

Page 41: ...ss of the E mail Alert recipient Cc Define the e mail address of the E mail Alert copy to recipient From Define the e mail address of the user who sends the E mail Alert Outgoing SMTP server Define the outgoing SMTP server Username Define the SMTP server user name Password Define the SMTP server password The E mail Alert allows you to enter your e mail alert address and adjust related settings ...

Page 42: ...ow lamp life and Temperature warning Select the conditions you want to apply and then press Submit to apply the selection The projector sends an alert e mail SMART Alert to your e mail address Press the E mail Alert Test to confirm your e mail address The projector sends a test e mail SMART Alert Test Mail to your e mail address ...

Page 43: ...access Web Management Select Disable to be able to turn on the projector without a password This projector provides a security function that allows the administrator to manage usage for the projector The Password Settings allow you to enable the Administrator Password function First Time The Password is 4 digits default value is 1234 If you can t remember your password please refer to Password Rem...

Page 44: ...displayed image If you are using a desktop computer For computers running the Windows 95 Windows 98 Windows 2000 or Windows XP operating system 1 Click My Computer Control Panel and then double click Display 2 Select the Settings tab 3 Verify that your display resolution setting is lower than or equal to UXGA 1600 1200 If the projector is still not projecting the whole image you will also need to ...

Page 45: ... F4 If you experience difficulty changing resolutions or your monitor freezes restart all equipment including the projector The screen of the laptop or PowerBook computer isn t displaying your presentation If you are using a laptop Some laptop PCs may deactivate their own screens when a second display device is in use Each has a different way to be reactivated Refer to your computer s manual for d...

Page 46: ...16 9 DVD title When you play an anamorphic DVD or a 16 9 DVD the projector displays the image in 16 9 format If you play a 4 3 format DVD title change the Aspect Ratio to Fill Screen in the projector OSD If the image is still stretched adjust the aspect ratio type Image is too small or too large Press Menu on the remote control select Aspect Ratio and then try the different settings Other Problems...

Page 47: ...Mode Solid Amber Off Powering Flashing Green Off On Lamp On Green Off Cooling Flashing Amber Off Error Temperature Exceeded Off Flashing Red Error Fan Failure Off Solid Red Error Color Wheel Failure Off Solid Red Error Lamp Failure Solid Amber Flashing Red Contact your authorized SMART Reseller to solve the problem ...

Page 48: ... The projector will automatically shut down Temperature warning Projector overheated Air vents might be blocked or the ambient temperature might be over 55 The projector will automatically shut down Lamp warning Power message Video mute message Contact your authorized SMART Reseller to solve the problem ...

Page 49: ...5 49 725 57 283 1024 768 XGA_60 60 004 48 363 65 1024 768 XGA_70 70 069 56 476 75 1024 768 XGA_75 75 029 60 023 78 75 1024 768 XGA_85 84 997 68 667 94 5 1024 768 MAC19 74 7 60 134 79 857 1152 864 SXGA1_75 75 67 54 108 1280 768 WXGA 59 87 47 776 79 5 1280 800 16 10 59 81 49 702 83 5 1280 960 QuadVGA_60 60 60 108 1280 960 QuadVGA_85 85 002 85 938 148 5 1280 1024 SXGA3_60 60 02 63 981 108 1280 1024 S...

Page 50: ... 25 50 720p 750p 60 Hz 45 60 720p 750p 50 Hz 37 5 50 1080i 1125i 60 Hz 33 75 60 1080i 1125i 50 Hz 28 13 50 1080p 1125p 60 Hz 67 5 60 1080p 1125p 50 Hz 56 25 50 S Video and Composite Video signals Video mode fh kHz fv Hz fsc MHz NTSC 15 73 60 3 58 PAL 15 63 50 4 43 SECAM 15 63 50 4 25 or 4 41 PAL M 15 73 60 3 58 PAL N 15 63 50 3 58 PAL 60 15 73 60 4 43 NTSC4 43 15 73 60 4 43 ...

Page 51: ...49 English Appendices Appendices RS 232 Connector Pin Assignments Pin no Spec 1 N A 2 TXD 3 RXD 4 N A 5 GND 6 N A 7 N A 8 N A 9 9VDC 5 4 3 2 1 9 8 7 6 ...

Page 52: ...her to clean the lens 3 Use clean compressed air to remove dust and debris from the lens 4 If wiping the lens becomes unavoidable use protective gloves to dip a soft woven cloth in anti static solvent and gently wipe from the center to the outer part Use an anti static solvent such as Hyperclean EE 6310 and a cloth such as Purestat PW2004 or similar ...

Page 53: ...ng the lamp Warning To reduce the risk of personal injury don t drop the lamp module or touch the lamp bulb The bulb may shatter and cause injury if it is dropped Caution Hot Let unit cool for 30 minutes before removing lamp module cover Do not obstruct lens High pressure lamp may shatter if improperly handled Disconnect power before changing lamp Replace only with SMART Technologies approved lamp...

Page 54: ...low the projector to cool down for at least 30 minutes 3 Disconnect the power cord 4 Pull the lamp cover carefully 5 Remove the lamp cover 6 Use a screwdriver to unscrew the 2 screws from the lamp module 7 Pull up the lamp handle carefully 8 Remove the lamp module To replace the lamp module follow previous steps in reverse order 2 3 4 5 1 ...

Page 55: ...t that has a WEEE symbol or accompanying WEEE guidelines If you need more information on the collection reuse and recycling of electrical and electronic equipment please contact your local WEEE recycling agency Alternatively contact your local reseller or SMART Technologies for information on the environmental performance of our products Restriction of Certain Hazardous Substances RoHS Directives ...

Page 56: ...the issue without delay All SMART products include online telephone fax and e mail support Online www smarttech com contactsupport Telephone 1 403 228 5940 or Toll Free 1 866 518 6791 U S Canada Monday to Friday 5 a m 6 p m Mountain Time Fax 1 403 806 1256 E mail support smarttech com General Inquiries Address SMART Technologies 1207 11 Ave SW Suite 300 Calgary AB T3C 0M5 CANADA Switchboard 1 403 ...

Page 57: ......

Page 58: ...SMART Technologies 1207 11 Avenue SW Suite 300 Calgary AB T3C 0M5 CANADA www smarttech com support www smarttech com contactsupport Support 1 403 228 5940 Toll Free 1 866 518 6791 U S Canada ...

Reviews: