background image

Was this document helpful?

smarttech.com/docfeedback/171371

SMART electric height-adjustable wall
stand

USER GUIDE

WSE-400

|

Summary of Contents for WSE-400

Page 1: ...Was this document helpful smarttech com docfeedback 171371 SMART electric height adjustable wall stand USER GUIDE WSE 400 ...

Page 2: ... other countries All third party product and company names may be trademarks of their respective owners Copyright notice 2019 SMART Technologies ULC All rights reserved No part of this publication may be reproduced transmitted transcribed stored in a retrieval system or translated into any language in any form by any means without the prior written consent of SMART Technologies ULC Information in ...

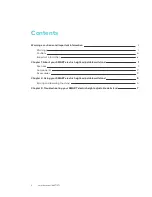
Page 3: ...Important information iv Chapter 1 About your SMART electric height adjustable wall stand 1 Features 1 Components 2 Accessories 3 Chapter 2 Using your SMART electric height adjustable wall stand 5 Raising and lowering the stand 5 Chapter 3 Troubleshooting your SMART electric height adjustable wall stand 7 ...

Page 4: ......

Page 5: ...e l To prevent injury this product must be securely attached to the wall in accordance with the installation instructions l The assembly and installation of this product is intended for a trained professional l The installer must follow the instructions in the installation guide Not doing so can result in injury or damage to equipment l Use only SMART supplied mounting hardware or hardware that is...

Page 6: ...e of your SMART product Rather mount the product at the appropriate height l Ensure that any cables extending across the floor to the SMART product are properly bundled and marked to avoid a trip hazard l Unplug the power cord before cleaning the SMART product Use only a dry or slightly dampened cloth to clean the product l Do not allow children to clean or maintain the product without supervision...

Page 7: ...uarantee l Refer all servicing to qualified service personnel Servicing is required when the apparatus has been damaged in any way such as power supply cord or plug is damaged liquid has been spilled or objects have fallen into the apparatus the apparatus has been exposed to rain or moisture does not operate normally or has been dropped l Use only original accessories and replacement parts Using o...

Page 8: ... Make sure an electrical socket is near the SMART product and remains easily accessible during use l Plug the SMART product into its own electrical outlet for best operation l This product includes an article or articles that contain lead cadmium and Bisphenol A These are candidate SVHCs under the EU REACH Regulation EC 1907 2006 ...

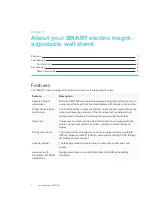
Page 9: ...sm to prevent damage while you re raising and lowering a display If the stand contacts an object while being raised or lowered it will stop and reverse direction briefly Power bar The power mounted on the side of the cabinet has surge protection and is a convenient place to connect a display and accessories to power Sturdy steel frame The sturdy steel frame allows the stand to support displays up ...

Page 10: ...3 1 2 No Description 1 Power bar 2 Control panel 3 Mounting holes N A Storage cabinet rear surface Control panel You can raise and lower the stand with the control panel It s located on the right side of the stand but you can remove and attached it to a mounted display See the installation guide for information on how to move the control panel 2 1 ...

Page 11: ...your wall stand Accessory Description Laptop shelf The laptop shelf is a convenient place to place your laptop when you re using a stand mounted interactive display More information See the following resources for more information l WSE 400 specifications smarttech com kb 171387 l WSE 400 installation guide smarttech com kb 171363 These documents are available in the Support section of the SMART w...

Page 12: ......

Page 13: ...low the stand to be used by children or by people who cannot operate it safely l To prevent injury keep hands and people away from crush and pinch locations on the stand l Operating the SMART product can create a hand crushing or hand pinching hazard To prevent injury keep hands and people away from crush and pinch locations on the product l Allow adequate clearance above and below your stand to e...

Page 14: ...e Down button and lower the stand to the lowest position 3 Press the Down button for five seconds and then release it The stand moves up and down 1 cm Raising and lowering the stand To raise the stand 1 Press and hold the Up button on the control panel 2 Release the Up button to stop raising the display To lower the stand 1 Press and hold the Down button on the control panel 2 Release the Down but...

Page 15: ...ot damaged l Ensure the actuators and the control panel are connected to the control box l Ensure the power cable is connected to the stand l Unplug the power cable for the stand Wait fifteen minutes and then reset the stand If the stand lowers but does not move when you try raising it or if you replace the controller perform a reset by following the steps bellow To reset the stand 1 Connect the s...

Page 16: ......

Page 17: ......

Page 18: ...SMART TECHNOLOGIES smarttech com support smarttech com contactsupport smarttech com kb 171371 ...

Reviews: