background image

- 17 -

 USER CONTROLS - Menu Operations

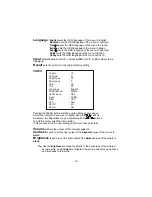
PC

Brightness
Contrast
Clock
Phase
Auto
H Position
V Position
RGB Offset
Image Effect
Volume
Language
Input
Recall

: 25
: 41
: 125
: 16
: Stop
: 0
: 0
: 0
: 5 
: 10
: English
: PC
: No

Brightness


is used to set the light output of the 

darkest

 areas of the picture to 

black

.

Contrast


is used to set the light output of the 

brightest

 areas of the picture to 

white

.

Clock

 is used to adjust best picture quality. It adjusts the numbers of the pixel 

clock across one line time. Therefore it can affect the picture poisition and size.

Phase

 is used to adjust best picture quality. It adjusts the sampling phase across 

one pixel time. When the phase is not adjusted properly, the picture quality is not 
good. Therefore this value should be carefully adjusted.

Auto

Select "Yes" using    or    buttons to adjust the best picture quality automatically.
Execute repeatedly if the picture quality is not good.

H Position

 is used to adjust the horizontal position of the image on the screen.

V Position

 is used to adjust the vertical position of the image on the screen.

RGB Offset 

RGB Offset is used to adjust the video input range. When the bright areas of the 
picture is too high (low), increase (decrease) the RGB Offset value.

Image Effect

 is used to soften or sharpen the image.

Volume

 controls the output of the internal speakers.

Pushing the MENU


button will bring up the Menu shown above.

Select the item which you want to adjust using the    ,     buttons
As shown, the Brightness may be adjusted with the    or     buttons.
To exit the menu, push the MENU button.
(This process store the new settings which you have selected.)

Summary of Contents for STM-150

Page 1: ...www smartec security eu Smartec STM 150 170 190 LCD Monitors User Manual...

Page 2: ...ing to be used for several days or more To disconnectthe cord pull it out by the plug Never pull the cord itself Allow adequate air circulation to prevent internal heat build up Do not place the unit...

Page 3: ...UIPMENT DOES CAUSE HARMFUL INTERFERENCE TO RADIO OR TELEVISION RECEPTION WHICH CAN BE DETERMINED BY TURNING THE EQUIPMENT OFF AND ON THE USER IS ENCOURAGED TO TRY TO CORRECT THE INTERFERENCE BY ONE OR...

Page 4: ...third grounding pin This plug will only fit into a grounding type power outlet This is a safety feature If you are unable to insert the plug into the outlet contact your electrician to replace your o...

Page 5: ...E OF CONTENTS Features Installation Connections Operating Instructions Controls Backside Connections User Controls Menu Operations Specifications Bracket Features Stand Features 6 7 14 15 16 17 20 26...

Page 6: ...tor High Bright High Quality Picture NTSC and PAL in Composite and Y C Thin and Lightweight Rugged Metal Cabinets Many Mounting and Installation Options Low Power Consumption 12 volts DC Operation Ful...

Page 7: ...100 mVpp CAUTION Note that many portable battery systems and all automobiles that have a 12 volt nominal supply will often be found to have high voltage spikes and be as high as 18 volts when chargin...

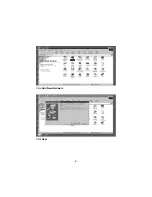
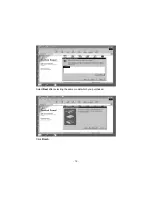
Page 8: ...Click Add New Hardware Click Next 8...

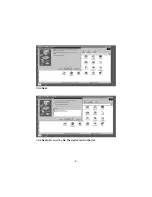
Page 9: ...Click Next Click Next after selecting No the device isn t in the list 9...

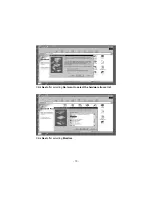
Page 10: ...Click Next after selecting No I want to select the hardware from a list Click Next after selecting Monitors 10...

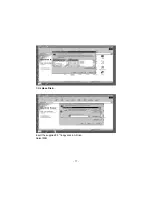
Page 11: ...Click Have Disk Insert the supplied 3 5 floppy disk in A Drive Select OK 11...

Page 12: ...15 LCD MONITOR Select Next after selecting the same model which you purchased Click Finish 12...

Page 13: ...oosing Close button and OK button until you close the Display Properties dialogue box You can get some other screen for warning message or others then click the appreciate option for your monitor Micr...

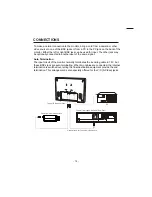
Page 14: ...of the monitor Either the left or right BNC jack can be used for input The other jack may be optionally connected to another user of the same signal Auto Termination The input circuit of the monitor...

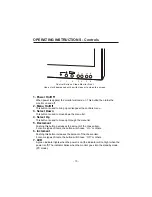
Page 15: ...creases the amount of the chosen item For some types of items the button will choose On or others 6 Increment Pushing this button increases the amount of the chosen item For some types of items the bu...

Page 16: ...e input or output Auto termination switches inside See Connections below 3 Speakers Audio inputs are high impedance RCA jack connections are left white and right red Inserting only a single plug will...

Page 17: ...is not good Therefore this value should be carefully adjusted Auto Select Yes using or buttons to adjust the best picture quality automatically Execute repeatedly if the picture quality is not good H...

Page 18: ...BNC or Y C 4 pin S video to be dispalyed Recall sets the monitor to the original factory setting Pushing the MENU button will bring up the Menu shown above Select the item which you want to adjust usi...

Page 19: ...right or left appear depending on the video source When flowing vertical lines appear it is convenient to reduce them by adjusting the DVCO Recall sets the monitor to the original factory setting Hot...

Page 20: ...Input connector Input resolution Plug Play 15 0 inches TFT LCD Panel 15 0 inches 1024 H x 768 V RGB vertical stripe 0 297mm x 0 297mm 8 Bit 16 0M Colors 400 1 Typical 2 250 cd m Typical 65 65 45 55 T...

Page 21: ...ications are subject to change without notice 21 Bright Contrast Tint Color Sharpness etc English French German Italian Spanish Polish Czech 12VDC 3 0A 30 Watts Standby 2Watts Barrel 5 5 2 1mm Center...

Page 22: ...nector Input resolution Plug Play 17 0 inches TFT LCD Panel 17 0 inches 1280 H x 1024 V RGB vertical stripe 0 264mm x 0 264mm 8 Bit 16 2M Colors 700 1 Typical 2 300 cd m Typical 75 75 75 60 Typical 4C...

Page 23: ...fications are subject to change without notice 23 Bright Contrast Tint Color Sharpness etc English French German Italian Spanish Polish Czech 12VDC 3 25A 41 Watts Standby 2Watts Barrel 5 5 2 1mm Cente...

Page 24: ...ctor Input resolution Plug Play 19 0 inches TFT LCD Panel 19 0 inches 1280 H x 1024 V RGB vertical stripe 0 294mm x 0 294mm 8 Bit 16 7M Colors 1000 1 Typical 2 250 cd m Typical 89 89 89 89 Typical 4CC...

Page 25: ...ifications are subject to change without notice 25 Bright Contrast Tint Color Sharpness etc English French German Italian Spanish Polish Czech 12VDC 3 5A 45 Watts Standby 2Watts Barrel 5 5 2 1mm Cente...

Page 26: ...and is capable of supporting loads up to 20 lb 9 0kg Pan adjustment Tilt adjustment LCD mounting Construction Finish Maximum load Dimension Weight four 4 M4 x 10L machine screw supplied Die cast and...

Page 27: ...plate has the regular interval of VESA standard users 2 CAUTION For the safety and better usage use only FH4X6 size screws provided when you fix the metal plate to LCD monitor 1 1 FH4X6 size SCREW 1 2...

Reviews: