User Manual - twentynine
7.1.2
LAN IP Configuration
To successfully establish the connection to a camera, the Network configuration needs to be done according
to the requirements of the application. The connection of the physical Network Interface Card (NIC) needs
to be enabled and set-up properly. Table 48 shows a good configuration for a first start with a single NIC,
but does however not represent a setup suited for all application and network environments.
NIC (Cameras)
NIC (others)
Camera 1
Camera 2
Camera 3
IP
169.254.0.1
not 169.254.x.x
169.254.1.1
169.254.1.2
169.254.1.x
Subnetmask
255.255.0.0
if 255.255.0.0
255.255.0.0
255.255.0.0
255.255.0.0
Table 48: Basic IP configuration of the PC
Note
To use several cameras on multiple Network Interface Cards (NIC) in one PC, make
absolutely sure that each NIC is configured for a different network. Otherwise it will
not be possible to operate all cameras correctly.
7.1.2.1
IP Setup in Microsoft Windows
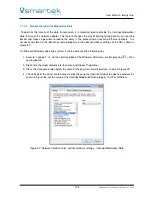
On Microsoft Windows operating systems, the IP can be setup by the following steps:
1. Execute "ncpa.cpl", i.e. via the command box of the Windows
Startmenu
or after pressing
+ R on
your keyboard
2. Right-click the target network interface card and choose
Properties
.
3. Choose the
Internet Protocol Version 4 (TCP/IPv4)
entry in the list of protocols.
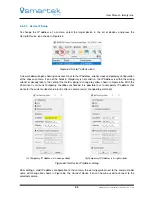
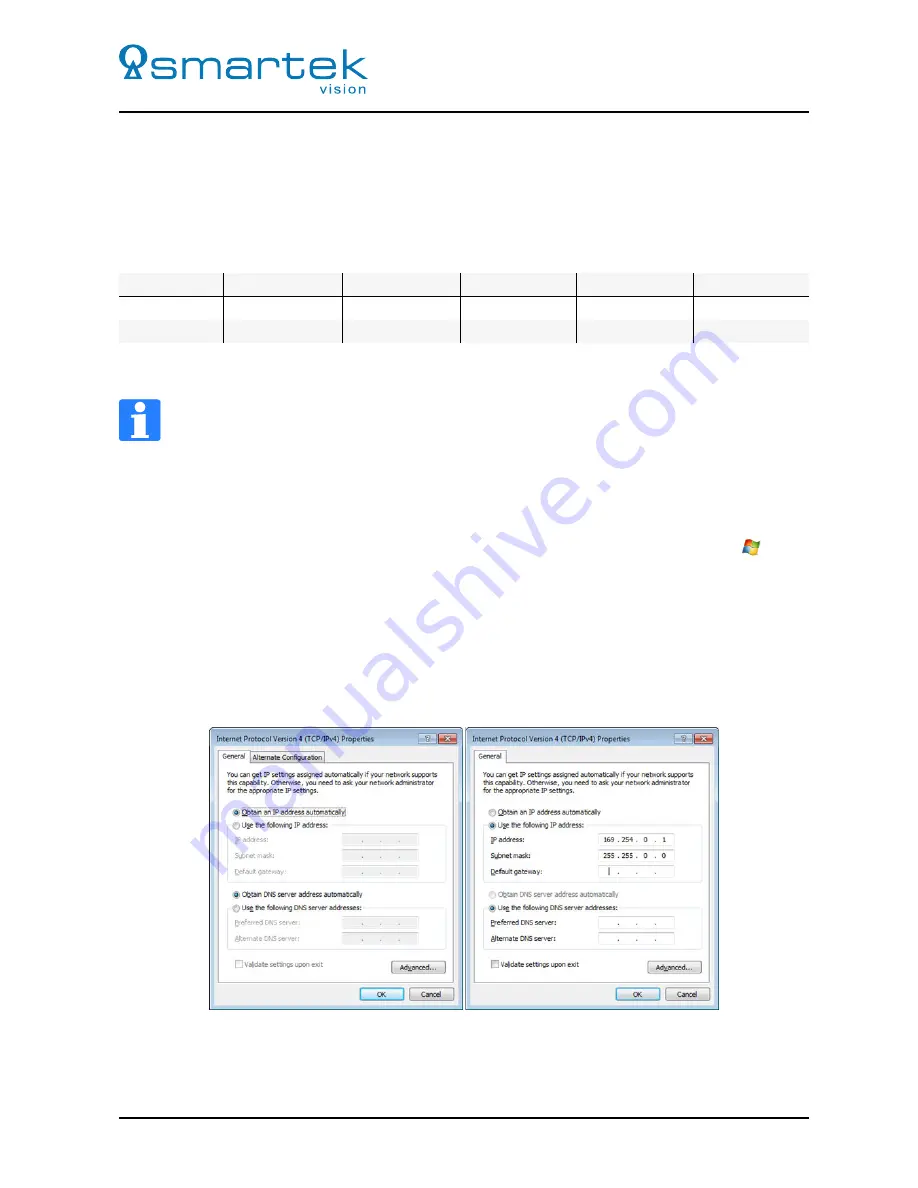
4. By default the interface is configured to obtain an IP address automatically by a DHCP server, shown
in Figure 78, usually provided by routers or dedicated servers. A fixed IP address and Subnet mask
can be entered like shown in Figure 78 right, after choosing
Use the following IP address
.
Figure 78: Internet Protocol Version 4 (TCP/IPv4) properties
99
SMARTEK Vision | User Manual - twentynine | Doc. v1.0.2


