14
DE5457P
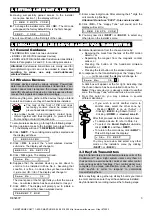
6.13 Second Private Telephone No.
Here you program the telephone number of the second
private subscriber to which the system will report the
event groups defined in Location 16.
Upon selecting Location 12, the display will change to:
1 2 : 2 N D P R V T T E L #
Enter the second private subscriber’s telephone number
as outlined in Para. 6.1 D above.
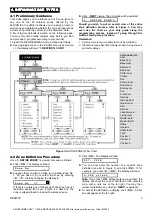
6.14 Third Private Telephone No.
Here is the place to program the telephone number of the
third private subscriber to which the system will report the
event groups defined in Location 16.
Upon selecting Location 13, the display will change to:
1 3 : 3 R D P R V T T E L #
Enter the third private subscriber’s telephone number as
outlined in Para. 6.1 D above.
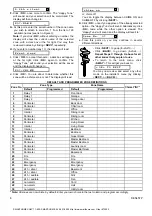
6.15 Telephone Message Type
Here you determine whether reporting to private
telephone subscribers will be carried out by tone signals
or by voice. The options are:
tone
and
voice
.
Upon selecting Location 14, the display will change to:
1 4 : T E L . M S G T Y P E
Select the desired option as outlined in Para. 6.1 C above.
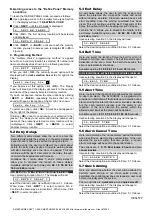
6.16 Private Tel. Dialing Attempts
Here you determine how many times the communicator
will dial the called party’s number (private telephone).
The options are:
1
,
2
,
3
and
4
attempts.
Attention!
A maximum of 2 dialing attempts is permitted
by the Australian Telecommunication Authority.
Upon selecting Location 15, the display will change to:
1 5 : P R V T A T T E M P T S
Select the desired option as outlined in Para. 6.1 C above.
6.17 Events reported to Private
Telephones
Here you determine which event groups will be reported
to private telephone subscribers.
The options are:
&
all
&
alerts
&
op/cl
&
alarms
&
alerts
&
op/cl
&
disable report.
Note:
“
all
” does not include trouble messages, which are
not reported to private telephones.
Upon selecting Location 16, the display will change to:
1 6 : R E P O R T
➜
➜
➜
➜
T E L .
Select the desired option as outlined in Para. 6.1 C above.
6.18 Telephone Acknowledge
Here you determine whether the system will use the
single acknowledge or the all-acknowledge mode when
reporting to private telephones.
Note:
In the single acknowledge mode, receiving an
acknowledge signal from a single telephone is sufficient
to consider the current event closed and call off the
communication session. The remaining telephones serve
for backup purposes only.
In the all acknowledge mode, an acknowledge signal
must be received from each telephone before the current
event is considered reported.
The options are:
single ack
and
all ack
.
Upon selecting Location 17, the display will change to:
1 7 : T E L E P H O N E A C K
Select the desired option as outlined in Para. 6.1 C above.
6.19 Pager Telephone Number
Here you program the telephone number of the pager to
which the system will report (if any).
Upon selecting Location 18, the display will change to:
1 8 : P A G E R T E L #
Enter the pager’s phone number as in Para. 6.1 D above.
6.20 Pager’s PIN Number
Here you enter the pager’s PIN code - a digital sequence
which is the pager’s address. The paging company’s
computer needs this input for routing messages to the
specific pager. The PIN sequence precedes any digital
message that the
SECURELINC
sends to the pager to
report an event. It may include digits, pauses and special
characters (
✶
✶
✶
✶
or
#
). Call the paging company to find out
what the pager’s PIN code should consist of.
Upon selecting Location 19, the display will change to:
1 9 : P A G E R P I N #
Important!
In this location, special characters can be
entered as shown below:
To Insert
Keying Sequence Character Displayed
✶
✶
✶
✶
<#>
⇒
<1>
B
#
<#>
⇒
<2>
C
5 sec pause <#>
⇒
<3>
D
Enter the pager’s PIN number (up to 16 digits, including
special characters, depending on pager system protocol).
6.21 Reporting to a Pager
Here you determine which event groups will be reported
to the pager.
The options are:
&
all
&
alerts
&
all (- op/cl)
&
trbl + op/cl
&
trbl
&
op/cl
&
disable report
Upon selecting Location 20, the display will change to:
2 0 : R E P O R T
➜
➜
➜
➜
P A G E R
Select the desired option as outlined in Para. 6.1 C above.
6.22 Recent Closure
Here you enable or disable the “recent closing” report,
that is sent to the central station if an alarm occurs within
2 minutes from the expiry of the exit delay.
The options are:
recent close ON
and
recent close OFF
Upon selecting Location 21, the display will change to:
2 1 : R E C E N T C L O S E
Select the desired option as outlined in Para. 6.1 C above.
6.23 Remote Access
Here you give or deny permission to access the system
and exercise control from a remote telephone.
The options are:
rem. access ON
and
rem. access OFF
SMARTHOME.COM™ 1-800-SMART-HOME 949-221-9200 http://www.smarthome.com Order #73902


