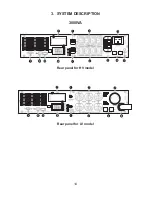
16
1. Inspecting the Equipment
2. Placement
3. Charging
4. Load Connection
5. Modem/Phone line Connection
6. DC Start Function
Inspect the UPS upon receipt. If the UPS has been damaged during
shipment, keep the box and packing material for the carrier. Notify the
carrier and dealer immediately.
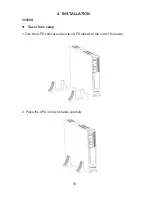
This UPS should be installed indoors with adequate airflow and free
of contamination. Locate it in a clean and indoor environment, free
from moisture, flammable liquids, and direct sunlight. Maintain a
minimum clearance of 4 inches (100mm); an ambient temperature
range must be 0°C to 40°C (32°F to 104°F), and operating humidity
range must be 20% to 80% relative humidity (non-condensing).
This UPS is shipped from the factory with its internal battery fully
charged; however, some charge may be lost during shipping. The
battery should be recharged prior to use. Plug the UPS into an
appropriate power supply and allow the UPS to charge at least 4
hours.
Connect one load-related device to each of the power receptacles
supplied at the rear of the UPS.
Plug incoming telephone line into the “In” socket at the back of the
UPS. Use on telephone line cable and plug one end of the telephone
line cable to the “Out” socket at the back of the UPS. Plug the other
end to the modem input socket.
DC Start Function enables UPS to be started up when AC utility
power is not available and battery is full charged. Just simply press
the On/Off switch to turn on the UPS.
CAUTION:
The long term use at ambient temperature higher than
25C should reduce battery life. In addition, place the UPS
unit away from the monitor at least 8in.to avoid
interference.
4. INSTALLATION


