background image

SR808ac Cable Modem User Manual

15

If your ISP uses static IP addressing, select “Static IP” for the WAN Connection
Type, and enter the information provided by your ISP for Static IP Address, Static
IP Mask, Default Gateway, Primary DNS, and Secondary DNS.
2.Enter a unicast MAC address in the Spoofed MAC Address field. Your ISP may
require this to be your PC’s MAC address. If not, you can simply supply the WAN
side MAC address of the router as your CPE and leave the spoofed MAC address
entry set to all 0’s, since there will be no spoofing required.
3.Select the Apply button. This will reset the CMRG.

At this point, the CMRG is configured for basic use. To connect to the Internet,
you must do the following:
1.Power up the CMRG and wait for it to register with the CMTS and obtain an
Internet-routable IP address
2.Get an IP lease from the internal DHCP server for each PC attached to the
CMRG.

Note that communication on the LAN will work regardless of whether the WAN
connection provided by the cable modem is up. However, you will not be able to
access the Internet until the WAN connection is enabled and has an IP address.

Some configurations settings are retrieved only once from non-volatile storage
when the CMRG first powers up. One such setting is changing the Static WAN IP
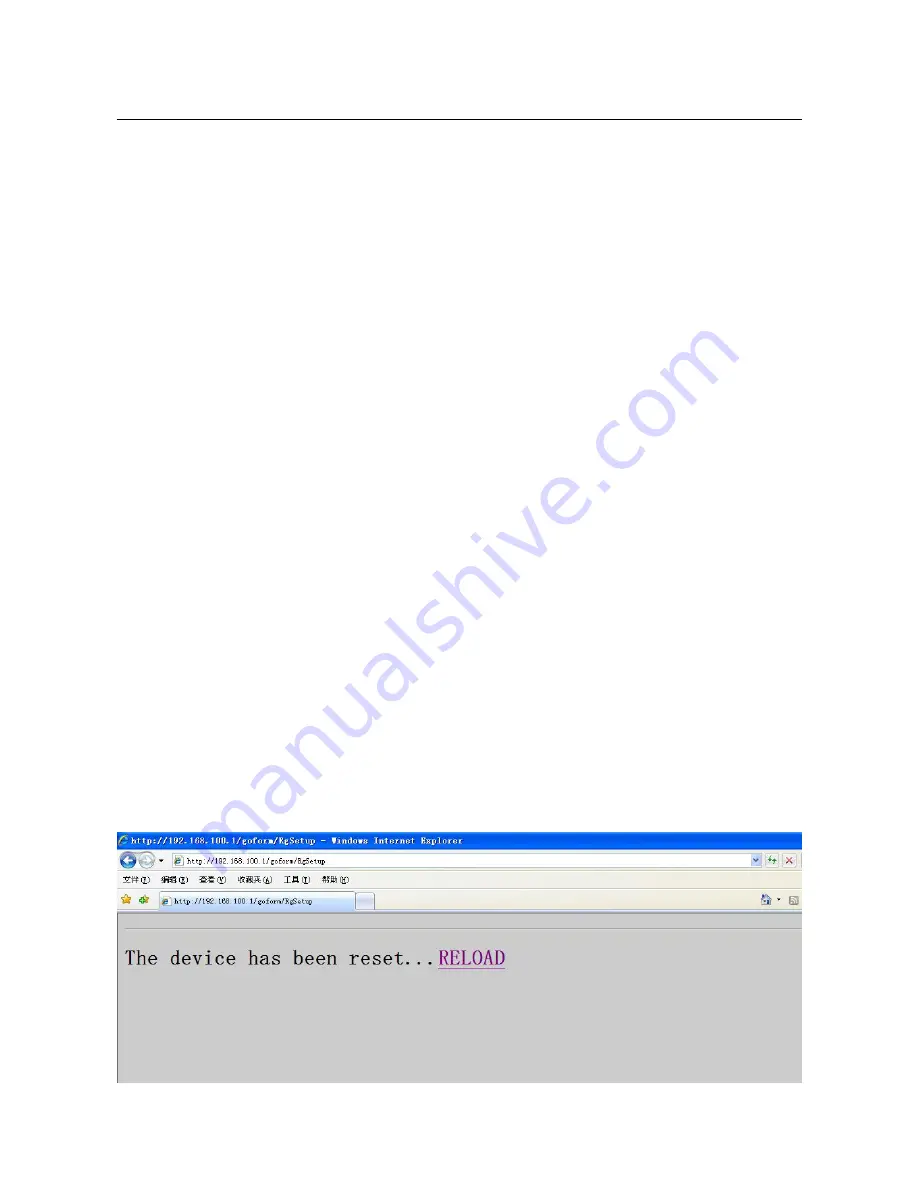
address parameters. Any changes to these settings will force the CMRG to reset
so that the new configuration can be read from non-volatile storage.

When this mandatory reset is required, the web interface will notify as follows:

Summary of Contents for SR808ac

Page 1: ...SR808ac Cable Modem User Manual VER 1 0 ...

Page 2: ...stallation 5 3 2 1 Connecting the Device 5 4 PC Network Configuration and Login 7 4 1 PC Network Configuration 7 4 2 Logging In to the BCM3384 Cable Modem 9 5 Web Based Management 10 5 1 Status 10 5 1 1 Software 10 5 1 2 Connection 11 5 1 3 Security 12 5 1 4 Diagnostics 12 5 2 Basic 13 5 2 1 Setup 14 5 2 2 DHCP 16 5 2 3 DDNS 17 5 2 4 Backup 18 5 3 Advanced 19 5 3 1 Options 19 5 3 2 IP Filtering 21...

Page 3: ...reless 35 5 6 1 Radio 35 5 6 2 Radio 37 5 6 3 Guest Network 40 5 6 4 Advanced 42 5 6 5 Access Control 44 5 6 6 WMM 45 5 6 7 Bridging 46 5 7 MTA 47 5 7 1 Status 48 5 7 2 DHCP 48 5 7 3 QoS 49 5 7 4 Provisioning 49 5 7 5 Event Log 50 5 8 Battery 50 5 8 1 Controller 51 5 8 2 UPS 51 5 8 3 Interface Delay 52 5 9 USB 52 5 9 1 USB Basic 52 5 9 2 Approved Devices 53 5 9 3 Storage Basic 54 5 9 4 Storage Adv...

Page 4: ...SR808ac Cable Modem User Manual iii 6 Q A 57 ...

Page 5: ...dissipation is necessary to avoid any damage caused by overheating to the device The holes on the device are designed for heat dissipation to ensure that the device works normally Do not cover these heat dissipation holes Do not put this device close to a place where a heat source exits or high temperature occurs Avoid the device from direct sunshine Do not put this device close to a place where i...

Page 6: ...PA2 security specifications The WLAN of the SR808ac supports 3T3R 2 1 Application Home gateway SOHOs Small enterprises Higher data rate broadband sharing Audio and video streaming and transfer PC file and application sharing Network and online gaming 2 2 Features User friendly GUI for web configuration Several pre configured popular games Just enable the game and the port settings are automaticall...

Page 7: ...eb filtering Remote update System statistics and monitoring 2 3 Standards Compatibility and Compliance Support application level gateway ALG DOCSIS EuroDOCSIS3 0 IEEE 802 3 IEEE 802 3u IEEE 802 11a IEEE 802 11ac IEEE 802 11b IEEE 802 11g IEEE 802 11n ...

Page 8: ...s locked U S frequency Blink CM is range and scan U S frequency Off Device is powered off or CM scan D S frequency Ethernet 1 2 3 4 Green On The Ethernet interface is connected Blink Data is being transmitted through the Ethernet interface Off The Ethernet interface is disconnected WLAN Green On WLAN is enabled Blink Data is being transmitted through the wireless interface Off WLAN is disabled WPS...

Page 9: ...ce USB 0 1 USB port for connecting other USB storage devices Power Power interface for connecting the power adapter TEL1 2 RJ 11 port for connecting the router to Phones Warning Do not press the Reset button unless you want to clear the current settings The Reset button is in a small circular hole on the rear panel If you want to restore the default settings please press the Reset button gently fo...

Page 10: ...SR808ac Cable Modem User Manual 6 Step3 Plug one end of the power adapter to the wall outlet and connect the other end to the Power port of the CMRG ...

Page 11: ...ss or be instructed to automatically obtain an IP address using the network DHCP server BCM3384 provides a DHCP server on its LAN and it is recommended to configure your LAN to automatically obtain its IP address and DNS server IP address The configuration principle is identical but should be carried out differently on each operating system The following displays the TCP IP Properties dialog box o...

Page 12: ...Choose Start Control Panel Network Connections Step2 Right click the Ethernet connection icon and choose Properties Step3 On the General tab select the Internet Protocol TCP IP component and click Properties Step4 The Internet Protocol TCP IP Properties window appears Step5 Select the Obtain an IP address automatically radio button ...

Page 13: ...er Step2 Enter http 192 168 100 1 the default IP address of the BCM3384 cable modem in the address bar The login page appears Step3 Enter the user name and the password The default username is blank and enter Broadcom in the Password field Step4 Click OK to log in to the Web page Otherwise please click Cancel to exit the login page Figure 2 Login page After logging in to the BCM3384 cable modem yo...

Page 14: ...the Cable Modem which allows you to configure and control all of cable modem residential gateway features and system parameters in a user friendly GUI 5 1 Status Choose Status and the submenus of Status are shown as below Figure 3 Submenus of status 5 1 1 Software Choose Status Software and the following page appears ...

Page 15: ...nformation This page displays information about the RF upstream and downstream channels including downstream channel frequencies upstream channel IDs and upstream and downstream signal power and modulation This page also displays IP lease information including the current IP address of the cable modem the duration of both leases the expiration time of both leases and the current system time from t...

Page 16: ...ssword is Broadcom and is case sensitive Note that you can also change the security password from this page by entering a new password in both the New Password and Re Enter New Password fields and the current password in the Current User ID Password field Clicking Apply will change the password You do NOT have to restore factory defaults to change the password 5 1 4 Diagnostics Choose Status Diagn...

Page 17: ...route allows you to map the network path from the CMRG to a public host Selecting Traceroute from the drop down Utility list will present alternate controls for the traceroute utility To run either utility make any changes to the default parameters and select Start Test to begin The window will automatically be refreshed as the results are displayed in the Results table 5 2 Basic Choose Basic and ...

Page 18: ...etup Choose Basic Setup and the following page appears Figure 8 Setup configuration Enter the information from the Required Information section as indicated 1 If your ISP uses DHCP select DHCP for the WAN Connection Type and enter Host Name and Domain name if required OR ...

Page 19: ... connect to the Internet you must do the following 1 Power up the CMRG and wait for it to register with the CMTS and obtain an Internet routable IP address 2 Get an IP lease from the internal DHCP server for each PC attached to the CMRG Note that communication on the LAN will work regardless of whether the WAN connection provided by the cable modem is up However you will not be able to access the ...

Page 20: ...C s IP addresses you can disable the internal DHCP server by selecting the No radio button If you do this make sure the IP address assigned to the CMRG is on the same subnet as the external DHCP server the subnet mask is always 255 255 255 0 or you won t be able to access the CMRG from the LAN The IP address of the CMRG can be set from the Basic Setup page You can also set the starting IP address ...

Page 21: ...service You will create a username and password and be asked to choose a host name for your server and the dynamic DNS domain to which your host will be assigned You will also be asked for your host s current IP address This is the WAN IP address that has been assigned to your CMRG during provisioning See WAN IP Address on the Basic Setup web page 2 Enter your account information on the Basic DDNS...

Page 22: ...rticular configuration or to recover from changes you may have made that have had an undesirable effect To backup the current configuration click Backup and follow the prompts To restore a previous configuration click Browse and use the navigation window to locate the file Usually GatewaySettings bin unless you rename it before saving Once the file has been located click Restore to restore the set...

Page 23: ...8ac Cable Modem User Manual 19 5 3 Advanced Choose Advanced and the submenus of Advanced are shown as below Figure 13 Submenus of advanced 5 3 1 Options Choose Advanced Options to display the following page ...

Page 24: ... fly without a system reset WAN Blocking prevents the CMRG or the PCs behind it from being visible to the WAN For instance pings to the CMRG s WAN IP address or the PCs behind it are not returned Therefore it will be more difficult for hacker to discover your WAN IP address to begin an attack on your private LAN IpSec and PPTP Point to Point Tunneling Protocol pass through modes enable these proto...

Page 25: ...s the UPnP agent in the CMRG If you are running a CPE application that requires UPnP check this box 5 3 2 IP Filtering Choose Advanced IP Filtering to display the following page Figure 15 IP Filtering configuration This page allows you to configure the CMRG to prevent local PCs from getting access to the WAN by specifying those IP addresses that should be filtered By entering starting and ending I...

Page 26: ...e following page Figure 16 MAC filtering configuration This page is used to prevent PCs from sending outgoing TCP UDP traffic to the WAN via their MAC address This is useful for the fact that the MAC address of a specific NIC card never changes unlike its IP address which can be assigned via DHCP server or hard coded to various addresses over time 5 3 4 Port Filtering Choose Advanced Port Filterin...

Page 27: ... traffic is allowed out to the WAN on a per port basis Note the specified port ranges are blocked for ALL PCs and this setting is not IP address or MAC address specific For instance if you would like to block all PCs on the private LAN from accessing HTTP sites or web surfing you would set the Start Port to 80 the End Port to 80 the Protocol to TCP check the Enabled box and click Apply 5 3 5 Forwa...

Page 28: ...umbers that should be forwarded locally and the IP address to which traffic to those ports should be sent If only a single port specification is desired enter the same port number in the start and end locations for that IP address A table of commonly used Port numbers is supplied on the page for convenience If both external and Local internal port numbers are present the Local port number is a man...

Page 29: ...ed to as bi directional ports data If no outgoing traffic is detected on the Trigger Range ports for 10 minutes the Target Range ports will close This is a safer method for opening specific ports for special applications e g video conferencing programs interactive gaming file transfer in chat programs etc because they are dynamically triggered and not held open constantly or erroneously left open ...

Page 30: ...t You may configure one PC to be the DMZ host This setting is generally used for PC s using problem applications that use random port numbers and do not function correctly with specific port triggers or port forwarding setups mentioned earlier If a specific PC is set as a DMZ Host remember to set this back to 0 when finished with the needed application since this PC will be effectively exposed to ...

Page 31: ...llowing this example uses BRCMV2 as the RIP Authentication Key and 1 as the Key ID 1 To turn on RIP MD5 Authentication check the Enable box 2 To specify a RIP MD5 Authentication Key String type BRCMV2 for this example key name a string value to match CMTS key name value 3 To specify a RIP MD5 Auth Key ID type 1 key number a number to match the CMTS key number value 4 To change the RIP annoucement ...

Page 32: ...red to accept RIPv2 messages If the CMRG is registered on the CMTS you should see messages that are similar to the message below 00 28 41 RIP received packet with MD5 authentication 00 28 41 RIP received v2 update from 10 24 81 148 on Cable2 0 00 28 41 10 24 81 0 24 via 10 24 81 148 in 1 hops The CMRG has broadcast that is connected to the network 10 24 81 0 24 through the interface 10 24 81 148 T...

Page 33: ...ed Cable2 0 C 10 24 95 16 28 is directly connected FastEthernet0 0 S 0 0 0 0 0 1 0 via 10 24 95 17 In the example above the CMRG was set up to send RIPv2 messages to the CMTS The CMTS was also set up to receive these messages 5 4 Firewall Choose Firewall and the submenus of Firewall are shown as below Figure 20 submenus of Firewall 5 4 1 Basic Choose Firewall Basic to display the following page Th...

Page 34: ...ss to even fewer services The off setting allows all traffic to pass Block Fragmented IP packets prevents all fragmented IP packets from passing through the firewall Port Scan Detection detects and blocks port scan activity originating on both the LAN and WAN IP Flood Detection detects and blocks packet floods originating on both the LAN and WAN The Apply button must be clicked in order to activat...

Page 35: ...his page also An Ethernet mac address of all 0 s will apply to all CPE s A start and end port of 0 will apply to all ports 5 4 3 Local Log Choose Firewall Local Log to display the following page The Local Log can send firewall attack reports out in two different ways Individual emails can be sent out automatically each time the firewall is under attack and also a local log is stored within the mod...

Page 36: ...Log Choose Firewall Remote Log to display the following page The Remote Log can send firewall attack reports out to a standard SysLog server so many instances can be logged over a long period of time Individual attack or configuration items can be selected that will be sent to the SysLog server such that only the items of interest can be monitored Permitted connections blocked connections known In...

Page 37: ...gure 21 Submenus of VPN 5 5 1 Basic Choose VPN Basic to display the following page Figure 22 Basic settings This page will the status of configured tunnels To start the process of manually adding a new tunnel select the Add New Tunnel button 5 5 2 IPsec Choose VPN IPsec to display the following page ...

Page 38: ...SR808ac Cable Modem User Manual 34 Figure 23 IPsec In this page you are allowed to configure all aspects of the IPSec tunnel 5 5 3 Event Log Choose VPN Event Log to display the following page ...

Page 39: ...er Manual 35 Figure 24 Event Log configuration This page will events related to VPN 5 6 Wireless Choose Wireless and the submenus of Wireless are shown as below 5 6 1 Radio Choose Wireless Radio to display the following page ...

Page 40: ...tions are allowed to associate with the CM If it s set to off then b g n are all allowed Bandwidth 802 11b g channels are only 20 MHz wide but 802 11n channels may be 40 MHz wide There are some backward compatibility issues with 40 MHz channels though These issues are more likely to be encountered in the 2 4 GHz band where legacy 802 11b g devices may be operating using 20 MHz channels Sideband fo...

Page 41: ...OBSS Coexistence Enable Disable Overlapping BSS Coexisistence OBSS coexistence refers to the ability of the AP to support 20 MHz devices within 40 MHz channels It also allows the AP to better deal with nearby 20 MHz devices that are interfering with part of its 40 MHz channel STBC Tx STBC Space Time Block Code Switch to on will obtain the full antenna gain Scan Wireless AP s Force the Modems Acces...

Page 42: ...ts the Network Name also known as SSID of the primary network This is a 1 32 ASCII character string Closed Network The Network Name is not broadcast by the AP in a Closed Network Therefore only clients who already know the network name will be able to connect WPA Wi Fi Protected Access is a slightly older and less secure algorithm for securing a wireless network This is the Enterprise variant that...

Page 43: ...encryption modes can be set AES provides the strongest encryption while TKIP provides strong encryption with improved backward compatibility The TKIP AES mode allows both TKIP and AES capable clients to connect WPA Pre Shared Key Sets the WPA Pre Shared Key PSK This is an 8 63 ASCII character string or a 64 digit hex number Enabled when the Network Authentication method is WPA PSK or WPA2 PSK RADI...

Page 44: ...he encryption transmit key PassPhrase Sets the text to use for WEP key generation Generate WEP Keys When WEP encryption is enabled this action button converts the passphrase entered to a set of WEP keys Remember to click the Apply button to save the keys Automatic Security Configuration Wi Fi Protected Setup WPS WPS is the standard method to achieve the same goal as Broadcom s SES The protocol is ...

Page 45: ...ost of the configuration points on the guest network page are identical to those on the Primary Network page A few extras are explained below DHCP Server Enables the DHCP server to gives out leases to guest network clients from the specified lease pool If the DHCP server is disabled guest network STAs need to be assigned static IP addresses IP Address This specifies the gateway IP relayed to guest...

Page 46: ...ed to display the following page This page allows you to configure advanced wireless settings 54g Mode Sets the network mode Choices are 54g Auto 54g Performance 54g LRS and 802 11b Only 54g Auto accepts 54g 802 11g and 802 11b clients but optimizes performance based on the type of clients connected 54g Performance accepts only 54g clients and provides the highest throughout nearby 802 11b network...

Page 47: ...Multicast Rate This is the rate at which you send out multicast packets to stations Multicast packets are not acknowledged NPHY Rate Choose 802 11n rate to be applied to all unicast packets Legacy Rate N mode must be off on the radio webpage for this control to be active When active the user can force the rate in which the AP will operate Beacon Interval Sets the beacon interval in milliseconds fo...

Page 48: ... information about wireless clients connected to your access point MAC Restrict Mode Selects whether wireless clients with the specified MAC address are allowed or denied wireless access To allow all clients select Disabled MAC Addresses A list of wireless client MAC addresses to allow or deny based on the Restrict Mode setting Valid input MAC address formats are XX XX XX XX XX XX and XX XX XX XX ...

Page 49: ...d since data was transmitted to or received from the client 5 6 6 WMM Choose Wireless WMM to display the following page This page allows you to configure WiFi Multi Media WMM WMM is an implementation of Quality of Service Qos which is defined by the IEEE standard 802 11e WMM Support Sets WMM support Choices are Auto On or Off If enabled Auto or On the WME Information Element is included in beacon ...

Page 50: ...n Window CWmin and CWmax Arbitration Inter Frame Spacing Number AIFSN and Transmit Opportunity Limit TXOP Limit There are also two AP specific settings Admission Control and Discard Oldest First Admission control specifies if admission control is enforced for the Access Categories Discard Oldest First specifies the discard policy for the queues On discards the oldest first Off discards the newest ...

Page 51: ...rm a single network using wireless point to point links Wireless Bridging This setting enables or disables wireless bridging Remote Bridges Table of remote bridge MAC addresses authorized to establish a wireless bridge Up to 4 remote bridges may be connected Typically you will also have to enter your AP s MAC address see section 0 on the remote bridge too 5 7 MTA Choose MTA and the submenus of MTA...

Page 52: ...nual 48 5 7 1 Status Choose MTA Status to display the following page This page displays initialization status of the MTA including Registration Provisioning and line states 5 7 2 DHCP Choose MTA DHCP to display the following page ...

Page 53: ... address of the DNS server lease timers and DHCP option 122 values 5 7 3 QoS Choose MTA QoS to display the following page This page displays information about Downstream FEC errors Service Flow counters and the state of Payload Header Suppression 5 7 4 Provisioning Choose MTA Provisioning to display the following page ...

Page 54: ...isplay the contents of the MTA config file and the value of assorted MTA mib s 5 7 5 Event Log Choose MTA Event Log to display the following page This page display MTA events 5 8 Battery Choose Battery and the submenus of Battery are shown as below ...

Page 55: ...hoose Battery Controller to display the following page This page display general battery pack information and the Pico version UPS driver 5 8 2 UPS Choose Battery UPS to display the following page This page displays the status of the individual batteries ...

Page 56: ...page This page display the interface delay values Each interface has the ability to support a different value for the shutdown delay that will be applied after switching to battery power 5 9 USB Choose USB and the submenus of USB are shown as below 5 9 1 USB Basic Choose USB USB Basic to display the following page ...

Page 57: ...uttons on the left side frame 5 9 2 Approved Devices Choose USB Approved Devices to display the following page This page allow to choose if any USB storage device plugged into the modem can be used or only approved devices If approved device is selected then each device must be manually approved on this page USB storage devices can be safely removed ...

Page 58: ...ser will be asked which device they want to remove 5 9 3 Storage Basic Choose USB Storage Basic to display the following page This page allows you to configure the device name and what folders should be shared 5 9 4 Storage Advanced Choose USB Storage Advanced to display the following page ...

Page 59: ...name can is configured here The Windows Network and FTP support can be enabled or disabled on this page The IP address displayed in the link field is the Linux IP stack address that should be used for the FTP server address in the FTP clients 5 9 5 MediaServer Choose USB MediaServer to display the following page ...

Page 60: ...llow you to configure the DLNA media server The media server name and the file names that will be scanned on the USB storage devices are configured using this page If desired the media Server can scan the device periodically to check for new files ...

Page 61: ...t installed and used in accordance with the instructions may cause harmful interference to radio communications However there is no guarantee that interference will not occur in a particular installation If this equipment does cause harmful interference to radio or television reception which can be determined by turning the equipment off and on the user is encouraged to try to correct the interfer...

Page 62: ...ue subi même si le brouillage est susceptible d en compromettre le fonctionnement The device meets the exemption from the routine evaluation limits in section 2 5 of RSS 102 and compliance with RSS 102 RF exposure users can obtain Canadian information on RF exposure and compliance Le dispositif rencontre l exemption des limites courantes d évaluation dans la section 2 5 de RSS 102 et la conformité...

Page 63: ...uvé par Industrie Canada pour fonctionner avec les types d antenne énumérés ci dessous et ayant un gain admissible maximal et l impédance requise pour chaque type d antenne Les types d antenne non inclus dans cette liste ou dont le gain est supérieur au gain maximal indiqué sont strictement interdits pour l exploitation de l émetteur 5GHz 5150 5250 MHz band is restricted to indoor operations only ...

Reviews: