background image

User Manual of Digital Video Recorder 


145 

10.5


Checking HDD Status 

Purpose: 

You may check the status of the installed HDDs on device so as to take immediate check and maintenance in case 

of HDD failure.


Checking HDD Status on HDD Information Interface   

Steps: 

1.


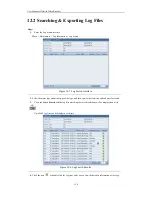
Enter the HDD Information interface. 

Menu > HDD>General   

2.


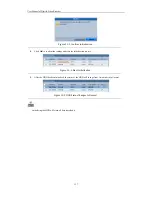
Check the status of each HDD which is displayed on the list.   


Figure 10. 19


View HDD Status (1)


If the status of HDD is 

Normal 

or 

Sleeping

, it works normally. If the status is 

Uninitialized 

or 

Abnormal

, please 

initialize the HDD before use. And if the HDD initialization is failed, please replace it with a new one. 

Checking HDD Status on HDD Information Interface 

Steps: 

1.


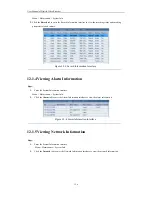
Enter the System Information interface. 

Menu > Maintenance > System Info   

2.


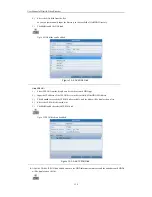
Click the 

HDD

 tab to view the status of each HDD displayed on the list. 


Figure 10. 20


View HDD Status (2)


Summary of Contents for H20HVR16A16I

Page 1: ...SmartWatch Hybrid Video Recorder H20HVR4A4I H20HVR8A8I H20HVR16A16I Operation Manual...

Page 2: ...o the new version of this manual We will readily improve or update the products or procedures described in the manual In order to simplify the description we make the following conventions unless othe...

Page 3: ...rence received including interference that may cause undesired operation EU Conformity Statement This product and if applicable the supplied accessories too are marked with CE and comply therefore wit...

Page 4: ...s properly secured to a rack or shelf Major shocks or jolts to the unit as a result of dropping it may cause damage to the sensitive electronics within the unit Use the device in conjunction with an U...

Page 5: ...output and VGA output at up to 1920 1080P resolution 1 4 6 8 9 16 division live view is supported and the display sequence of screens is adjustable Live view screen can be switched in group and manual...

Page 6: ...mismatch illegal login network disconnected IP confliction abnormal record HDD error and HDD full etc Alarm triggers full screen monitoring audio alarm notifying surveillance center sending email and...

Page 7: ...channel transmission Alarm and exception information can be sent to the remote host Remotely start stop recording Remotely start stop alarm output Upgraded by remote FTP server is supported Remote PT...

Page 8: ...2 Using an Auxiliary Monitor 34 3 2 3 Quick Setting Toolbar in Live View Mode 34 3 3 Adjusting Live View Settings 37 3 4 User Logout 39 Chapter 4 PTZ Controls 40 4 1 Configuring PTZ Settings 41 4 2 S...

Page 9: ...ing Sensor Alarms 103 8 3 Detecting Video Loss 106 8 4 Detecting Video Tampering 108 8 5 Handling Exceptions 110 8 6 Setting Alarm Linkage Actions 111 8 7 Triggering or Clearing Alarm Output Manually...

Page 10: ...tenance 154 12 1 Viewing System Information 155 12 1 1 Viewing Device Information 155 12 1 2 Viewing Camera Information 155 12 1 3 Viewing Record Information 155 12 1 4 Viewing Alarm Information 156 1...

Page 11: ...User Manual of Digital Video Recorder 10 Troubleshooting 176 List of Compatible IP Cameras 180...

Page 12: ...User Manual of Digital Video Recorder 11 Chapter 1 Introduction...

Page 13: ...nel No Name Function Description 1 POWER POWER indicator turns green when device is powered up 2 STATUS STATUS indicator lights in red when data is being read from or written to HDD 3 Tx Rx Tx Rx indi...

Page 14: ...1 2 Table 1 2 Description of the IR Remote Control Buttons No Name Description 1 POWER Power on off the device 2 DEV Enables Disables Remote Control 3 Alphanumeric Buttons Switch to the corresponding...

Page 15: ...Button Switch single screen and multi screen mode In PTZ Control mode it is used to adjust the focus in conjunction with the A FOCUS button 12 DIRECTION ENTER Buttons The DIRECTION buttons are used t...

Page 16: ...heck and remember device ID The default ID is 255 This ID is valid for all the IR remote controls 3 Press the DEV button on the remote control 4 Enter the device ID in step 2 5 Press the ENTER button...

Page 17: ...The operation of the mouse Table 1 3 Description of the Mouse Control Name Action Description Left Click Single Click Live view Select channel and show the quick set menu Menu Select and enter Double...

Page 18: ...Method Description Figure 1 3 Soft Keyboard Description of the buttons on the soft keyboard Table 1 4 Description of the Soft Keyboard Icons Icon Description Icon Description Number English letter Low...

Page 19: ...SB flash memory devices 4 HDMI HDMI video output 5 ALARM Alarm in out 6 VGA DB15 connector for VGA output Display local video output and menu 7 AUDIO OUT RCA connector for audio output 8 LAN Interface...

Page 20: ...wer Supply UPS be used in conjunction with the device 2 Press the POWER button on the rear panel The Power indicator LED should turn green indicating that the device begins to start up Shutting down t...

Page 21: ...User Manual of Digital Video Recorder 20 Chapter 2 Getting Started...

Page 22: ...after the language settings are configured as shown in Figure 2 2 Figure 2 2 Start Wizard Interface Operating the Setup Wizard 1 The Start Wizard can walk you through some important settings of the d...

Page 23: ...d check the New Admin Password checkbox Enter the new password and confirm the password in the given fields 5 Click Next to enter the date and time settings window as shown in Figure 2 4 Figure 2 4 Da...

Page 24: ...Figure 2 6 HDD Management 8 To initialize the HDD click Init Initialization removes all the data saved in the HDD 9 Click Next to enter the IP Camera Management window as shown in Figure 2 7 Figure 2...

Page 25: ...gital Video Recorder 24 Figure 2 8 Record Settings Optionally click Copy to copy the settings to other channels as shown in Figure 2 9 Figure 2 9 Copy Record Settings 11 Click OK to complete the start...

Page 26: ...e view window and a live view toolbar appears at the top of the screen as follows Figure 2 10 Live View Toolbar Adding IP Cameras Automatically Steps 1 Click the icon on the live view toolbar to enter...

Page 27: ...nected to the device successfully The added IP camera does not work properly Edit the advanced settings including IP address port number and password of the added IP camera 3 To add other cameras 1 Cl...

Page 28: ...network cameras can be added to H20HVR series at most when all the analog cameras are disabled 2 Click the IP Camera tab to enter the IP Camera Management interface The online cameras in the same netw...

Page 29: ...he Custom Adding interface Figure 2 13 Input the required information including the IP address protocol management port user name and admin password and then click Add to add the camera manually When...

Page 30: ...e standard protocols Steps 1 Click the button Protocol on the Custom Adding interface to open the Protocol Management page Figure 2 19 Protocol Management Interface 2 There are 16 customized protocols...

Page 31: ...a adopting custom protocol must support getting stream through standard RTSP Transfer Protocol Select the transfer protocol for the custom protocol Port Set the port number for the custom protocol Pat...

Page 32: ...User Manual of Digital Video Recorder 31 Chapter 3 Live View...

Page 33: ...to the Live View mode Live View Icons In the live view mode there are icons in the upper right corner of the live view window showing the status of the record and alarm in the channel so that you can...

Page 34: ...e connection of the output interfaces to define the main and auxiliary output interfaces See the table below for the priority level of the main and aux outputs Table 3 2 Priorities of Outputs HDMI VGA...

Page 35: ...he front panel or remote 3 2 2 Using an Auxiliary Monitor Certain features of the Live View are also available while in an Aux monitor These features include Single Screen Switch to a full screen disp...

Page 36: ...found it means there is no record during the last five minutes Digital Zoom function makes the camera zoom in on selected area thus to get a close view of the picture You can click and drag the mouse...

Page 37: ...d click Copy to copy the image settings to other analog channels For Network Cameras You can customize the brightness contrast saturation and hue of the network camera Figure 3 5 Image Settings Custom...

Page 38: ...e in this menu include Video Output Interface Designates the output to configure the settings for Outputs include HDMI VGA and Main CVBS Live View Mode Designates the window division mode to be used f...

Page 39: ...then double click to select a channel in the left region Thus the selected channel will be displayed in the corresponding screen 4 Click Apply to save the setting means the channel will not be display...

Page 40: ...ew mode If you want to do more operations you will need to enter user name and password to log in again Steps 1 Enter the Shutdown menu Menu Shutdown Figure 3 9 Shutdown 2 Click Logout After you have...

Page 41: ...User Manual of Digital Video Recorder 40 Chapter 4 PTZ Controls...

Page 42: ...the PTZ Settings interface Menu Camera PTZ Figure 4 1 PTZ General 2 Select the camera for PTZ setting from the Camera drop down list 3 Input the parameters of the PTZ camera The parameters should be...

Page 43: ...Camera PTZ More Settings Figure 4 2 PTZ More Settings 2 Use the directional buttons on the PTZ control panel to steer the camera to the desired view 3 Check 4 Click the preset number to save the prese...

Page 44: ...click the PTZ Control icon in the quick setting bar to open the PTZ panel 2 Click the Camera tab on the panel and select the channel for control on the camera list 3 Click the Preset tab on the panel...

Page 45: ...ameters such as the preset No duration of staying for one key point and speed of patrol The key point is corresponding to the preset The Preset determines the order at which the PTZ will follow while...

Page 46: ...ct the patrol number and then click to call the patrol 3 Click to stop it Figure 4 9 Calling Patrol Call a patrol in live view mode Steps 1 In the live view mode press the PTZ button on the front pane...

Page 47: ...tions Steps 1 Enter the PTZ Control interface Menu Camera PTZ More Settings 2 Select the pattern number from the drop down list Figure 4 11 PTZ Pattern 3 Click and then click and drag the image or use...

Page 48: ...PTZ moves according to the pattern 4 Click to stop it Figure 4 12 PTZ Calling Pattern Call a pattern in live view mode Steps 1 In the live view mode press the PTZ button on the front panel or click t...

Page 49: ...no mouse is connected the icon will be displayed in the lower left corner of the window indicating that this camera is in PTZ control mode Figure 4 14 PTZ Panel Table 4 1 Description of the PTZ panel...

Page 50: ...User Manual of Digital Video Recorder 49 Chapter 5 Recording Settings...

Page 51: ...ls see Chapter 10 4 Configuring Quota Mode 3 If the HDD mode is Group you should set the HDD group For details see Chapter 5 8 Configuring HDD Group for Recording Steps 1 Enter the Record settings int...

Page 52: ...es with lower bitrate This feature is only supported by analog cameras Enable 960 Mode Enable 960 mode to get the WD1 NTSC 960 480 PAL 960 576 recording resolution Figure 5 3 Record Encoding when HDD...

Page 53: ...ick Copy to copy the settings to other analog channels if needed 4 Configure the overwrite mode of the HDD Menu Record Advanced Check checkbox to enable the overwrite mode and then the record files wi...

Page 54: ...dit button to enter the Schedule Editing interface Figure 5 9 Edit Schedule 2 Select the day for which you want to set the schedule from the drop down list 3 Click the icon to specify the start time a...

Page 55: ...ording 5 Click OK to save the settings Option 2 Draw the Schedule Steps 1 Click to select a recording type including Continuous Motion Alarm M A M A and None 2 Click and drag the mouse to draw the tim...

Page 56: ...to save the settings Up to 8 periods can be configured for each day And the time periods can t be overlapped To enable Motion Alarm Motion Alarm motion or alarm and Motion Alarm motion and alarm trig...

Page 57: ...full screen as the motion detection area and click Clear to clear all the motion detection areas 4 Click to configure the motion detection settings in the pop up message box Figure 5 14 Motion Detect...

Page 58: ...User Manual of Digital Video Recorder 57 Figure 5 15 Record Schedule...

Page 59: ...ings 2 Click the Alarm Input tab Figure 5 17 Alarm Settings Alarm Input 1 Select the Alarm Input No from the drop down list and configure alarm parameters 2 Edit the alarm name as desired and choose N...

Page 60: ...e above steps to configure other alarm input parameters Optionally you can click Copy to copy the settings to other alarm inputs Figure 5 19 Copy Alarm Input Settings 3 Set the alarm schedule for reco...

Page 61: ...ecording Click the status icon before camera number The icon turns to or click the status icon before Analog IP Camera to enable the manual recording of all cameras 3 Disable the manual recording Clic...

Page 62: ...holiday schedule 1 Click the icon to enter the Edit Holiday Schedule interface Figure 5 25 Edit Holiday Settings 2 Check checkbox to enable the holiday schedule 3 Select the mode of date format from t...

Page 63: ...User Manual of Digital Video Recorder 62 You need to select schedule type as Holiday or draw the schedule for the Holiday Figure 5 26 Edit Schedule Holiday Figure 5 27 Draw Schedule Holiday...

Page 64: ...re should be at least another HDD which is in R W mode Steps 1 Enter HDD Information interface Menu HDD General Figure 5 28 HDD General 2 Select the HDD and click the icon to enter the Local HDD Setti...

Page 65: ...r Manual of Digital Video Recorder 64 4 Click Apply to save settings Repeat the above steps 2 4 for configuring other channels Optionally you can click Copy to copy the settings to other analog channe...

Page 66: ...s see Chapter 10 3 Managing HDD Group 3 Click the General tab on the left side and click the icon to enter the Local HDD Settings interface Figure 5 32 Local HDD Settings 4 Configure the HDD group 1 S...

Page 67: ...from the drop down list of Record on HDD Group 3 Check the checkboxes to select the channels you want to save in this group 4 Click Apply to save the settings After having configured the HDD groups yo...

Page 68: ...es to select the channels 3 Select the record type and file type from the drop down list and specify the start and end time for search 4 Click Search and the record files meeting the search conditions...

Page 69: ...interface Figure 5 37 Local HDD Settings 3 Select Read only as the HDD Property 4 Click Apply to save the settings and click OK to exit Files in Read only HDD cannot be deleted meanwhile no files can...

Page 70: ...User Manual of Digital Video Recorder 69 Chapter 6 Playback...

Page 71: ...e 6 1 Instant Playback Interface Playback by channel Steps 1 Enter the Playback interface Right click on the live view window and the live view toolbar appears at the top of the screen Then click the...

Page 72: ...xplanation of Playback by channel Interface Button Operation Button Operation Button Operation Button Operation Mute Audio on Start Stop clipping Add default tag Add customized tag Tag management Digi...

Page 73: ...e Menu Playback Normal 2 Check the checkbox to select the camera for playback on the camera list 3 Double click to select a date on the calendar to play back the record file Or select a date on the ca...

Page 74: ...nation of Playback by time Interface Button Operation Button Operation Button Operation Button Operation Mute Audio on Start Stop clipping Add default tag Add customized tag Tag management Digital Zoo...

Page 75: ...e configured For details see Chapter 5 3 and Chapter 5 4 Purpose The recordings triggered by different types of event e g alarm input and motion detection can be searched and played back if needed Ste...

Page 76: ...play The time you set to play back after the event For example when an alarm triggered the recording ends at 11 00 if you set the post play time as 5 seconds the video plays back till 11 00 05 If onl...

Page 77: ...peration Button Operation Mute Audio on Start Stop clipping Add default tag Add customized tag Tag management Digital Zoom Pause Play reverse Pause Play Stop 30s reverse 30s forward Slow forward Fast...

Page 78: ...ough tag playback Before you start 1 Enter the Normal Playback or Event Playback interface For details see Chapter 6 1 2 or Chapter 6 1 3 Figure 6 12 Interface of Playback 2 Click the icon at the bott...

Page 79: ...Playback Tag Figure 6 14 Video Search by Tag 2 Select the channels from the list and specify the start time and end time for search 3 Optionally you can input the keyword of the tag name in the Keywor...

Page 80: ...e can be added to the time point of the tag according to actual needs Figure 6 16 Interface of Playback by Tag Figure 6 17 Toolbar of Playback by Tag Table 6 4 Detailed Explanation of Playback by tag...

Page 81: ...to locate specific frames 6 1 5 Playing Back by Searching System Log Purpose You can also play back record file s after searching system logs Steps 1 Enter Log Information interface Menu Maintenance...

Page 82: ...og the message box No result found will pop up Figure 6 20 Interface of Playback by Log 6 1 6 Playing Back External Files Purpose The record files stored in the external storage devices e g USB flash...

Page 83: ...2 The files stored in the extrenal device are listed on the right side and you can click the Refresh button to refresh the file list 2 Select a record file and click the icon to play back it Figure 6...

Page 84: ...se button in toolbar 6 2 2 Smart Search Purpose Smart Search allows you to analyze a certain area scene dynamically and to quickly detect any motion events that have occurred in this area Before you s...

Page 85: ...pears at the bottom of the screen 3 Click and drag the mouse to draw area s for smart search You can click the icon to set the full screen as target searching area Multi area and full screen searching...

Page 86: ...of Smart search playback Toolbar Button Operation Button Operation Button Operation Button Operation Mute Audio on Start Stop clipping Add default tag Add customized tag Tag management Digital Zoom S...

Page 87: ...drag the mouse to draw a red rectangle on the window in the lower right corner of the interface And then the image within it will be enlarged up to 16 times 4 Right click to exit the Digital Zoom mod...

Page 88: ...User Manual of Digital Video Recorder 87 Figure 6 28 4 ch Synchronous Playback Interface 3 Click the icon on the playback control toolbar and the record files will be played back reversely...

Page 89: ...User Manual of Digital Video Recorder 88 Chapter 7 Backup...

Page 90: ...search conditions and click the button Search to enter the search result interface You can click the button to play the record file if you want to view it Multiple record types are selectable Continuo...

Page 91: ...And then select to export the video and log files or the player to the backup device Click OK to confirm Figure 7 4 Export Selection A prompt message box will pop up after the backup process is comple...

Page 92: ...ked up on USB devices including USB flash drives USB HDDs USB writers Steps 1 Enter Event Export interface Menu Export Event Figure 7 7 Event Search for Backup 2 Select Alarm Input or Motion from the...

Page 93: ...ick Export to enter the Export interface Click the button Details and you can view the detailed information of selected events Then select the record files click the button Export to enter the Export...

Page 94: ...files or the player to the backup device Click OK to confirm Figure 7 11 Export Selection A prompt message box will pop up after the backup process is complete Click OK to confirm Figure 7 12 Export...

Page 95: ...ayback to USB devices including USB flash drives USB HDDs and USB writers Steps 1 Enter Playback Figure 7 14 Interface of Playback by Time 2 During playback click the icon in the playback toolbar to s...

Page 96: ...lick No to exit and do not save video clips Figure 7 16 Video Clip Export Interface using USB Flash Drive 5 Select the backup device from the drop down list click the button Export And then select to...

Page 97: ...Finished 6 The exported video clips will be displayed in a list Click the icon and you can play the selected video clip Click the icon and you can delete the selected video clip from the backup device...

Page 98: ...it Select a record file picture click the icon and then you can play and view the video picture For USB Flash Drives and USB HDDs Click the button New Folder and you can create a new folder in the bac...

Page 99: ...User Manual of Digital Video Recorder 98 Reconnect device...

Page 100: ...User Manual of Digital Video Recorder 99 Chapter 8 Alarm Settings...

Page 101: ...area for the detection region And then drag the slider on the sensitivity bar to adjust the motion detection sensitivity You can also click Full Screen to set the whole video area as the detection reg...

Page 102: ...linkage actions of motion detection Click Apply to save the settings and click OK to exit For details of the linkage actions see Chapter 8 6 Setting Alarm Linkage Actions Figure 8 5 Set Alarm Linkage...

Page 103: ...User Manual of Digital Video Recorder 102 Figure 8 6 Copy Settings of Motion Detection...

Page 104: ...he alarm name as desired and set the alarm type as N C Normal Closed or N O Normal Open Figure 8 8 Alarm Input Settings Interface 3 Click the icon to configure more alarm input settings 4 Click the Tr...

Page 105: ...larm Linkage Actions Figure 8 11 Set Alarm Linkage Actions of Alarm Input 7 Click the PTZ Linking tab select the PTZ linking channel and set the PTZ parameters Click Apply to save the settings and cli...

Page 106: ...pply on the Alarm Input Settings interface to save the settings 9 Repeat the above steps to configure the alarm input settings for other channels Optionally you can click Copy on the Alarm Input Setti...

Page 107: ...ck the checkbox of Enable Video Loss Alarm to enable the function of video loss alarm 3 Click the icon to configure more video loss alarm settings 4 Click the Arming Schedule tab select a day in the w...

Page 108: ...Settings interface to save the settings 7 Repeat the above steps to configure the video loss alarm settings for other channels Optionally you can click Copy on the Video Loss interface to copy the se...

Page 109: ...be configured and check the checkbox of Enable Video Tampering Detection to enable the function of video tampering alarm 3 Click the icon to configure more video tampering alarm settings 4 Click the...

Page 110: ...erface to save the settings 7 Repeat the above steps to configure the video tampering detection settings for other channels Optionally you can click Copy on the Video Tampering Detection Settings inte...

Page 111: ...gnal Input Output Video Standard Mismatch I O video standards do not match Record Exception No space for saving recorded files Input Output Video Standard Mismatch and Video Signal Exception are not s...

Page 112: ...the Live View interface You must select the channel s triggered for full screen monitoring during Trigger Channel settings Audible Warning Trigger an audible beep when an alarm is detected Notify Surv...

Page 113: ...he time periods for alarm output arming schedule Click Apply to save the settings and click OK to exit Figure 8 24 Set Arming Schedule of Alarm Output Up to 8 time periods can be set for each day and...

Page 114: ...output and then you can only clear the alarm manually Steps 1 Enter the Manual Alarm Settings interface Menu Manual Alarm Figure 8 26 Manual Alarm Settings Interface 2 Click to select the alarm outpu...

Page 115: ...User Manual of Digital Video Recorder 114 Chapter 9 Network Settings...

Page 116: ...e 9 1 Network Settings Interface 2 Click the General tab to enter the General Settings interface You can configure the following settings NIC Type IPv4 Address IPv4 Subnet Mask IPv4 Gateway MTU and DN...

Page 117: ...ssword should be assigned by your ISP Figure 9 3 PPPoE Settings Interface 5 Click Apply and reboot the device to activate the new settings You can go to Menu Maintenance System Info Network interface...

Page 118: ...The server address should be the IP address of the PC that runs IPServer Figure 9 5 IPServer Settings Interface DynDNS 1 Enter Server Address for DynDNS e g members dyndns org 2 In the Device Domain N...

Page 119: ...2 Input the Device Domain Name You can register the device domain name in the HiDDNS server first and then input the name to the Device Domain Name field on the device you can also input the domain na...

Page 120: ...ame Device Name Option 1 Access the Device via Web Browser Open a web browser and enter http www hiddns com alias in the address bar Alias refers to the Device Domain Name on the device or the Device...

Page 121: ...ve the settings 9 2 3 Configuring NTP Server Settings Purpose A Network Time Protocol NTP Server can be configured on your device to ensure the accuracy of system date time Steps 1 Enter the Network S...

Page 122: ...P Settings Purpose You can use Simple Network Management Protocol SNMP to get device status and parameters related information Steps 1 Enter the Network Settings interface Menu Configuration Network 2...

Page 123: ...is set as multi address the Default Route of the device should be in the same network segment as that of the LAN IP address of the router Steps 1 Enter the Network Settings interface Menu Configuratio...

Page 124: ...the UPnP settings under the same router the value of the port number for each device should be unique Figure 9 18 External Port Settings Dialog Box 2 Click Apply to save the settings 3 You can click...

Page 125: ...pply to save the settings 9 2 7 Configuring Multicast Settings Purpose The multicast can be configured to realize live view for more than 128 cameras through network A multicast address spans the Clas...

Page 126: ...iguration Network 2 Click the More Settings tab to enter the More Settings interface Figure 9 23 RTSP Settings Interface 3 Input the RTSP port in the text field of RTSP Service Port The default RTSP p...

Page 127: ...per Text Transfer Protocol Secure ensures the data transferred is encrypted using Secure Socket Layer SSL or Transport Layer Security TLS HTTPS provides authentication of the web site and associated w...

Page 128: ...load of record files through web browser or CMS software If you enable the high speed download function the local menu operation will be affected It is recommended to disable this function after finis...

Page 129: ...he email accounts to which you want to send notification Steps 1 Enter the Network Settings interface Menu Configuration Network 2 Set the IPv4 Address IPv4 Subnet Mask IPv4 Gateway and the Preferred...

Page 130: ...rver Sender The name of sender Sender s Address The Email address of sender Select Receivers Select the receiver Up to 3 receivers can be configured Receiver The name of user to be notified Receiver s...

Page 131: ...real time information of device such as linking status MTU sending receiving rate etc Steps 1 Enter the Network Traffic interface Menu Maintenance Net Detect Figure 9 31 Network Traffic Interface 2 Y...

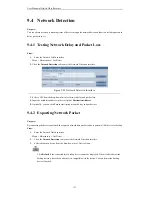
Page 132: ...the destination address in the text field of Destination Address 5 Optionally you can click Test to start testing network delay and packet loss 9 4 2 Exporting Network Packet Purpose By connecting th...

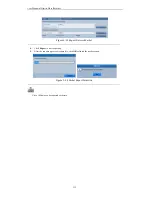
Page 133: ...order 132 Figure 9 33 Export Network Packet 4 Click Export to start exporting 5 After the exporting process is complete click OK to finish the packet export Figure 9 34 Packet Export Attention Up to 1...

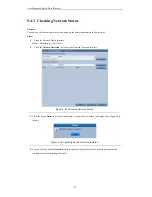
Page 134: ...ance Net Detect 2 Click the Network Detection tab to enter the Network Detection interface Figure 9 35 Checking Network Status 3 Click the button Status to get the network status If the network is nor...

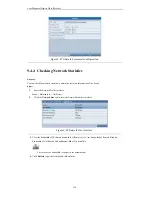
Page 135: ...the Network Traffic interface Menu Maintenance Net Detect 2 Click the Network Stat tab to enter the Network Statistics interface Figure 9 38 Network Stat Interface 3 View the bandwidth of IP Camera ba...

Page 136: ...User Manual of Digital Video Recorder 135 Chapter 10 HDD Management...

Page 137: ...following message box will pop up when the device starts up Figure 10 1 Message Box of Uninitialized HDD Click Yes to initialize it immediately or you can perform the following steps to initialize the...

Page 138: ...to confirm the settings and start the initialization process Figure 10 4 Start Initialization 5 After the HDD has been initialized the status of the HDD will change from Uninitialized to Normal Figure...

Page 139: ...D Information Interface 2 Click the button Add to enter the Add NetHDD interface Figure 10 7 Adding NetHDD Interface 3 You can add 2 types of network HDDs to the device NAS and IP SAN Add the NAS disk...

Page 140: ...down list as the network HDD type 2 Input the IP address of the IP SAN device in the text field of NetHDD IP Address 3 Click Search to search the IP SAN disks available and the disks will be displaye...

Page 141: ...User Manual of Digital Video Recorder 140 If the added network HDD is Uninitialized please select it and click Init for initialization Figure 10 10 Initialize Added NetHDD...

Page 142: ...DD Advanced 2 Select Group as the storage mode from the drop down list Figure 10 11 Storage Mode Interface 3 Click Apply to save the settings and the following Attention box will pop up Click Yes to r...

Page 143: ...ups A HDD can be set to read only to prevent important record files from being overwritten when the HDD becomes full in overwrite recording mode When the HDD property is set to redundancy the video ca...

Page 144: ...User Manual of Digital Video Recorder 143 At least 2 hard disks must be installed on your device when you want to set a HDD to Redundancy and there is one HDD with R W property...

Page 145: ...nterface 3 Select a camera for which you set the quota mode 4 Input the storage capacity in the text fieldof Max Record Capacity GB Figure 10 17 Configure Record Quota 5 Optionally you can click Copy...

Page 146: ...status of each HDD which is displayed on the list Figure 10 19 View HDD Status 1 If the status of HDD is Normal or Sleeping it works normally If the status is Uninitialized or Abnormal please initiali...

Page 147: ...ps 1 Enter the S M A R T Settings interface Menu Maintenance HDD Detect S M A R T Settings 2 Select a HDD to view its S M A R T information list To use the HDD even when the S M A R T fails check the...

Page 148: ...Sector Detection Figure 10 22 Bad Sector Detection 2 Select a HDD and choose Full Detection or Key Area Detection as the detection type 3 Click the button Detect to start detecting Figure 10 23 Bad S...

Page 149: ...ption type from the drop down list 3 Check the checkbox to select the linkage action of HDD error The alarm type can be selected to Audible Warning Notify Surveillance Center Send Email and Trigger Al...

Page 150: ...User Manual of Digital Video Recorder 149 Chapter 11 Camera Settings...

Page 151: ...Name in the text field 4 Configure the Display Name Display Date and Display Week by checking the checkbox 5 Select the Date Format Time Format and Display Mode Figure 11 1 OSD Configuration Interface...

Page 152: ...ble privacy mask Figure 11 3 Privacy Mask Settings Interface 4 Use the mouse to draw a zone on the window The zones will be marked with different frame colors Up to 4 privacy mask zones can be set and...

Page 153: ...ring Video Parameters Steps 1 Enter the Image Settings interface Menu Camera Image Figure 11 5 Image Settings Interface for Analog Camera Figure 11 6 Image Settings Interface for IP Camera 2 Select th...

Page 154: ...needs The parameters are including Brightness Contrast Saturation Hue Sharpness and Denoising You can also click Default to restore the default settings Sharpness Denoising and restoring default sett...

Page 155: ...User Manual of Digital Video Recorder 154 Chapter 12 Device Management and Maintenance...

Page 156: ...ce to view the device name model serial No firmware version and encoding version Figure 12 1 Device Information Interface 12 1 2Viewing Camera Information Steps 1 Enter the System Information interfac...

Page 157: ...1 4Viewing Alarm Information Steps 1 Enter the System Information interface Menu Maintenance System Info 2 Click the Alarm tab to enter the Alarm Information interface to view the alarm information F...

Page 158: ...formation Interface 12 1 6Viewing HDD Information Steps 1 Enter the System Information interface Menu Maintenance System Info 2 Click the HDD tab to enter the HDD Information menu to view the HDD stat...

Page 159: ...e 2 Select the major type and minor type of the logs and then specify the start time and end time for search 3 Click the button Search and the log files matching the search conditions will be displaye...

Page 160: ...ter the Export interface All the logs you searched out will be exported to the backup device Option 2 Export all logs stored on the HDD Click the Log Export tab to enter the Log Export interface check...

Page 161: ...og Export Finished 4 The exported log files will be displayed on a list Click the icon and you can delete the selected log file from the backup device Figure 12 13 Log Export Result Please connect the...

Page 162: ...h the same parameters Steps 1 Enter the Import Export Configuration File interface Menu Maintenance Import Export Figure 12 14 Import Export Config File 2 Select the backup device from the drop down l...

Page 163: ...the backup device and then Click Upgrade to start upgrading 5 After the upgrading is complete reboot the device to activate the new firmware 12 4 2Upgrading by FTP Server Before you start Set the PC r...

Page 164: ...fault interface Menu Maintenance Default Figure 12 17 Restore Default Settings 2 Click OK to restore the default settings All the parameters of the device except the network parameters including IP ad...

Page 165: ...User Manual of Digital Video Recorder 164 Chapter 13 Others...

Page 166: ...Standard Select the CVBS output standard to NTSC or PAL which must be the same with the video input standard Resolution Select the resolution for the VGA HDMI output which must be the same with the re...

Page 167: ...enu Configuration General 2 Click the DST Settings tab Figure 13 2 DST Settings Interface 3 You can check the checkbox of Auto DST Adjustment to adjust the DST settings automatically Or you can also c...

Page 168: ...set in the range of 1 255 and the default No is 255 CVBS Output Brightness Adjust the video output brightness Auto Logout Set timeout time for menu inactivity E g when the time is set to 5 Minutes the...

Page 169: ...s 12345 The Administrator has the permission to add and delete user and configure user parameters 13 4 1Adding a User Steps 1 Enter the User Management interface Menu Configuration User Figure 13 4 Us...

Page 170: ...e 5 Select the user from the list and then click the icon to enter the Permission Settings interface Figure 13 7 User Permission Settings Interface 6 Set the operating permission of Local Configuratio...

Page 171: ...mera s Local Manual Operation Locally starting stopping manual recording picture capturing and alarm output of the selected camera s Remote Manual Operation Remotely starting stopping manual recording...

Page 172: ...ace 4 Edit the user information including user name password level and MAC address If you want to change the password of the user check checkbox to enable changing the password 5 Click OK to save the...

Page 173: ...Digital Video Recorder 172 Figure 13 12 Change Password 3 Input the old password check the checkbox of Change Password and then input the new password and confirm password 4 Click OK to save the sett...

Page 174: ...ace Menu Shutdown Figure 13 13 Shutdown Menu 2 Click the Logout button to log out or Click the Shutdown button to shut down the device or Click the Reboot button to reboot the device After you have lo...

Page 175: ...User Manual of Digital Video Recorder 174 Chapter 14 Appendix...

Page 176: ...ransceiver modem over Ethernet and in plain Metro Ethernet networks DDNS Dynamic DNS is a method protocol or network service that provides the capability for a networked device such as a router or com...

Page 177: ...e step 1 to step 3 If it is solved finish the process If not please contact the engineer from our company to do the further process There is an audible warning sound after a new unit starts up Possibl...

Page 178: ...If not please contact the engineer from our company to do the further process The IPC frequently goes online and offline and the status of it displays as Disconnected Possible Reasons a The IPC and th...

Page 179: ...s If not please contact the engineer from our company to do the further process Live view stuck when video outputs locally Possible Reasons a Poor network between device and IPC and there exists packe...

Page 180: ...the playback Reduce the channel number of playback Select Menu Record Encoding Record and set the resolution and bitrate to a lower level 3 Reduce the number of local playback channel Select Menu Play...

Page 181: ...A1D 220 V3 13 16 AC 1280 1024 ARECONT AV8185DN 65172 1600 1200 AV1305M 65175 1280 1024 AV2155 65143 1600 1200 AV2815 65220 1920 1080 AV3105M 65175 1920 1080 AV5105 65175 1920 1080 AXIS M1114 5 09 1 1...

Page 182: ...2560 1920 DS 2CD854F E V4 1 0 build 130111 2048 1536 DS 2CD754F E I V4 1 0 build 130111 2048 1536 DS 2CD8254F E I V4 1 0 build 130111 2048 1536 DS 2CD754FWD E I V4 1 0 build 130111 1920 1080 DS 2CD825...

Page 183: ...CD2032 I V4 0 9 build 130106 1280 960 DS 2CD2132 I V4 0 9 build 130106 1280 960 DS 2CD2232 I V4 0 9 build 130106 1280 960 DS 2CD2332 I V4 0 9 build 130106 1280 960 DS 2CD7133F E V4 1 0 build 130111 64...

Page 184: ...74D V4 1 4 build 130110 1280 720 DS 2DF7284 A DS 2DF7274 A DS 2DF5284 A DS 2DF5274 A V4 2 4 build 130126 1280 960 DS 2DM1 718 V2 0 1 build 110520 V3 1 2 build 121124 704 576 DS 2DM1 518 V2 0 1 build 1...

Page 185: ...Application 1 66 Image data 1 03 640 360 WV SP102 ONVIF compatibility Application 1 66 Image data 1 03 640 480 WV SP509 ONVIF compatibility Application 1 30 Image data 2 21 1280 960 WV SW559 ONVIF com...

Page 186: ...48 1536 H20IPEBIR3VF 5 00 2048 1536 H20IPSD302 5 00 1920 1080 H20IPSDIR302 5 00 1920 1080 H20IPVDIR1F 5 00 1280 960 H20IPVDIR3F 5 00 2048 1536 H20IPVVIRD1VF 5 00 1280 960 H20IPVVIRD3VF 5 00 2048 1536...

Reviews: