SD CARD RECORDING
The system is designed for SD card recording. You can manually record the video or set
the receiver to record when there is motion detected by the camera. Before recording,
you need to insert a SD card to the SD card slot. The system can support up to a 16GB
SD card.
Note: SD Card Recording is only supported when viewing via the AV Output. To
copy or playback SD Card files on a PC, remove the SD Card & insert it into your PC.
Recording Modes
Auto Recording
(Motion Activated Recording)
Press the
(Record) Motion
button on the remote control or the
(Record) A
button on
the Receiver to set the system to Automatic Recording mode . In this mode the Receiver
will start recording when motion is detected by any activated camera.
•
The recording time can be set to 5, 15 or 30 seconds after the last detection of motion.
• When motion is detected, a bleeping alarm will sound from the Receiver unit. Control the
volume using the Volume dial on the Receiver unit or the Volume control on the Remote control.
• In Quad mode, when motion is detected by a camera, the Receiver will switch to display the
image from the camera in full screen and will automatically start recording. After recording, it
will automatically switch back to Quad mode.
• Press the (Record) Motion or (Record) A button again to cancel Automatic Recording mode.
Manual Recording
Press the
(Record) •
button on the remote control to make the receiver start recording.
•
Press the button again to cancel Manual Recording.
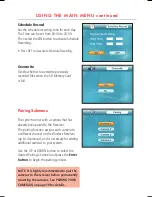
Schedule Recording
Set the recording
Start Time
and
End Time
, then activate
Schedule Recording
via the Receiver’s menu (see page 16) to enable Schedule Recording. In this mode, the
receiver will record at a certain time each day.
Note: Schedule Recording can only record ONE camera which should be selected in
View mode. Ensure Quad mode is OFF otherwise Scheduled Recording will not begin.

