110
5.
Click
Next
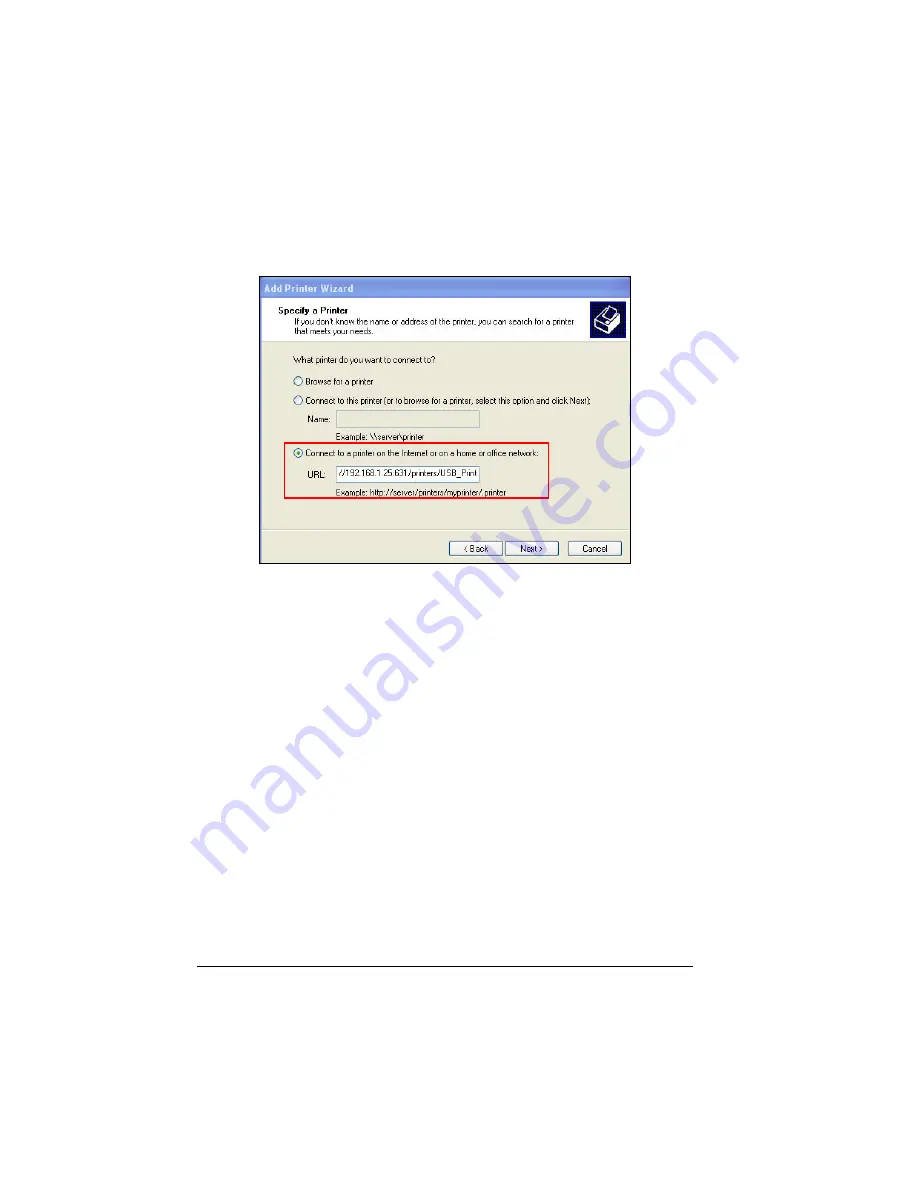
and the following screen appears. Select
Connect to a printer on
the Internet or on a home or office network
by clicking on the radio button.
6.
When setting up the USB printer on your computer, you need to check the
SMCNAS system’s IP address (e.g.,
192.168.1.25
). Then, when
installing the network printer you have to type the URL like as follows
(
http://192.168.1.25:631/printers/USB_Printer
).
7.
Click
Next
to continue.
8.
When the confirmation message appears, click
OK
to confirm.
Summary of Contents for NAS04 - annexe 3
Page 1: ...USER GUIDE SMCNAS04 SMCNAS24 TigerStore SMB Network Attached Storage Server...
Page 2: ...SMCNAS04 SMCNAS24 User s Guide Revision 1 8 February 2008...
Page 7: ......
Page 11: ......
Page 21: ......
Page 27: ......
Page 31: ...20 4 Click Finish when the following screen appears to exit installation...
Page 32: ...21 5 Click Setup NAS Discovery Utility 6 The following screen appears Click Next...
Page 37: ...26 14 The following screen appears...
Page 55: ...44 26 After rebooting log in by root again and no password is required...
Page 66: ...55 7 After rebooting it will display your new RAID mode log in again...
Page 81: ...70 1 Click Network setting and the following screen appear...
Page 86: ...75 z Click File and the following screen appears...
Page 98: ...87 3 Click Shared Folders and the following screen appears...
Page 99: ...88 4 Select the shared folder and click Assign Access The following screen appears...
Page 141: ......
Page 143: ...132 For non JAVA based...


