87
3. Enter settings shown in
Table 7.11
.
4.
Click
SAVE
to add the new IVR menu.
5. Click the IVR in the
All IVR Menus
list to see it as a tree view in
Info
.
6. For example, to create a basic Auto Attendant IVR for a trunk with Usergroup of
Privilege
dial_in
:
!
Enter
an
IVR Name
, say
Basic_AA
!
Choose
Thank you
from
Prompt
list in
Action Data
block.
!
Click
the
next to the
IVR Name
box.
!
Click
Cancel
in the pop-up window to confirm the Worktime setting is not
required.
!
Click
SAVE
.
!
Now,
Basic_AA
should be available in the
IVR List
of Trunk pages.
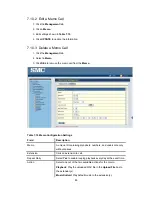
7.11.2 Edit an IVR Menu
1. Click an IVR name in the
All IVR Menus
list.
2.
Click
MODIFY
if you want to change the prompt and worktime settings for the first level
of IVR.
3. Select a prompt and modify the worktime settings.
4.
Click
UPDATE
to change the promprt and worktime settings.
5. For other settings, edit settings shown in
Table 7.11
.
6.
Click
SAVE
to update the changes.
7.11.3 Delete an IVR Menu
1. Click an IVR name in the
All IVR Menus
list.
2.
Click
DEL
to delete the IVR menu.
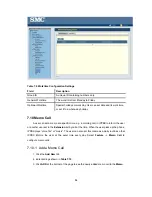
Table 7.11.1 Interactive Voice Response Configuration Settings
Field Description
All IVR Menus
Select a preferred IVR menu name.
Info
View the IVR menu as a tree view, and displays information for
items in the tree view.
IVR Name
Specify the name of the IVR.
Rule
Click a number(0-9), *, or # in the
Key
list and one of the following
actions in the
Action
list to associate an action with a key.
Summary of Contents for PBX10 FICHE
Page 1: ...SMCPBX10 TigerVoIP IP PBX Telephony System USER GUIDE TM...
Page 2: ......
Page 132: ...SMCPBX10...


