-25-
No. TQ1230001-OM101-A
6. How to change the number of cups
6.1
Change to 1 cup (with flange)
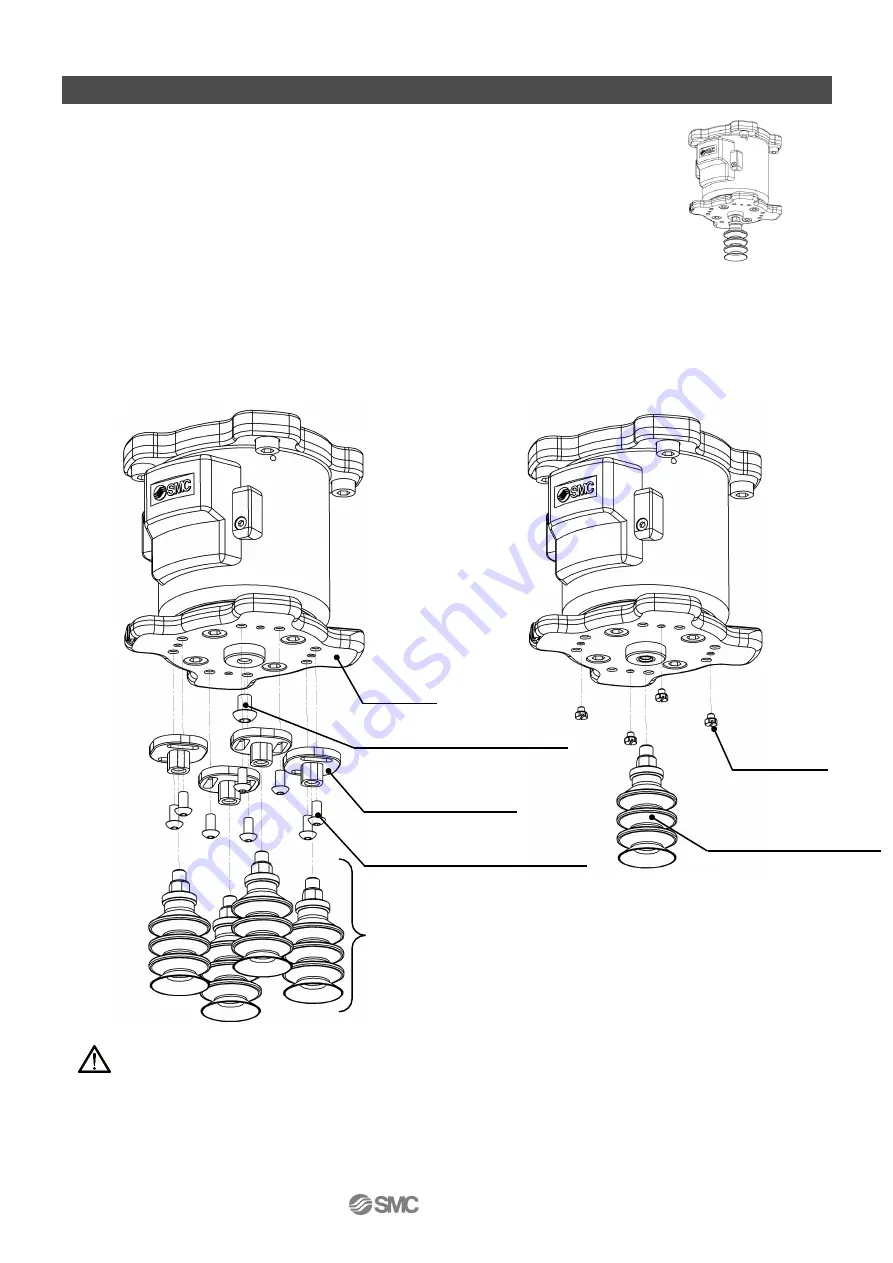
1. Removal of the cup.
(1) Remove the cup with adapter from plate B using a spanner.
(2) Loosen the bolt (M4 x 8), then remove plate B from plate A.
Be careful not to lose the O-ring.
(3) Loosen the bolt for sealing (M6X8), then remove the cup from plate A.
2. Mounting of the plug and cup with adapter
(1)
Confirm the gasket seal in the accessory plug, then mount the plugs to plate A.
(4 places)
(2) Confirm the gasket seal in the adapter, then mount the cup with adapter removed in the process (1) to
plate A.
Reassemble the parts by reversing the disassembling process with specified tightening torque.
Caution
T
ightening torque: 1N
・
m, (As reference, tighten by 45 degrees using a spanner after tightening by hand))
If tightened excessively, thread portion may be damaged and gasket may be deformed. This will cause
air leakage. Insufficient tightening may loosen the thread or cause air leakage.
(1) Disassemble the suction cups with adapter
(2) Mounting plugs and a
suction cup with adapter
Plate B (with O-ring)
Suction cup with adapter
Plate A
Hexagon socket button bolt (M6x8)
Tightening torque 5.2N
・
m
Hexagon socket button bolt (M4x8)
Tightening torque 1.5N
・
m
Plug (4 pcs)
Suction cup with adapter
Tighten by hand, and give it an
additional turn approx. 1/4
rotations with a wrench.
Completion drawing


