background image


Instructions for the User


4.11.1


How to use this program 

Use the knob to select the "easy" program (P10 *).  
The display shows "- - - - " to indicate that there are no cooking 
parameters present.  
Press 

START

 or keep it pressed to increase the preheating temperature 

(from 30° to 250°).  
Press 

STOP

 to move on to displaying the next parameter. 

The display shows 

H

2

O

.


Press 

START

 to increase the number of seconds of water infeed per 

minute (from 0 to 5 where 0 means conventional fan-mode cooking 
without the aid of humidification). 
Press 

STOP

 to increase the number of minutes of cooking (N.B. if a 

cooking time of 99 minutes is set, the cooking time will be infinite, meaning 
that cooking can only be stopped in manual mode, by ending the 
program).  
Release 

STOP

 and preheating will start automatically after 5 seconds.  

N.B. – When the cooking process is over, to repeat the same program do 
not turn the knob and press 

START

 again. 


4.12


Possible error messages on the display 

The display is able to show two different types of error: 


Err1 = probe failure. 
Err2 = low voltage: less than 160 volts. 


4.13


Technical notes 

If the power supply to the appliance fails at any time, always return the 
knob to the 0 setting before running any programs. 
 

33 

Summary of Contents for ALFA41VEK

Page 1: ...__________________ 27 5 CLEANING AND MAINTENANCE ___________________________ 34 6 EXTRAORDINARY MAINTENANCE _________________________ 36 INSTRUCTIONS FOR THE INSTALLER these are intended for the qualified engineer who is to install commission and test the appliance INSTRUCTIONS FOR THE USER these provide recommendations for use a description of the controls and the correct procedures for cleaning ...

Page 2: ...N THE HOME SEPARATE THE VARIOUS WASTE PACKAGING MATERIALS BY TYPE AND CONSIGN THEM TO THE NEAREST SEPARATE DISPOSAL CENTRE THE APPLIANCE MUST BE CONNECTED TO EARTH IN COMPLIANCE WITH ELECTRICAL SYSTEM SAFETY REGULATIONS IF THE MAIN ELECTRICAL CONNECTION IS TO BE MADE BY MEANS OF A PLUG AND SOCKET THEY MUST BOTH BE OF THE SAME TYPE AND MUST BE CONNECTED TO THE POWER SUPPLY LEAD IN ACCORDANCE WITH T...

Page 3: ...CIAL OVEN WARE DETERGENT NEVER USE ABRASIVE PRODUCTS THE OVEN S SIZE IS CALCULATED FOR A MAXIMUM LOAD OF 3 5 KG BEFORE THE APPLIANCE IS PUT INTO OPERATION ALL THE LABELS AND PROTECTIVE FILMS APPLIED INSIDE OR OUTSIDE MUST BE REMOVED THIS APPLIANCE IS TAGGED UNDER EUROPEAN DIRECTIVE 2002 96 EC ON WASTE ELECTRICAL AND ELECTRONIC EQUIPMENT WEEE THIS DIRECTIVE CONTAINS THE REGULATIONS GOVERNING THE CO...

Page 4: ... operation at 230V and power supply plug The power supply lead supplied is of 3 x 1 5 mm 2 three core H07RN F type The power supply lead must be replaced by the manufacturer or an authorised service centre to prevent all risks The power supply plug and wall socket must be of the same type in compliance with CEI standards Check that the power supply line is properly earthed The use of reductions ad...

Page 5: ...crew tightly to the hose If the water supply pipe is new or has been unused for a long time before making the connection turn the water on and allow it to flow out to ensure that it is clear and free from impurities Otherwise the water inlet may become fouled damaging the oven The oven must be supplied with water at a pressure between min 50 kPa and max 500 kPa 2 4 Steam vent pipe The rear of the ...

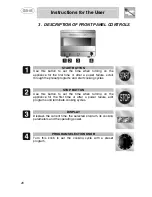
Page 6: ...ough the preset programs and start cooking cycles STOP BUTTON Use this button to set the time when turning on the appliance for the first time or after a power failure edit programs and terminate cooking cycles DISPLAY Displays the current time the selected program its cooking parameters and the operating power PROGRAM SELECTION KNOB Turn this knob to set the cooking cycle with a preset program ...

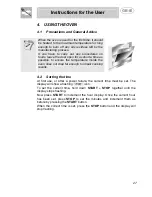
Page 7: ...re the temperature inside the oven does not drop far enough to impair cooking results 4 2 Setting the time At first use or after a power failure the current time must be set The display will show a flashing icon To set the current time hold down START STOP together until the display stops flashing Now press START to increment the hour display Once the current hour has been set press STOP to set th...

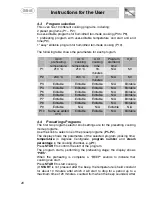
Page 8: ...able Editable N A Editable P8 Editable Editable Editable N A Editable P9 Editable N A N A Editable N A P10 Same as edited Ut C Editable Editable N A Editable 4 4 Presettings Programs The first two program selector knob settings are for the presetting cooking mode programs Use the knob to select one of the preset programs P1 P2 The display shows the parameters of the selected program cooking time t...

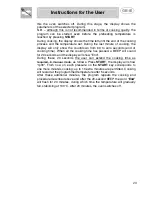
Page 9: ...g time When all the cooking time has passed a BEEP will sound for 20 seconds and the display will show End During these 20 seconds the user can extend the cooking time as required in manual mode as follows Press START the display will show tp00 From now on each pressure on the START key corresponds to one more minute s cooking up to 10 extra minutes are permitted Cooking will restart at the progra...

Page 10: ...ay shows UprH Press START to display the pre heating temperature Each time START is pressed the temperature increments by 1 C from 50 to 250 or hold START down for faster increments Press STOP to move on to displayng the next parameter The display shows U t C Press START to display the cooking temperature Press START or keep it pressed to increase the cooking temperature from 50 to 250 Press STOP ...

Page 11: ...the next parameter The display shows H2 O Press START to increase the number of seconds of water infeed per minute from 0 to 5 where 0 means conventional fan mode cooking without the aid of humidification Press STOP to complete the editing operation The display shows UEnd The parameters set are now saved in the chosen program 4 8 Programmed preheating P9 This program which can be edited by the use...

Page 12: ... Press STOP to move on to setting the minutes Press START per increment the minutes Press STOP to complete the editing operation The display shows UEnd The parameters set are now saved in the chosen program 4 10 How programmed preheating works If the above parameters are set correctly and only if the knob is set on P9 the oven will run the preheating program every day at the set time during the pr...

Page 13: ...cation Press STOP to increase the number of minutes of cooking N B if a cooking time of 99 minutes is set the cooking time will be infinite meaning that cooking can only be stopped in manual mode by ending the program Release STOP and preheating will start automatically after 5 seconds N B When the cooking process is over to repeat the same program do not turn the knob and press START again 4 12 P...

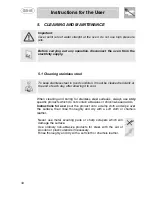
Page 14: ...r allowing it to cool When cleaning and caring for stainless steel surfaces always use only specific products which do not contain abrasives or chlorine based acids Instructions for use pour the product onto a damp cloth and wipe over the surface then rinse thoroughly and dry with a soft cloth or chamois leather Never use metal scouring pads or sharp scrapers which will damage the surface Use ordi...

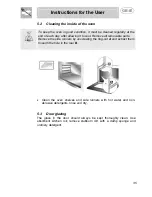
Page 15: ...l removable parts Remove the side runners by unscrewing the ring nut A and extract them through the hole in the rear B Clean the oven shelves and side runners with hot water and non abrasive detergents rinse and dry 5 3 Door glazing The glass in the door should always be kept thoroughly clean Use absorbent kitchen roll remove stubborn dirt with a damp sponge and ordinary detergent 35 ...

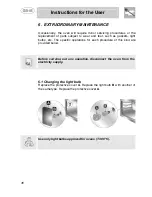
Page 16: ... as gaskets light bulbs etc The specific operations for each procedure of this kind are provided below Before carrying out any operation disconnect the oven from the electricity supply 6 1 Changing the light bulb Replace the protective cover A Replace the light bulb B with another of the same type Replace the protective cover A Use only light bulbs approved for ovens T 300 C ...

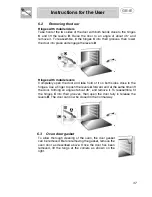
Page 17: ...n the door and take hold of it on both sides close to the hinges Use a finger to push the levers A forward and at the same time lift the door forming an angle of about 45 and remove it To reassemble fit the hinges C into their grooves then open the door fully to release the levers B The door can now be closed in the normal way 6 3 Oven door gasket To allow thorough cleaning of the oven the door ga...

Page 18: ......

Reviews: