EN
START-UP
15.
all the electric groundings are connected to the protective conductor PE.
ATTENTION
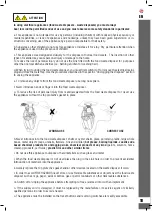
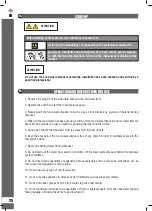
Before starting up the machine, it is necessary to ensure that:
placement, installation and connections have been carried out in accordan-
ce with best working practices, following the instructions indicated in this
manual.
ATTENTION
Do not use the Food waste disposer before the installation has been checked and verified by a
qualified professional
OPERATION AND INSTRUCTIONS FOR USE
16.
1. Remove the plug from the sink drain hole and let cold water flow.
2. Operate the switch to start the food waste disposer.
3. Slowly insert the food waste disposer in such a way as to minimise any ejection of material during
disposal.
4. When all the food waste has been ground, switch off the food waste disposer and let water flow for
about 20-30 seconds in order to clean the grinding chamber and the drains.
5. During use ensure that the water flow is at least 6-8 litre per minute.
6. Keep the area below the food waste disposer free of any object in order to facilitate access to the
reset push button.
7. Never use boiling water during disposal.
8. Do not interrupt the water flow and do not switch off the food waste disposer before the disposal
cycle completes.
9. Do not insert large quantities of eggshells, fibrous materials such as corncobs, artichokes, etc. as
this would risk clogging the drain piping.
10. Do not insert any type of non food waste.
11. Do not use the appliance to dispose of hard materials such as glass and metals.
12. Do not introduce grease or oil as this could clog the drain piping.
13. Do not suddenly introduce large quantities of fruit or vegetable peels. First open the water tap and
then gradually introduce the items to be disposed of.
25
Summary of Contents for KITFD050
Page 58: ...AR 57 SMEG SMEG...
Page 59: ...1 2 58 AR KITFD050 KITFD075 KITFD100...
Page 61: ...60 AR...
Page 62: ...6 61 AR...
Page 64: ...8 63 AR 1 2 3 4 5 6 7 8 9...
Page 65: ...9 64 AR 1 2 3 4 6 7 8 9 LOCK Id 0 03 A 220 50 60 1 5...
Page 66: ...10 12 11 65 AR 1 2 3 4 5 6 1 1 5 100 150 8 20...
Page 67: ...13 14 66 AR 1 2 3 4...
Page 68: ...15 16 67 AR PE...
Page 69: ...17 18 68 AR...
Page 70: ...19 20 69 AR 1 2 230 3 start stop...

