EN
1
16
Installation – Air outlet version
• The Hood is fitted with a system that
allows the direction of the air outlet to
be adjusted.
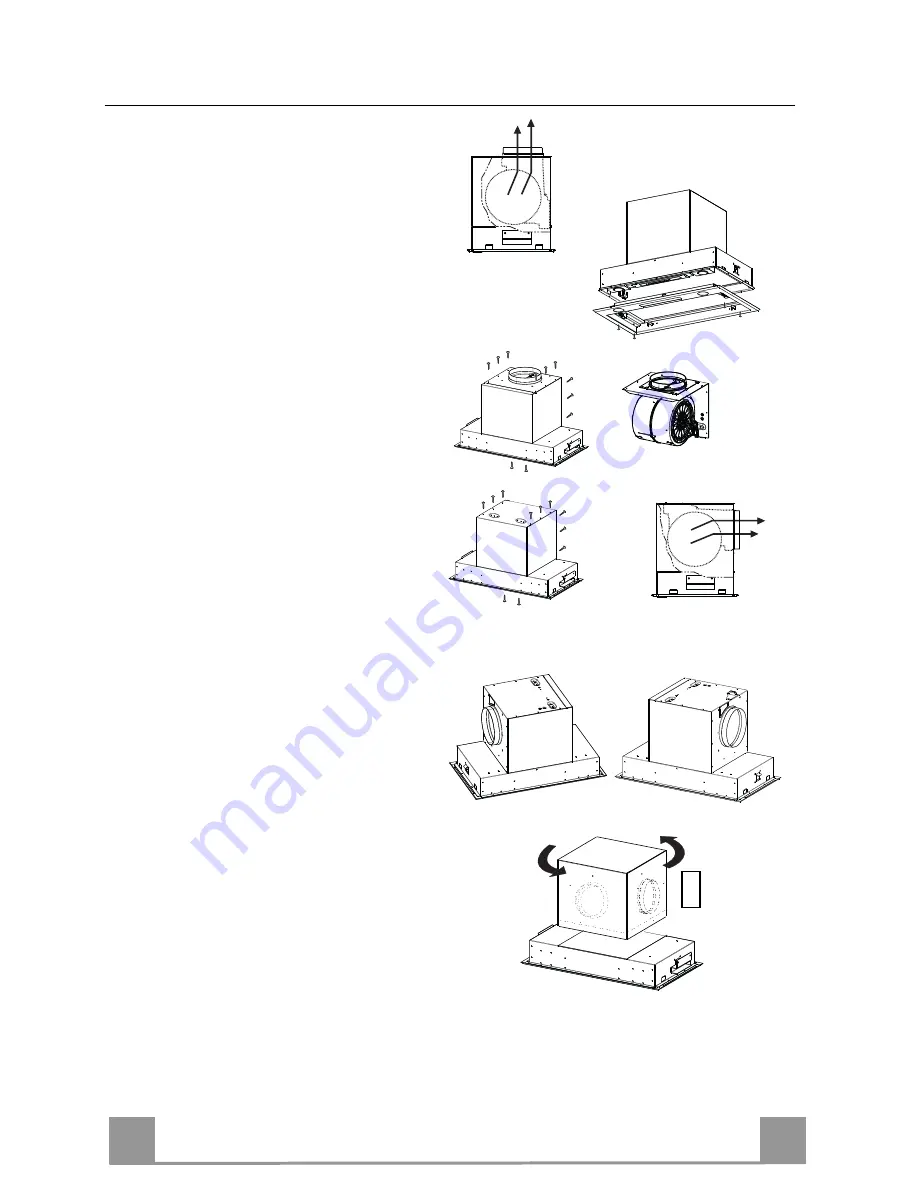
• On installation, the Hood is set up with
the air outlet in the Top position (fig.1).
• To modify the position of the air outlet,
remove the Comfort Panel (see
paragraph on Maintenance).
• Remove the Grease Filters (see the
paragraph on Maintenance).
• Remove the profile after unfastening
the 4 screws that fix it to the Hood
(fig.2).
• Remove any Activated Charcoal Filters
(see the paragraph on Maintenance).
• By removing the 6 upper screws, the 6
rear screws and the 2 screws on the
inside of the Hood, it is possible to turn
the Motor Unit with the bracket
attached so that the air outlet points to
the side (fig.3).
• To direct the air outlet to one of the
various sides (fig.4) unfasten from the
inside the screws that fix the upper part
containing the motor to the rest of the
Hood.
• Turn the upper part as required, to the
right or left, and then refasten the
screws removed as above from the
inside (fig.5).
• Replace the profile, using the 4 screws
removed as above.
• Replace the filters.
• Replace the Comfort Panel.
1
3
4
5
2


