background image

10 


not to use rinse aid. 


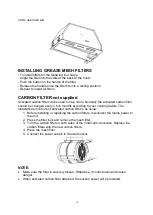
INSTALLING GREASE MESH FILTERS 

• To install filters for the following four steps: 

- Angle the filter into the slots at the back of the hood. 

- Push the button on the handle of the filter. 

- Release the handle once the filter fits into a resting position. 

- Repeat to install all filters.


CARBON FILTER-not supplied 

Activated carbon filter can be used to trap odors. Normally the activated carbon filter 

should be changed every 3 to 6 months according to your cooking habits. The 

installation procedure of activated carbon filter is as below: 

1.  Before installing or replacing the carbon filters, disconnect the mains power to 

the unit. 

2.  Press the filter lock and remove the mesh filter.  

3.  Turn the carbon filter on both sides of the motor anti-clockwise. Replace the 

carbon filters with the new carbon filters. 

4.  Place the mesh filter. 

5.  Connect the power supply to the wall socket. 


NOTE:  

  Make sure the filter is securely locked. Otherwise, it could loosen and cause 

danger.  

  When activated carbon filter attached, the suction power will be lowered. 


Summary of Contents for PUM610X

Page 1: ...V20210225 PUM610X PUM910X Cooker Hood Instruction Manual ...

Page 2: ...V20210225 Contents 1 Safety instructions 2 Installation 3 Start using your cooker hood 4 Troubleshooting 5 Maintenance and cleaning 6 Environment protection ...

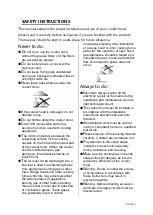
Page 3: ... fume extractors may adversely affect the safe operation of appliances burning gas or other fuels including those in other rooms due to back flow of combustion gases These gases can potentially result in carbon monoxide poisoning After installation of a range hood or other cooking fume extractor the operation of open flued gas appliances should be tested by a competent person to ensure that back f...

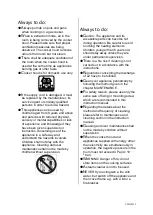
Page 4: ...lways to do Caution The appliance and its accessible parts can become hot during operation Be careful to avoid touching the heating elements Children younger than 8 years old should stay away unless they are under permanent supervision There is a fire risk if cleaning is not carried out in accordance with the instructions Regulations concerning the discharge of air have to be fulfilled Clean your ...

Page 5: ...or best effect See pic 1 3 Drill a hole in the cupboard with hole wide 570 265 mm for 60cm model and hole wide 865 265 mm for 90cm model See pic 2 Make sure the distance between the edge of the hole and the edge of the cupboard edge is at least 35mm 4 Take off the aluminium filter and push the hood into the cupboard Then use a screwdriver to secure the snap screws and fix the hood body to the cupb...

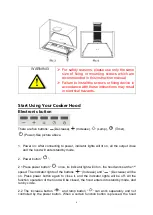
Page 6: ...ng to power indicator lights will lit on all the output close and the hood will enter standby mode 2 Power button 2 1 Press power button once its indicator light will lit on the hood works at the 1st speed The indicator lights of the buttons Increase and Decrease will be on Press power button again to close it and the indicator lights will be off All the function operation of the hood will be clos...

Page 7: ...hts of Increase button Decrease button and Power button keep bright 4 4 Press Increase button when it works at the 3rd speed the cooker hood works at the 4th speed The indicator lights of Increase button Decrease button and Power button keep bright 4 5 Press Increase button when it works at the 4th speed the cooker hood works at the 5th speed The indicator lights of Increase button will be off The...

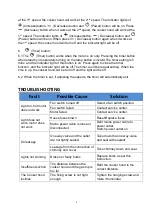
Page 8: ...od will be turn off and the light will be off 6 2 When the timer is set if adjusting the speeds the timer will automatically exit TROUBLESHOOTING Fault Possible Cause Solution Light on but motor does not work Fan switch turned off Select a fan switch position Fan switch failed Contact service center Motor failed Contact service center Light does not work motor does not work House fuses blown Reset...

Page 9: ... a long life expectancy Dry with a clean soft cloth A specialized stainless steel cleaning fluid may be used NOTE Ensure that wiping is done along with the grain of the stainless steel to prevent any unsightly crisscross scratching patterns from appearing CONTROL PANEL SURFACE The inlay control panel can be cleaned using warm soapy water Ensure the cloth is clean and well wrung before cleaning Use...

Page 10: ... changed every 3 to 6 months according to your cooking habits The installation procedure of activated carbon filter is as below 1 Before installing or replacing the carbon filters disconnect the mains power to the unit 2 Press the filter lock and remove the mesh filter 3 Turn the carbon filter on both sides of the motor anti clockwise Replace the carbon filters with the new carbon filters 4 Place ...

Page 11: ... in contact with the bulb as this can reduce the life of the bulb Note Before changing the lights make sure that the appliance is turned off and unplugged Protect against danger when changing lights such as wearing gloves Changing the lights 1 Remove the grease filter 2 Use the hand to press the LED light out Then slightly pull the light connecting wire out and dismantle the terminal of the light ...

Page 12: ... information please contact your local or regional authorities NOTE The following shows how to reduce total environmental impact e g energy use of the cooking process 1 Install the cooker hood in a proper place where there is efficient ventilation 2 Clean the cooker hood regularly so as not to block the airway 3 Remember to switch off the cooker hood light after cooking 4 Remember to switch off th...

Reviews: